Today, I took on the task of replacing the alternator.
So last Thursday, as I was preparing to leave work, I start the car, and it's groaning. Groaning, moaning, something like that. Well that sucks, but I gotta get home, so I drive.
On the way, I try to figure out what it is. It pitches up and down with the engine speed, so it's obviously something driven by the engine. It doesn't seem to get any louder or quieter when I steer, so it's probably not the power steering pump. It does, however, seem to partially disappear and reappear as I press the clutch. Damn, guess it must be the throwout bearing, or maybe the clutch or flywheel attachments.
The next morning I go to start the car. It starts, but it definitely sounds like the battery's a bit low. Strange, maybe it's just a fluke, so I drive to work with no issues aside from the groaning.
Work's up, so I go to the E36 to drive home, except when i unlock the door, that's the only door that got unlocked. Normally, all the other doors also get unlocked by some very 90's-sounding servos. Well shit. I go to start it, but, as expected, it's totally dead. Now, it's like half an hour after quitting time, as I tend to get out of bed rather late. Fortunately, one of my colleagues was also staying late, so he managed to give me a boost with his Aygo!
So with the E36 running, now realising that the problem is most likely the alternator, I drive home. I get stuck in some traffic almost straight out of the gate, so I'm idling. After a minute or so, the dashboard starts to light up. Well alright, I had this with my Volvo before when it had a fucked battery. So I just keep the revs up while sitting in traffic, and all is well. I get home without much issue.
Now what I should've done, it get my mum or dad to drive me to my dad's so that I can get my Volvo. It has its MOT booked for Wednesday anyway. Now, I had a pretty crappy weekend for some reason, so I totally forgot to organise this. This is a problem. What I did do, however, is buy a new battery. Cheapest one Halfords had, around £80. I put it in the E36, it starts no problem. I shoved a multimeter on the terminals. ~12.6V at idle. That's not good - a fully charged lead acid should sit at around 12.8V. At 2000 RPM it hovers at around 13.4V. Again, not good - the alternator should charge at 14~14.4V. I turn on the headlights... 12.6V, 12.5, 12.4, 12.3V, ... Headlights at 2000 RPM, same story. Well I guess that all but confirms it's the alternator. I take out the new battery, and put both old and new in my mum's Merc. We have lead acid chargers at work, so I should be able to charge them both back up. I can't take it on Monday, of course, but I should be able to on Tuesday.
Normally, I can work from home, so it isn't too big of a deal if I can't make it into the office. This time, of course, my rather urgent work requires access to some specific hardware that is only at the office. Another thing I forgot, is that my mum's Mercedes has its MOT on Monday, so I have no way to get to work. I'm really stressed out at this point, but oh well, not much I can do now, other than try my best to at least fix things in the code from home.
Monday evening comes, mum gets home. I expected her car to also be home at this point, but alas, not. She takes it to a garage that just gets around to the car when they have time. FFS. Alright, guess I'll have to get my dad to pick me up. Fortunately, he's happy to do so, so I collect my Volvo. I also ordered a new alternator (OEM number 12311744567 for reference) - the STARK SKGN-0320215. It's not OEM (that would cost £500~£800), but hopefully it'll do the job well enough for £200. It's also a bit of an upgrade, with a 140A over the 80A the stock one produces.
Tuesday, I go to work in the Volvo, no problem. Since at this point, who knows when the Merc's gonna be available, I borrowed a leisure battery from work to shove into the E36. It's big enough to hopefully get me to work and back on one charge.
I get home... Merc is still not there... As luck would have it, it failed its inspection due to a leaky fuel line. Well ok, guess I'm taking the E36. We put the battery it, and it fortunately works fine!
My Volvo initially failed its MOT due to a worn out track rod end ball joint, but it was all sorted on the same day, so I could take it to work on Thursday and Friday.
Friday, however, was also the day the E36 was scheduled to get its AC regassed! I had returned the leisure batter, and charged the new battery at this point (old one was too dead to save), so I could get it to the garage. As expected, there was no gas in the system, so the regassing cost quite a lot (£100 or 120). I also asked them to take a look at the alternator and ticky idle, just in case I ended up being wrong. If so, I could just return the alternator. But no, it is indeed the alternator. They also suspect the poor idle might have been caused by the low voltage, so we'll see. The alternator also arrived!
Sunday (today) comes around, and I have the time to do the swap, so here goes:
First, I just check to see if it's still alive.
Nope, dead as a rock. Just to confirm:
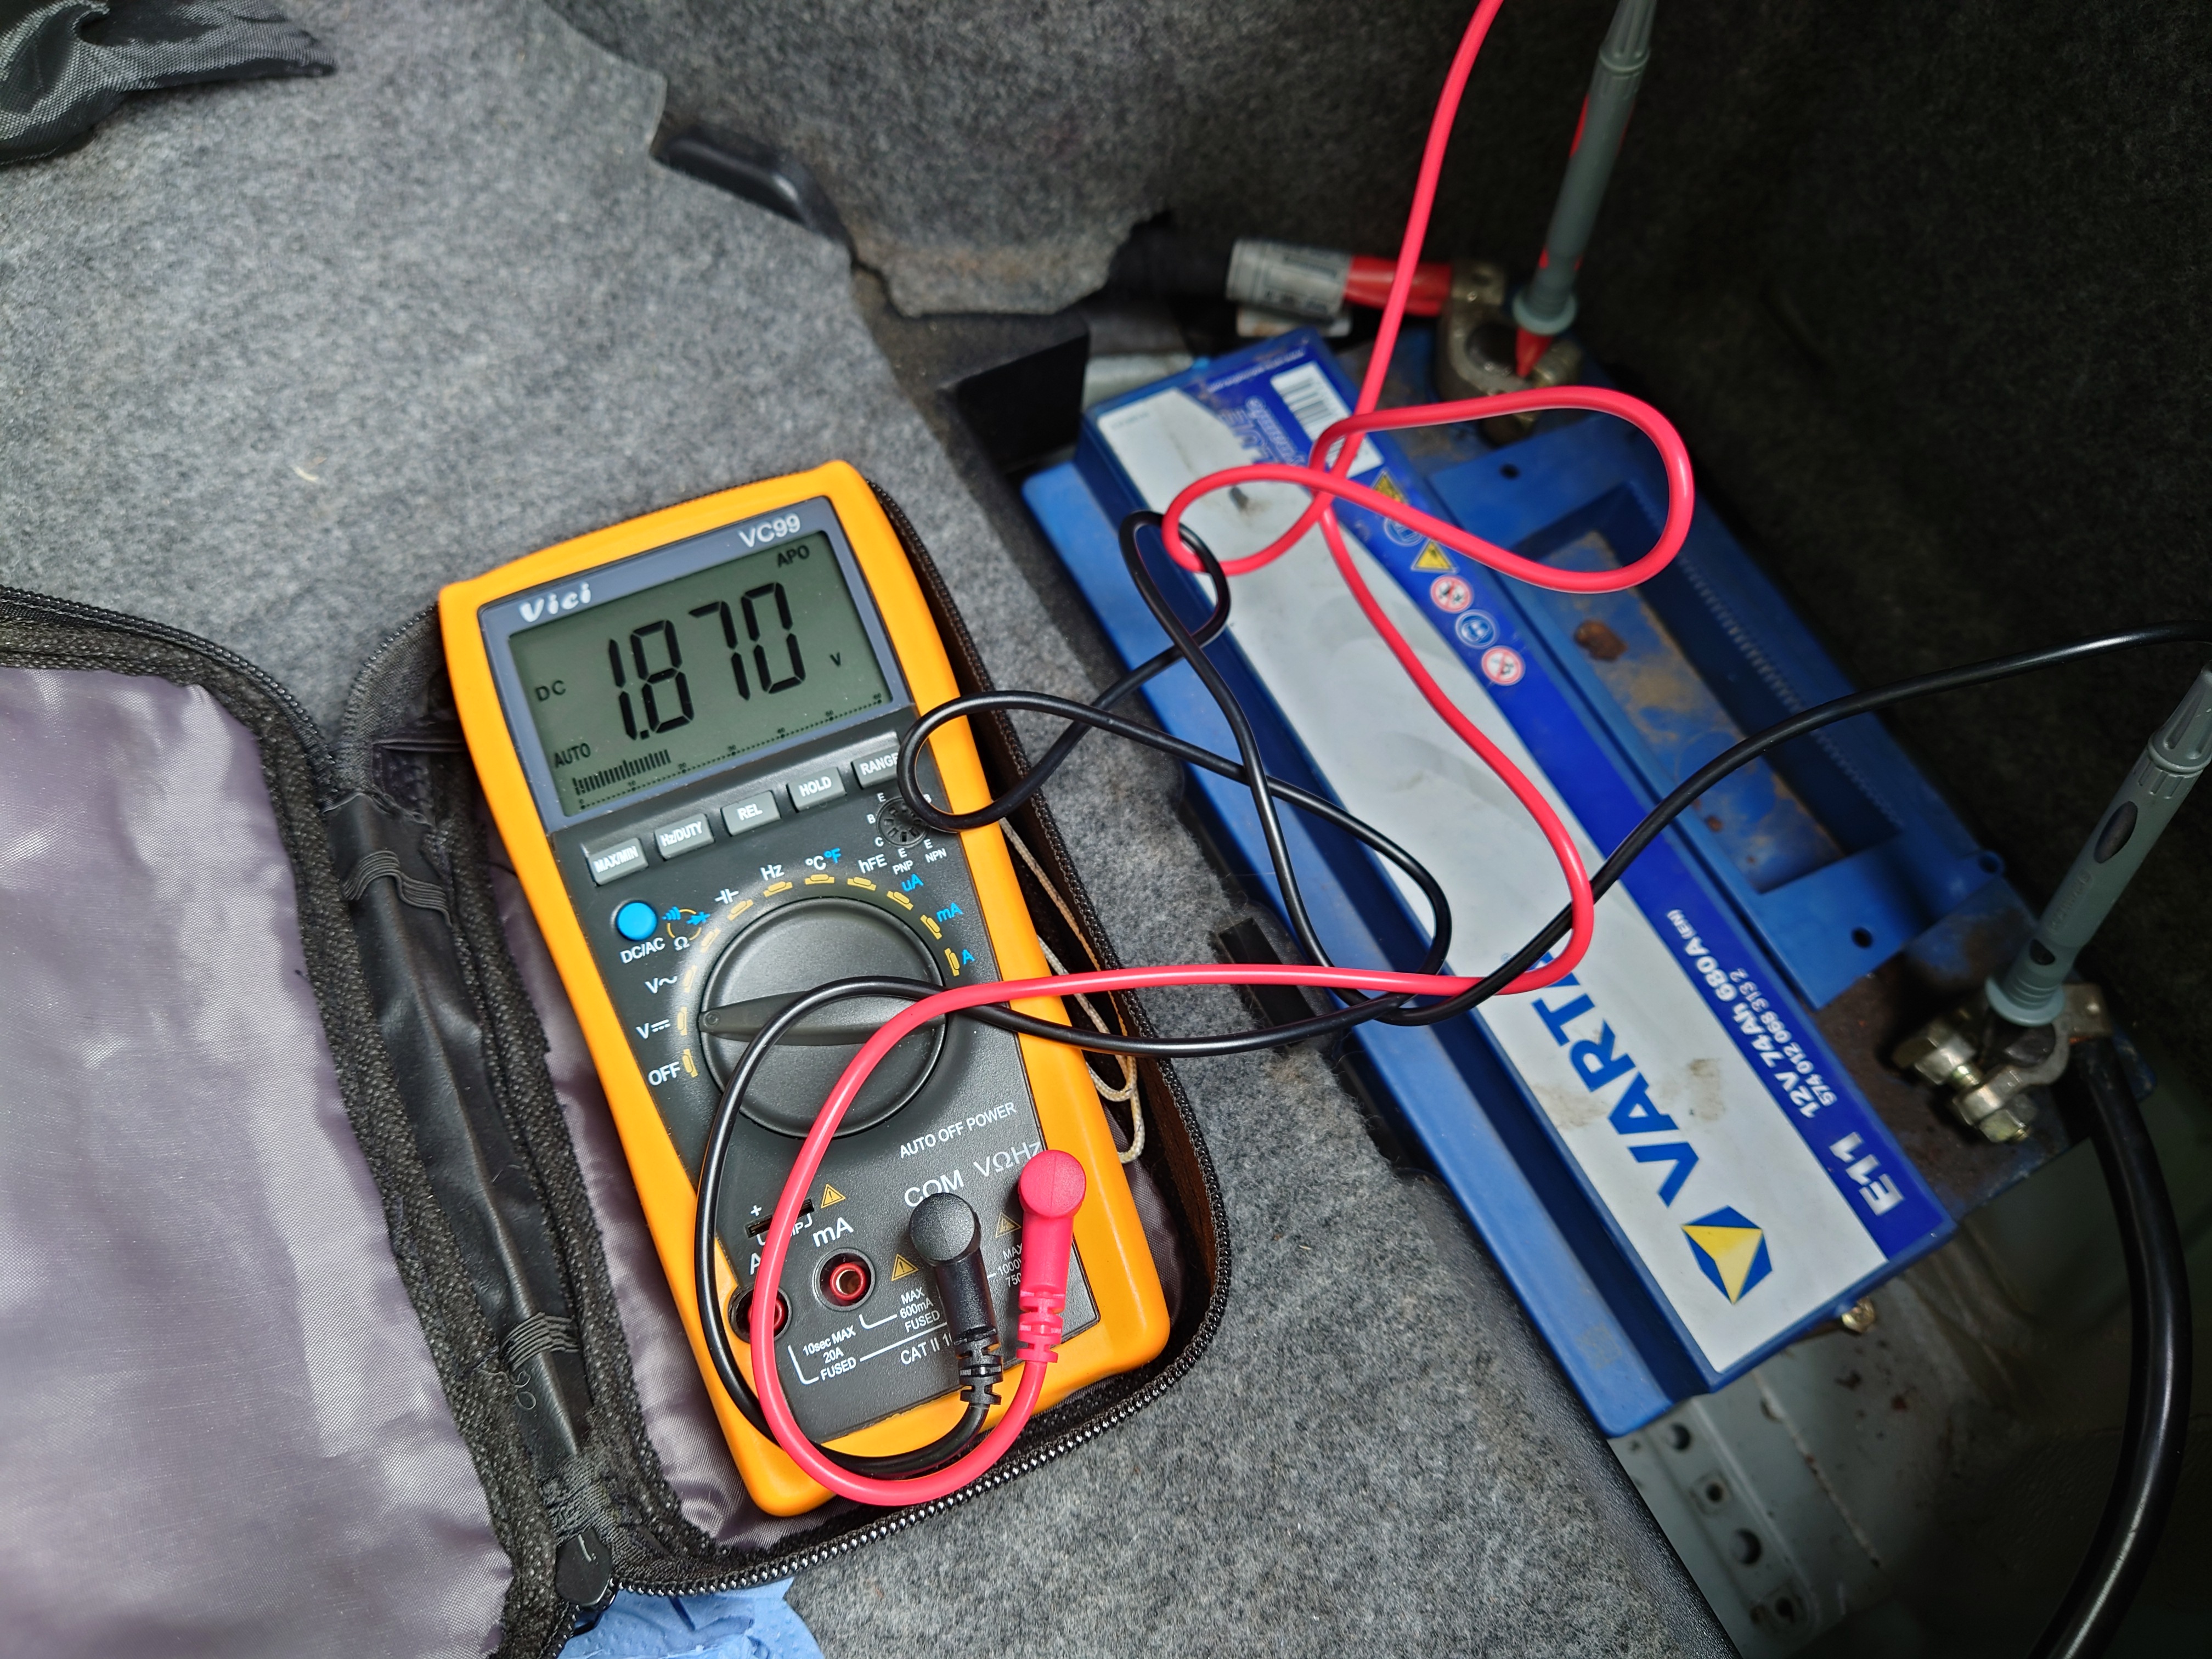
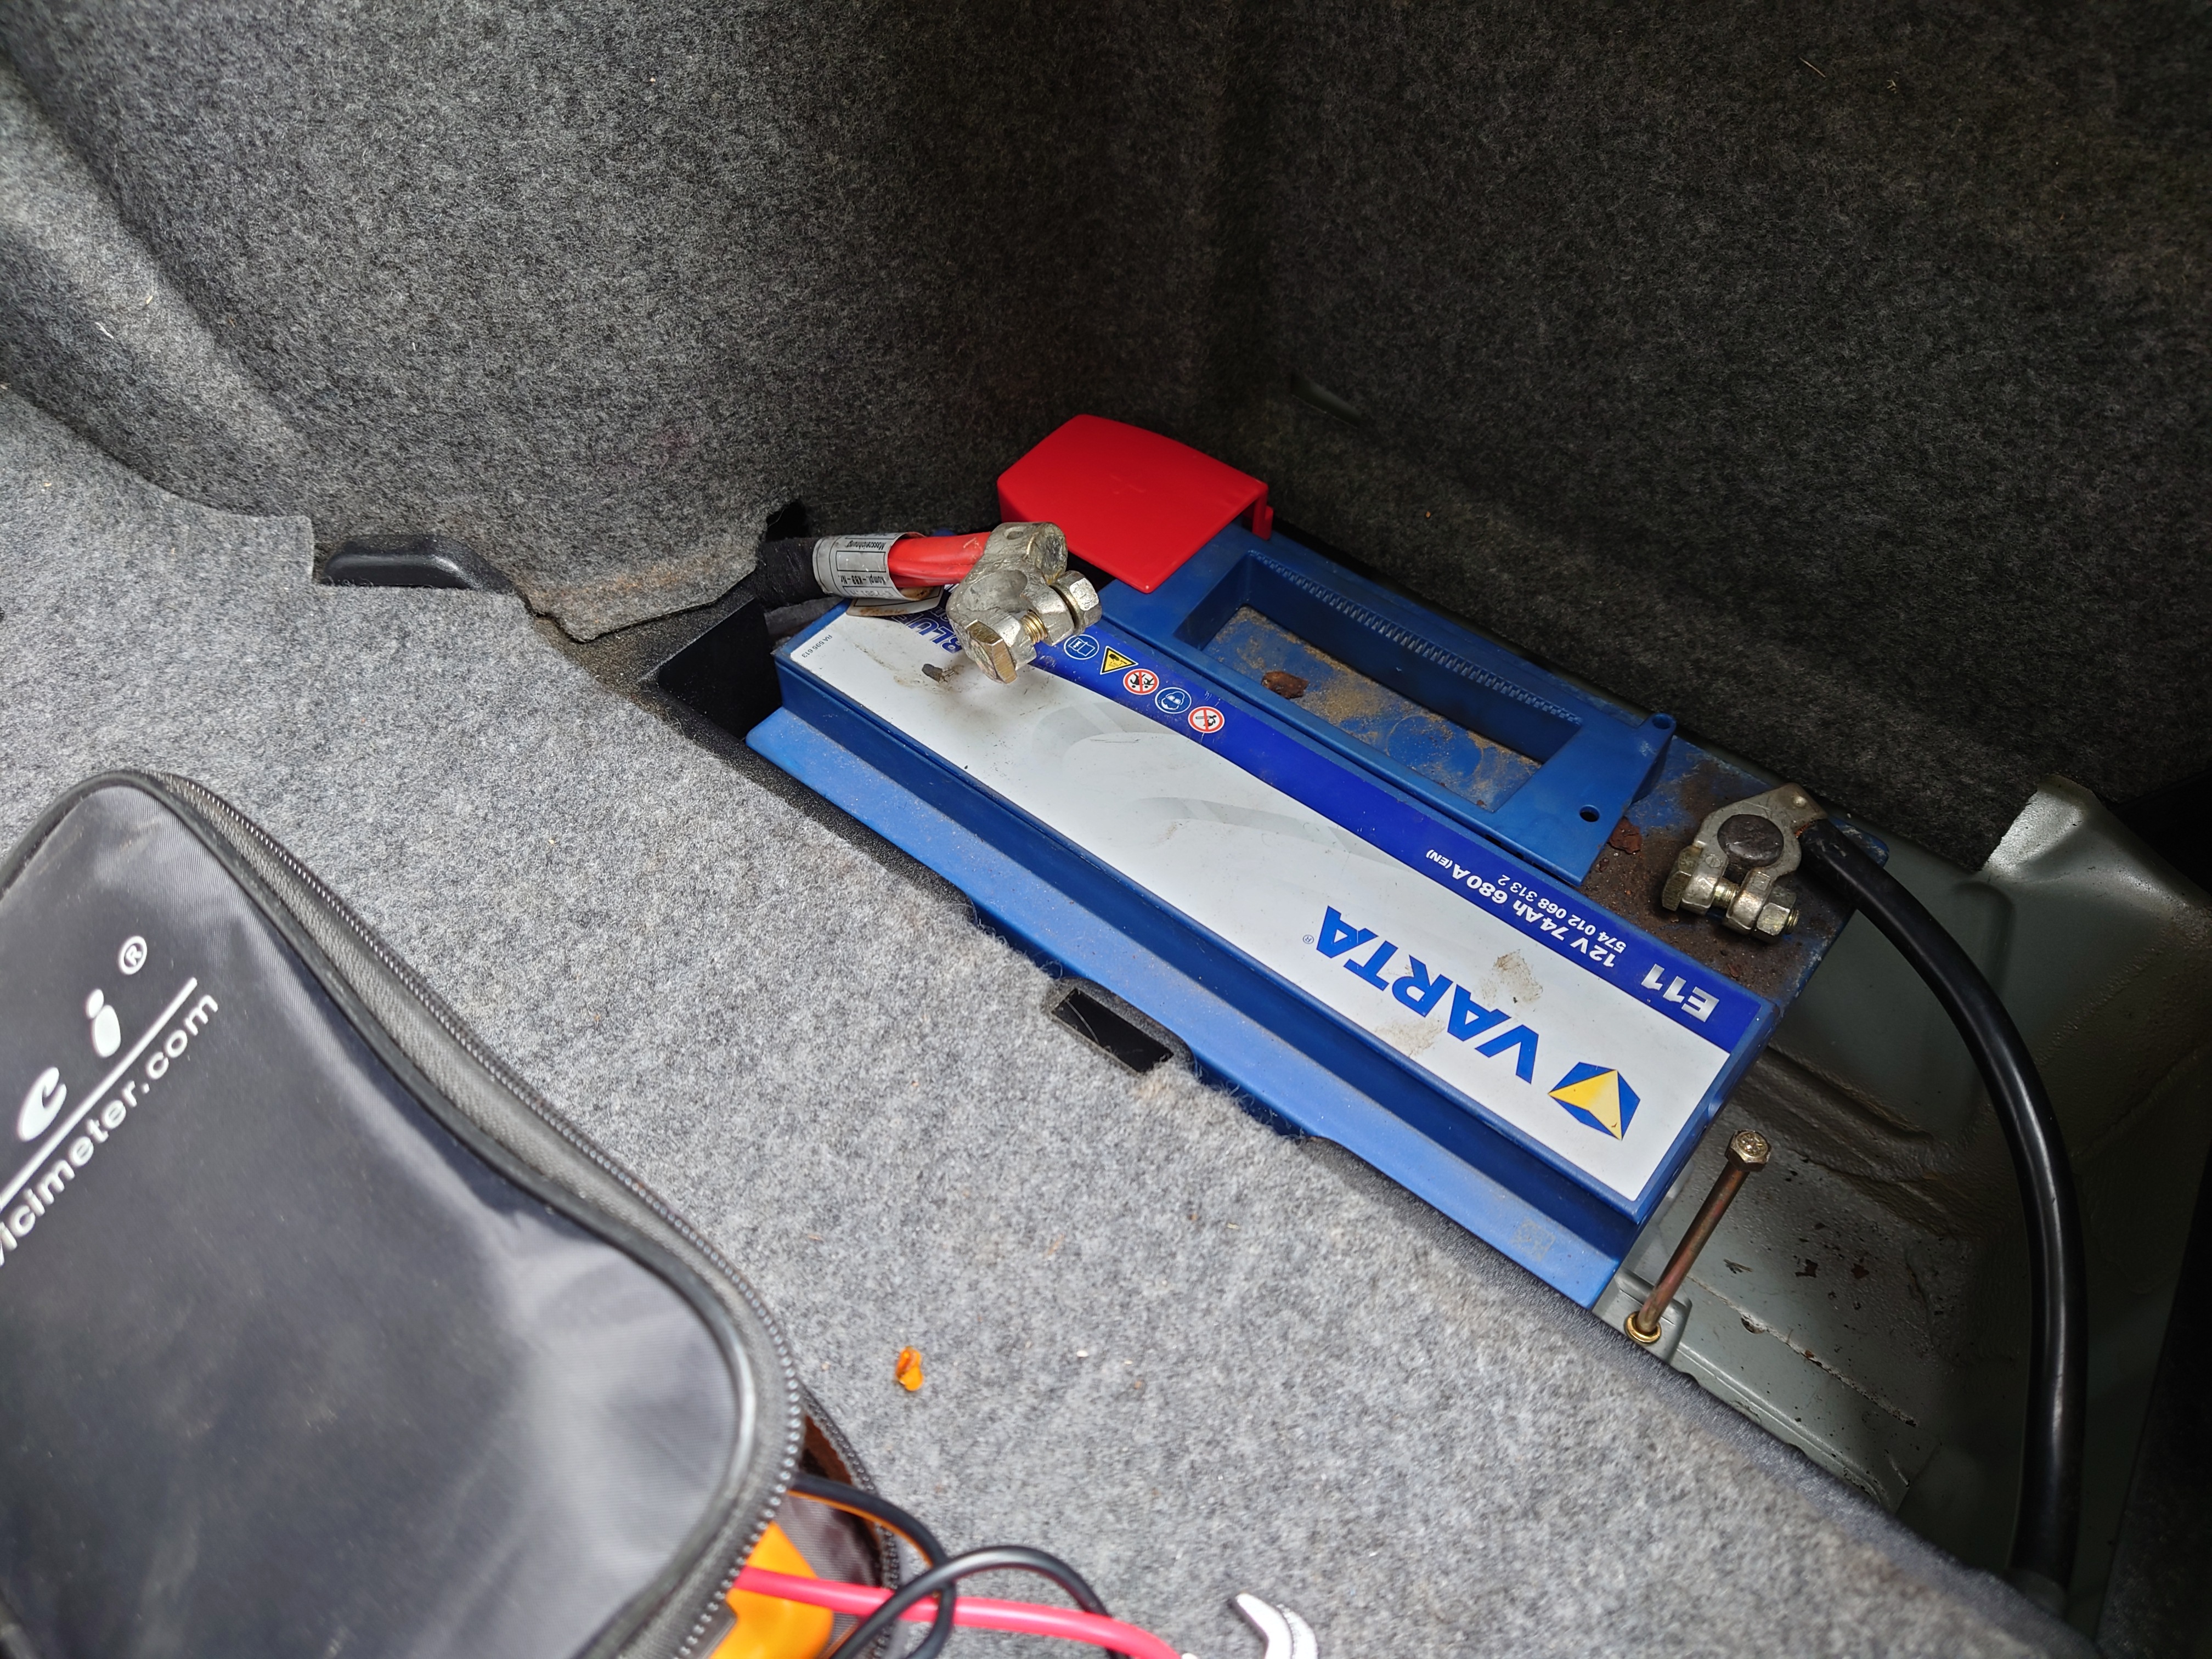
Yep lol. And yes, the battery is in the boot for E36s. Not super unusual, but it does surprise some people. Alright, before starting, I disconnect the positive, and cover it up. It's unlikely that anything would happen given how dead it is, but if it was still charged, then leaving it connected would be very bad!
Now behold, the engine bay! Home of the glorious M52B28, 2.8L straight-six, producing around 190 bhp @ 5900 RPM, and 280 Nm @ 3950 RPM! Not quite the M3's 280 or 320 bhp, but it's still plenty quick enough.
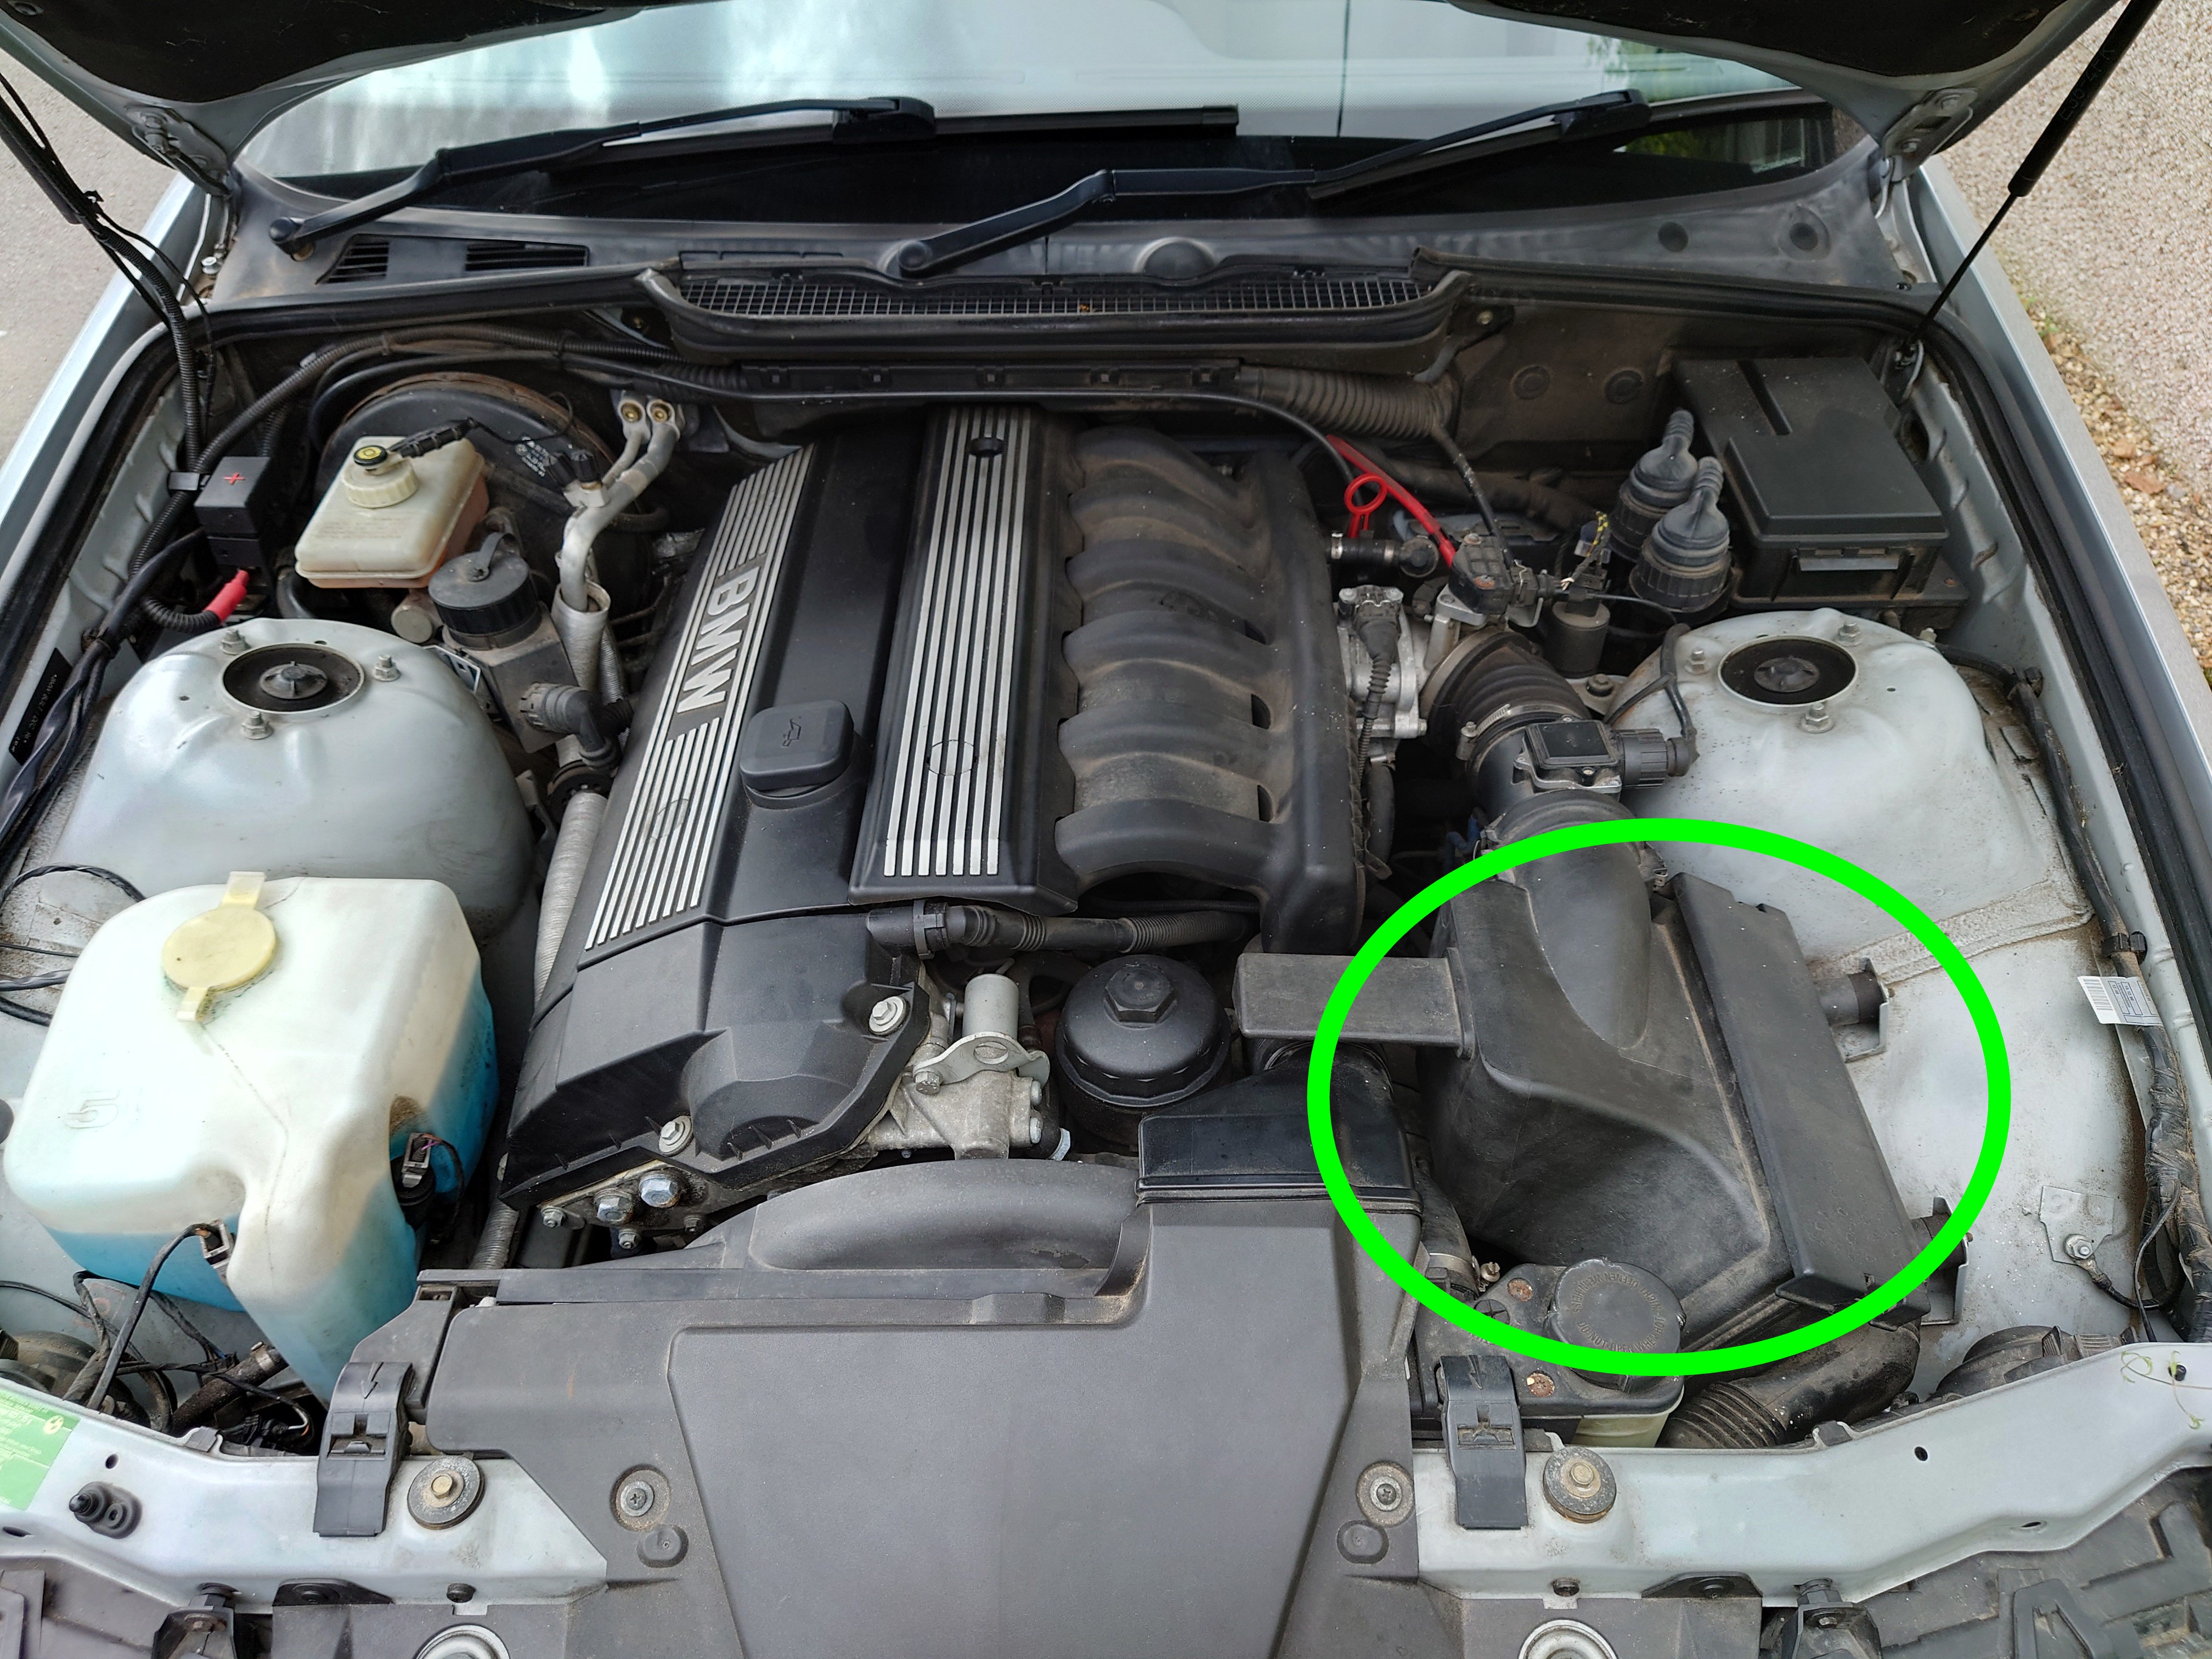
Circled in green is the airbox. This is what holds the air filter for the engine's air intake. We need to remove this, as the alternator is underneath. At the back of the airbox is the MAF sensor, and at the front we have the intake duct.
In the image below we have the old alternator.
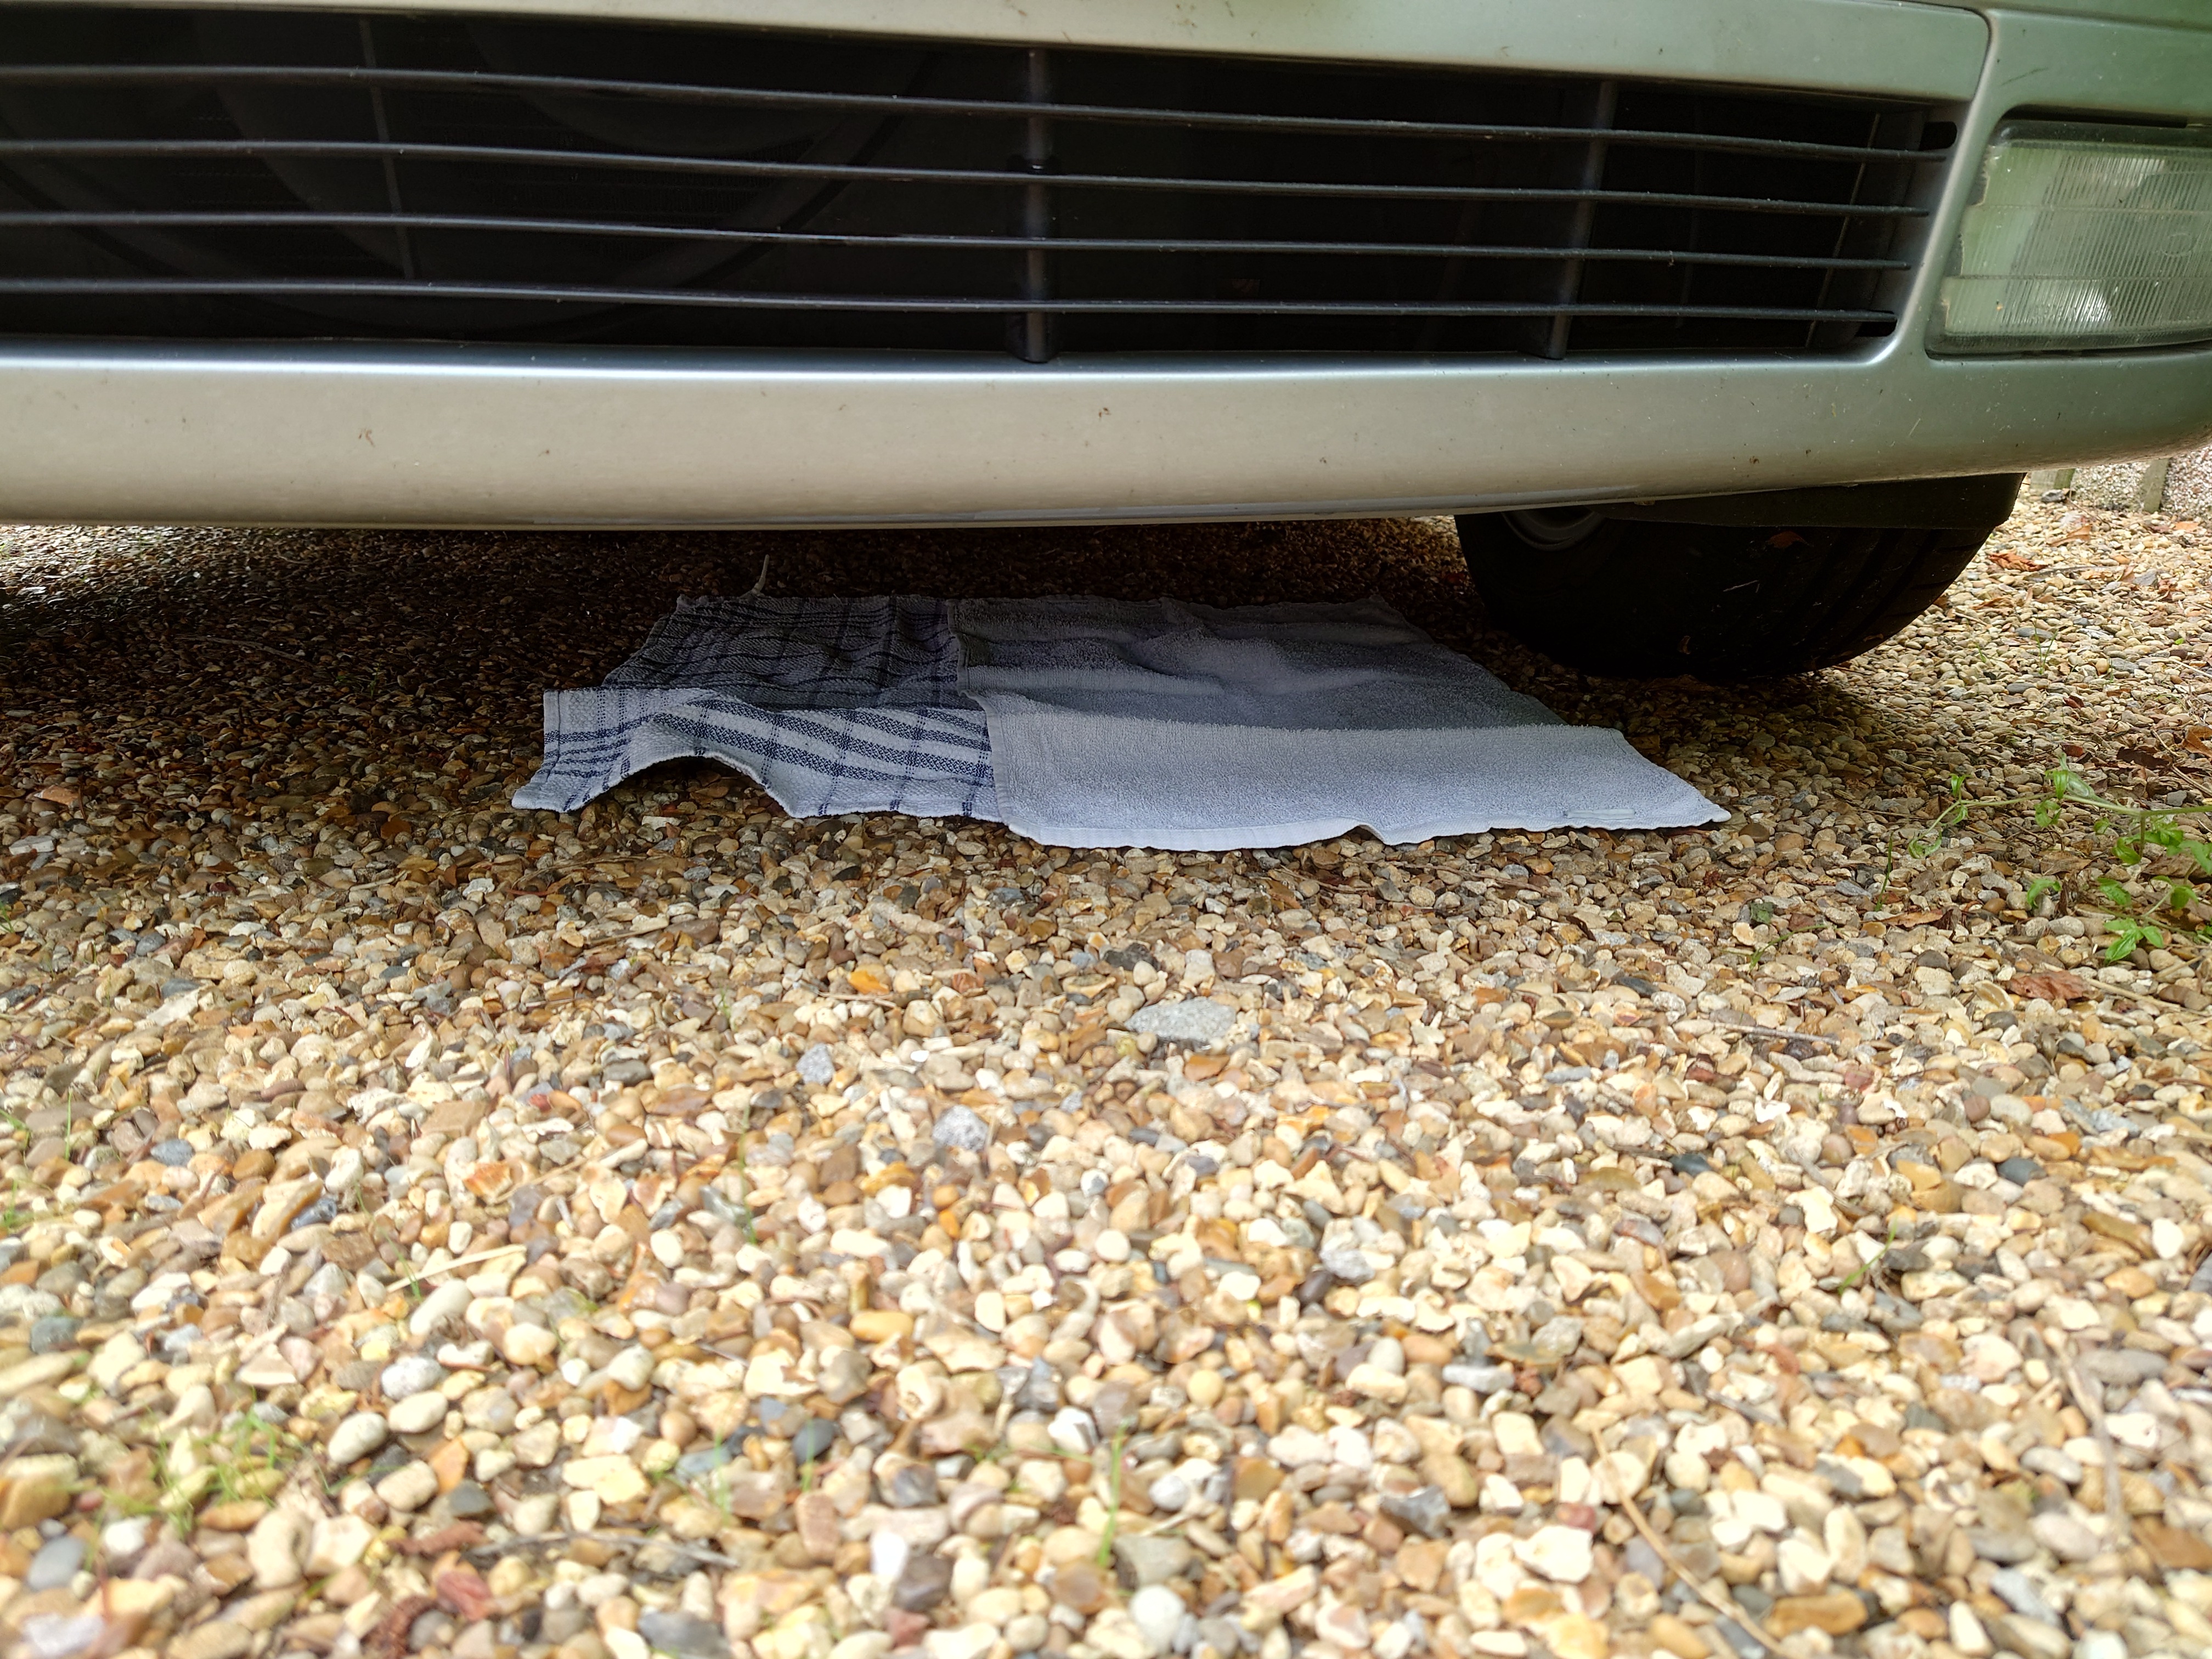
Before I start taking things apart, I lay a couple of tea towels under the work area. Since I'm working on gravel, I'll likely never be able to find any nut, bolt, or washer that I might drop. Fortunately, there's no need to get under the car for this job.
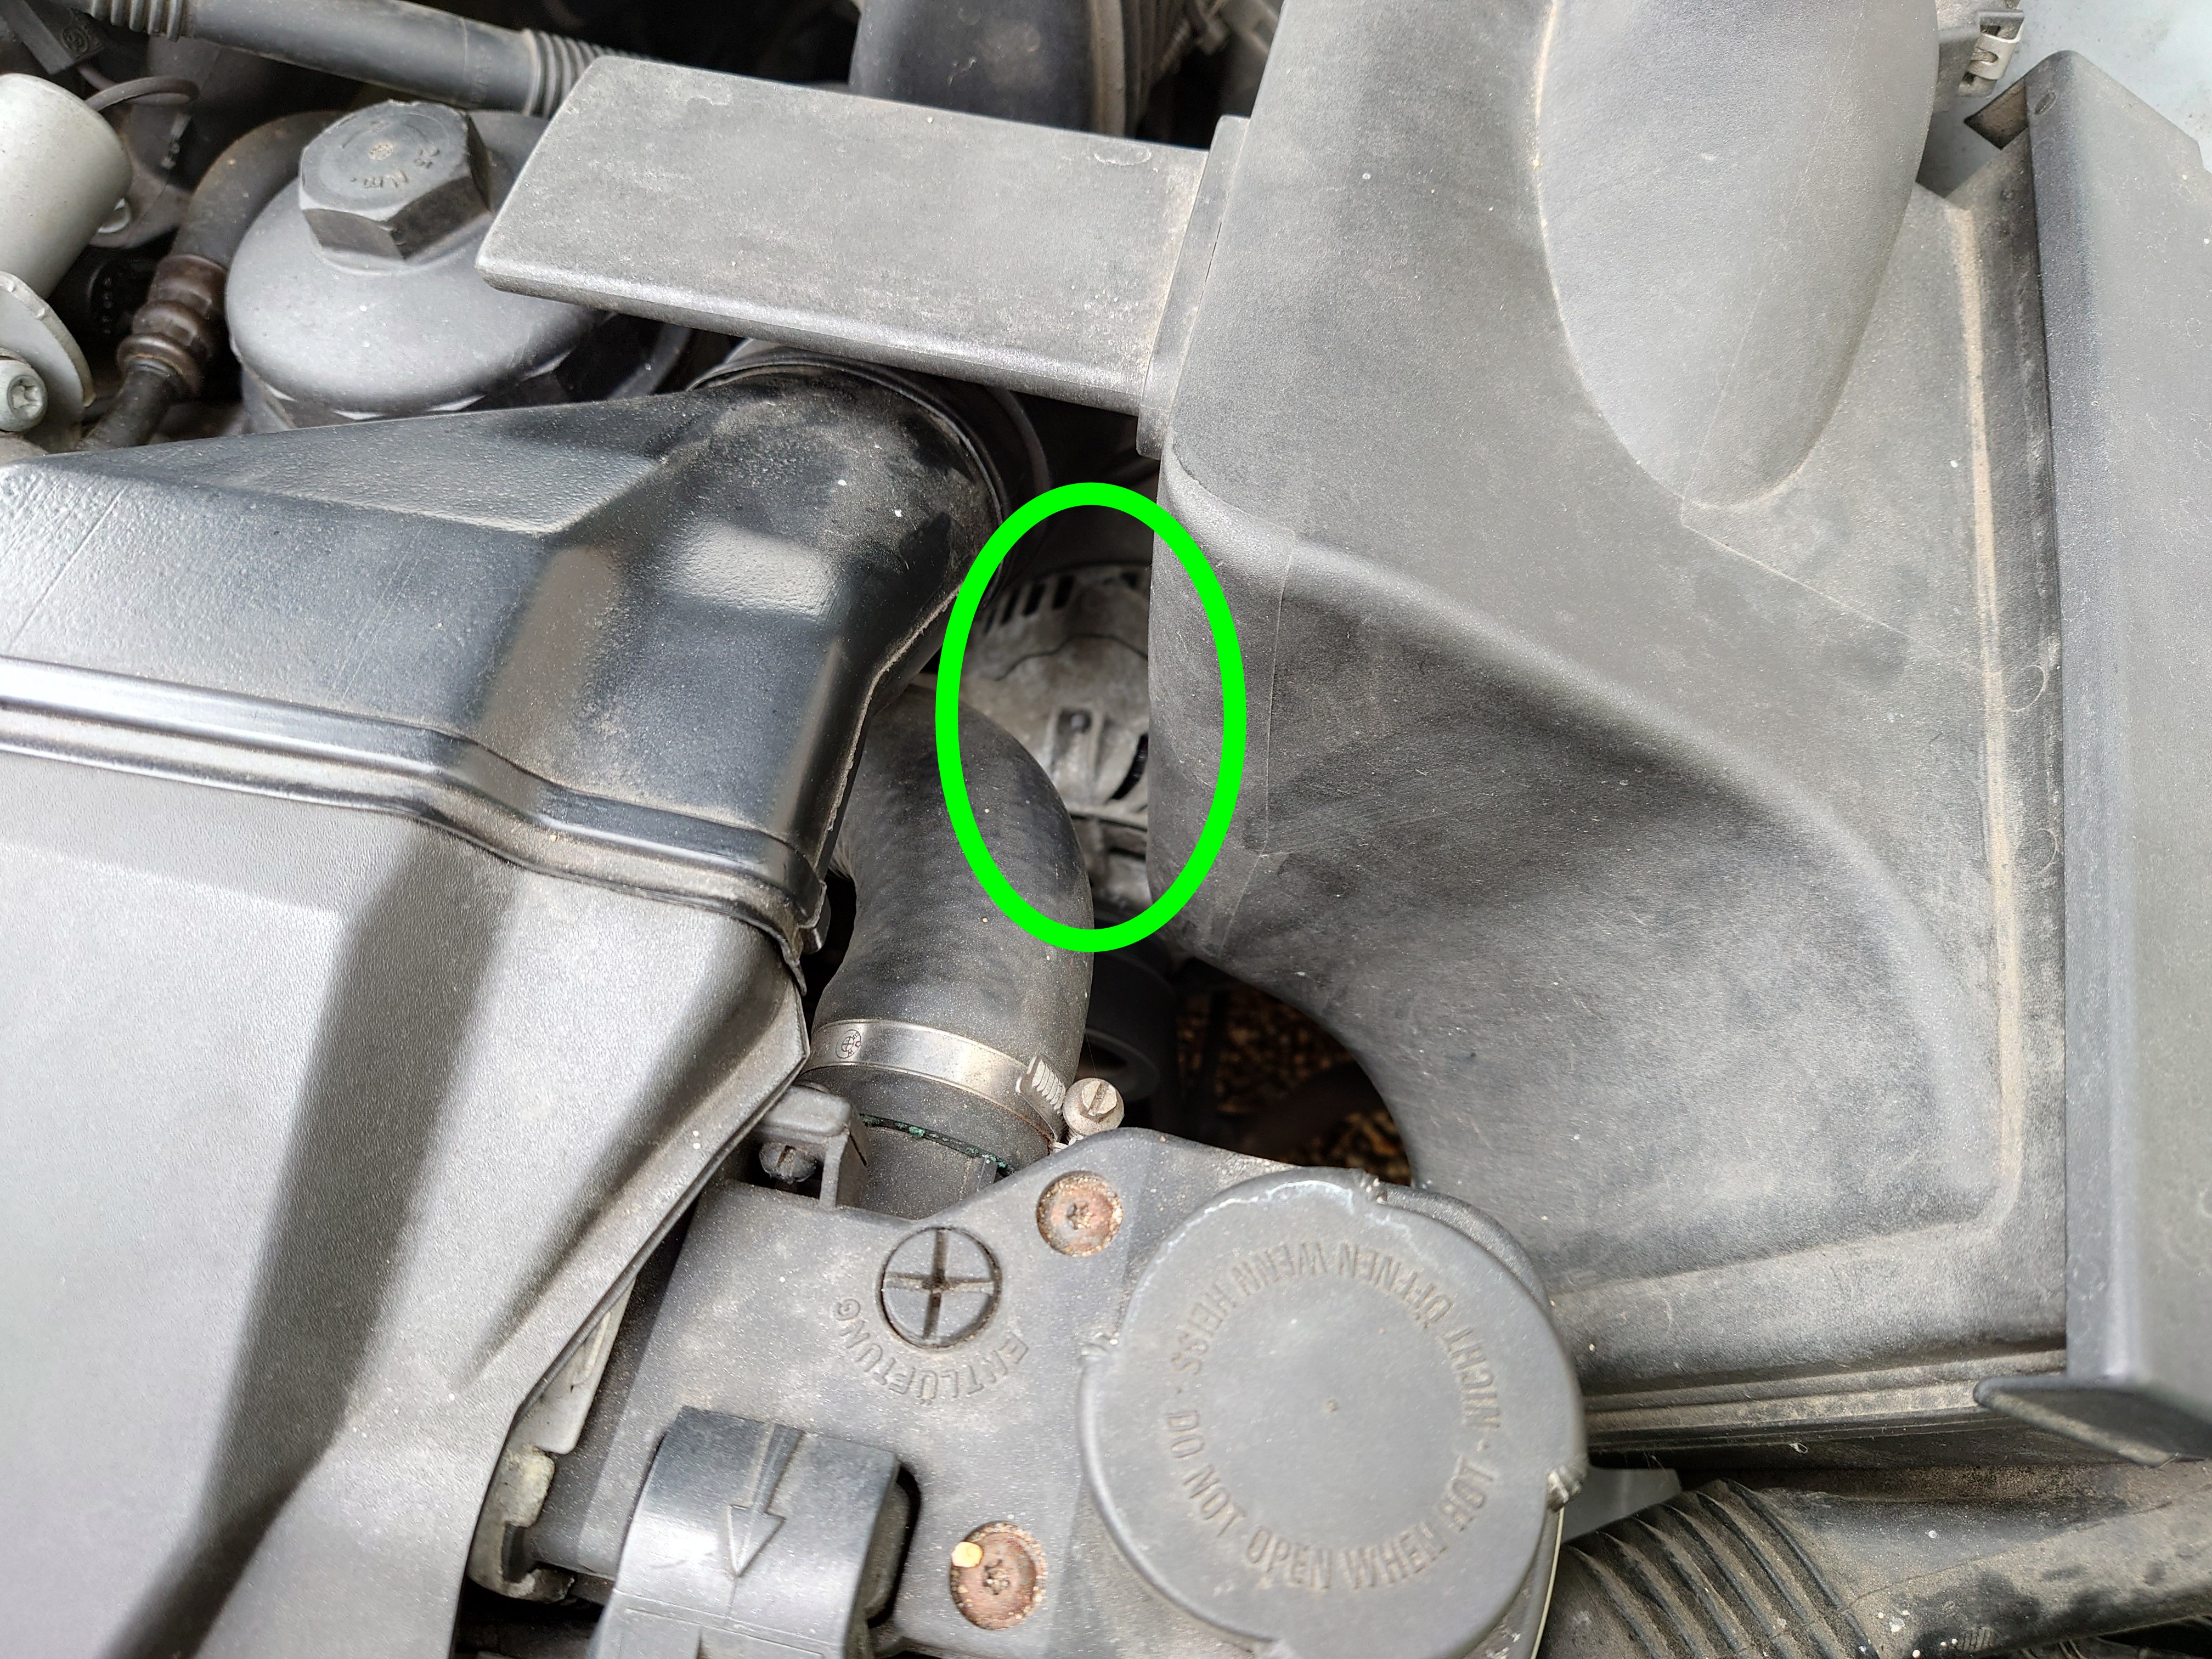
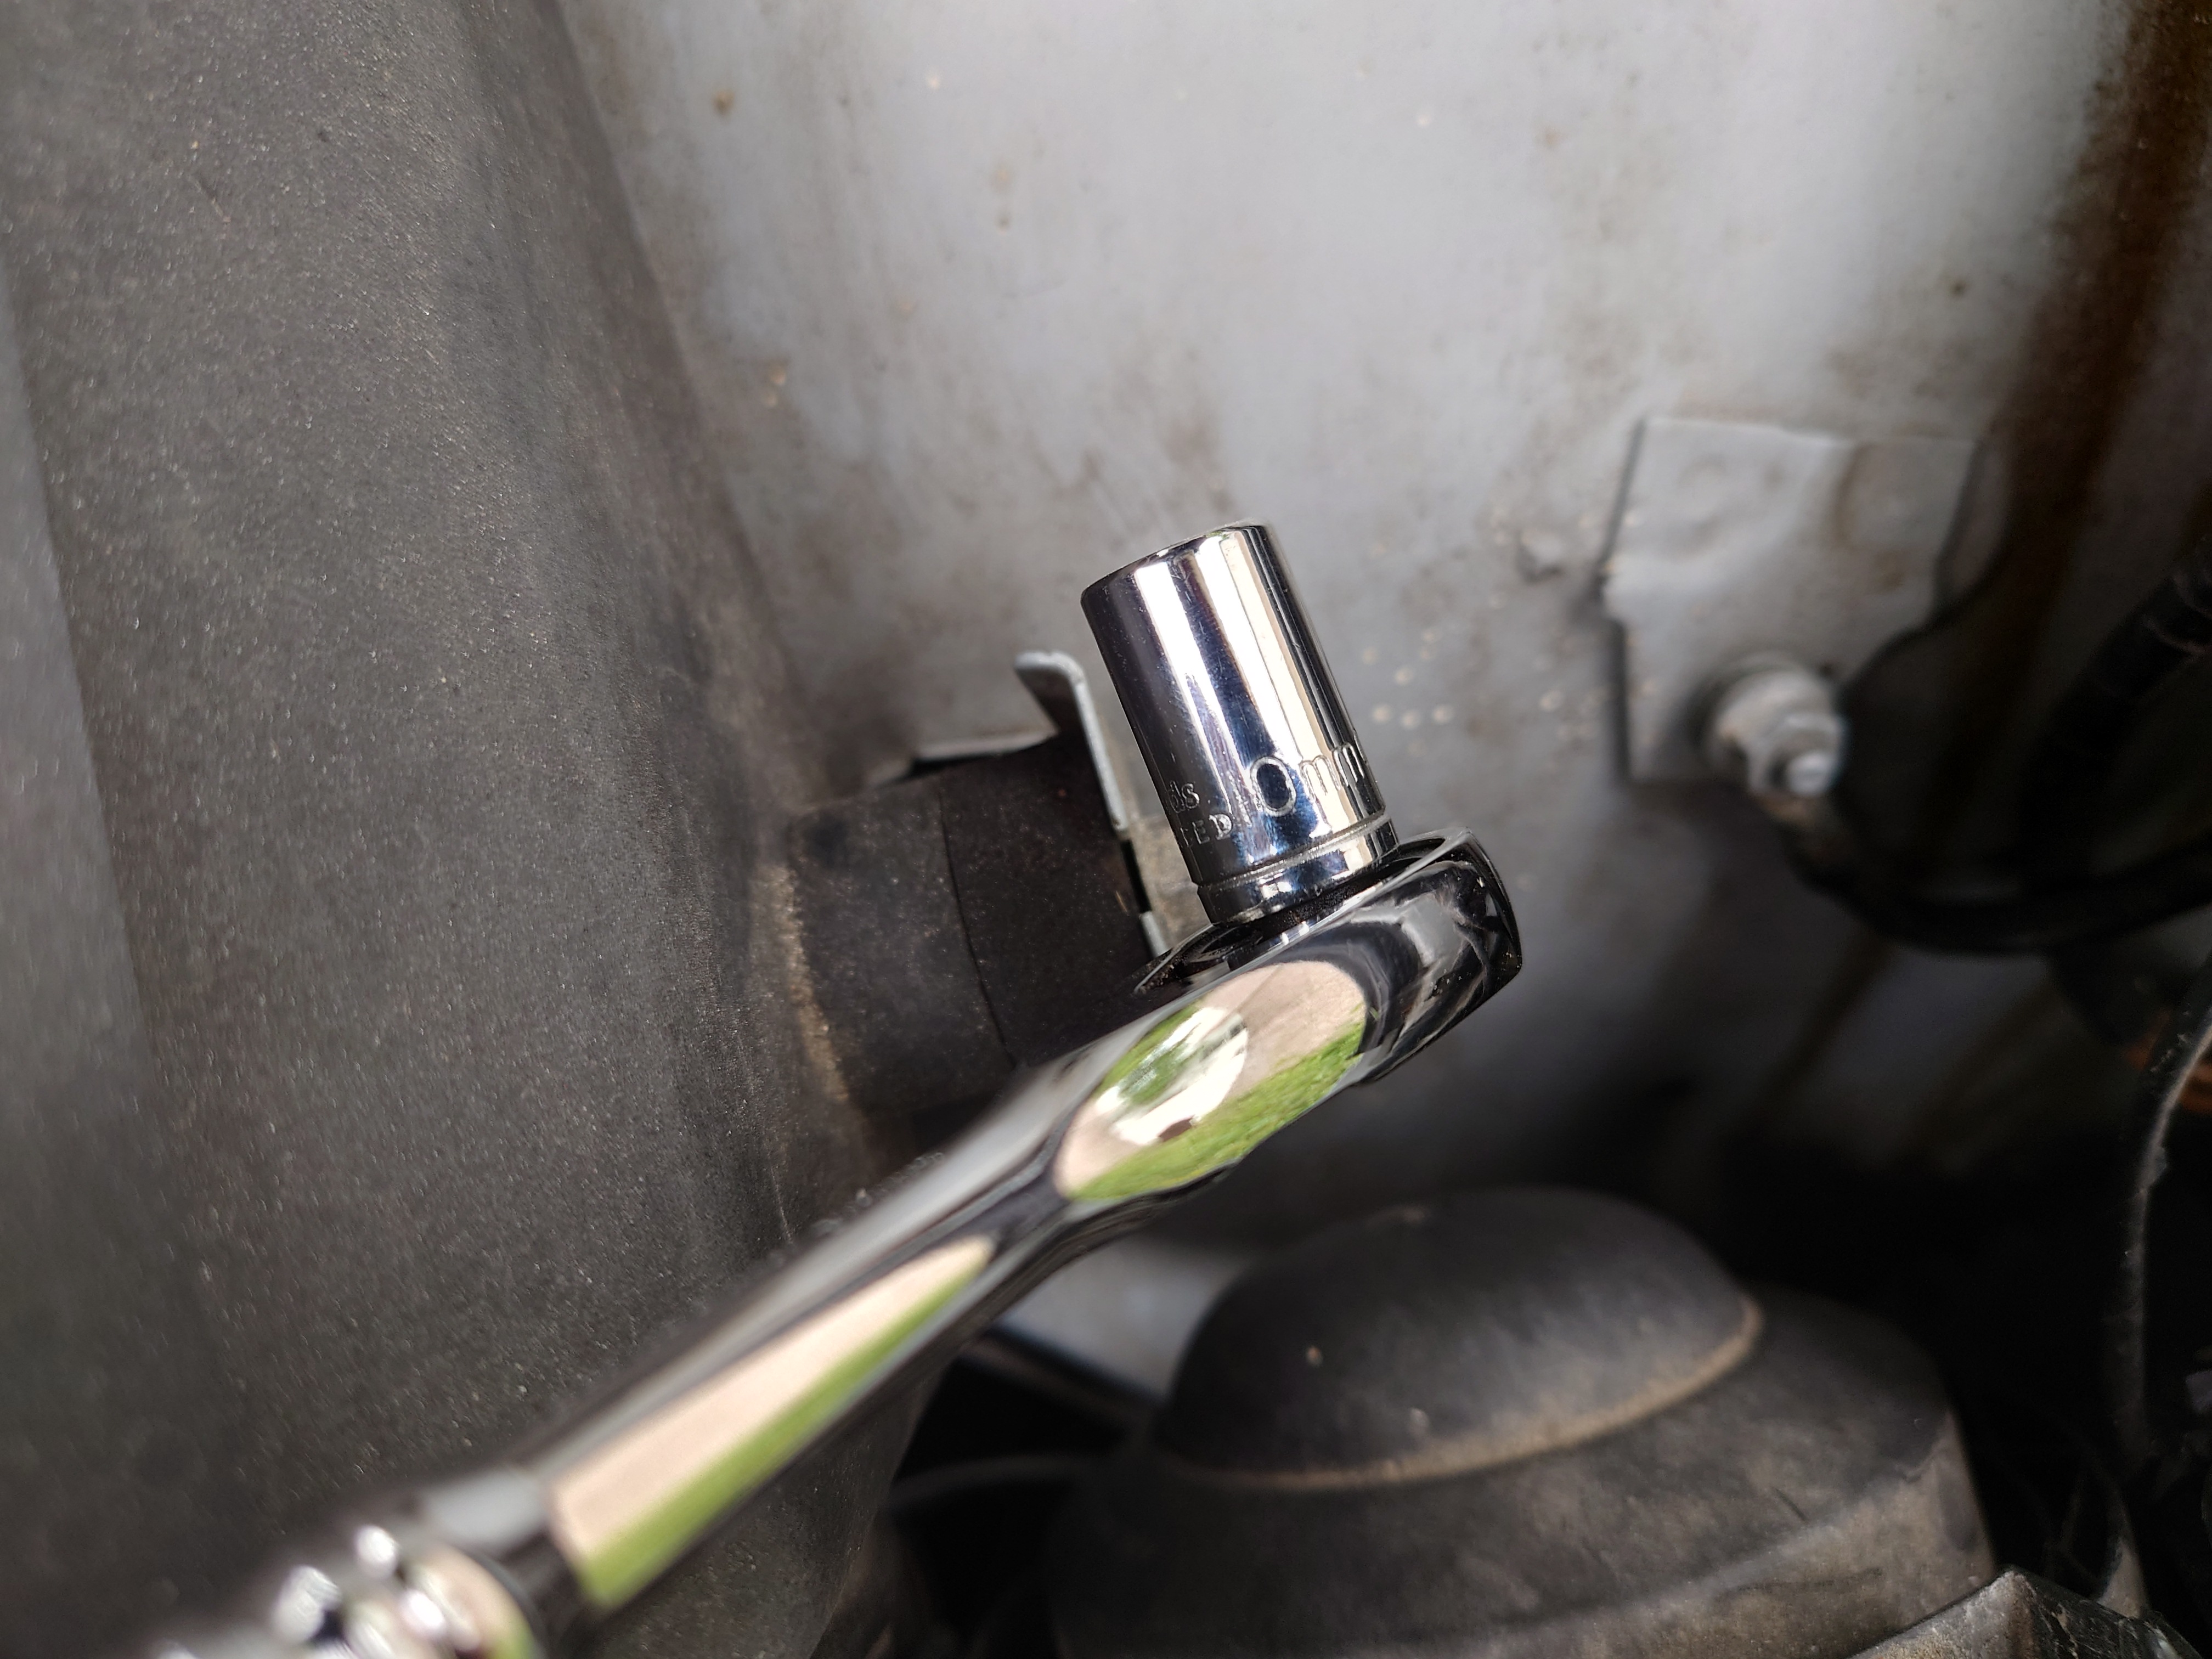
Removing the airbox is straightforward enough - the only fixings are those circled in green. The two clips holding the airbox to the MAF sensor that I already undid come off easily by hand, and the two nuts just require a 10mm hex socket.
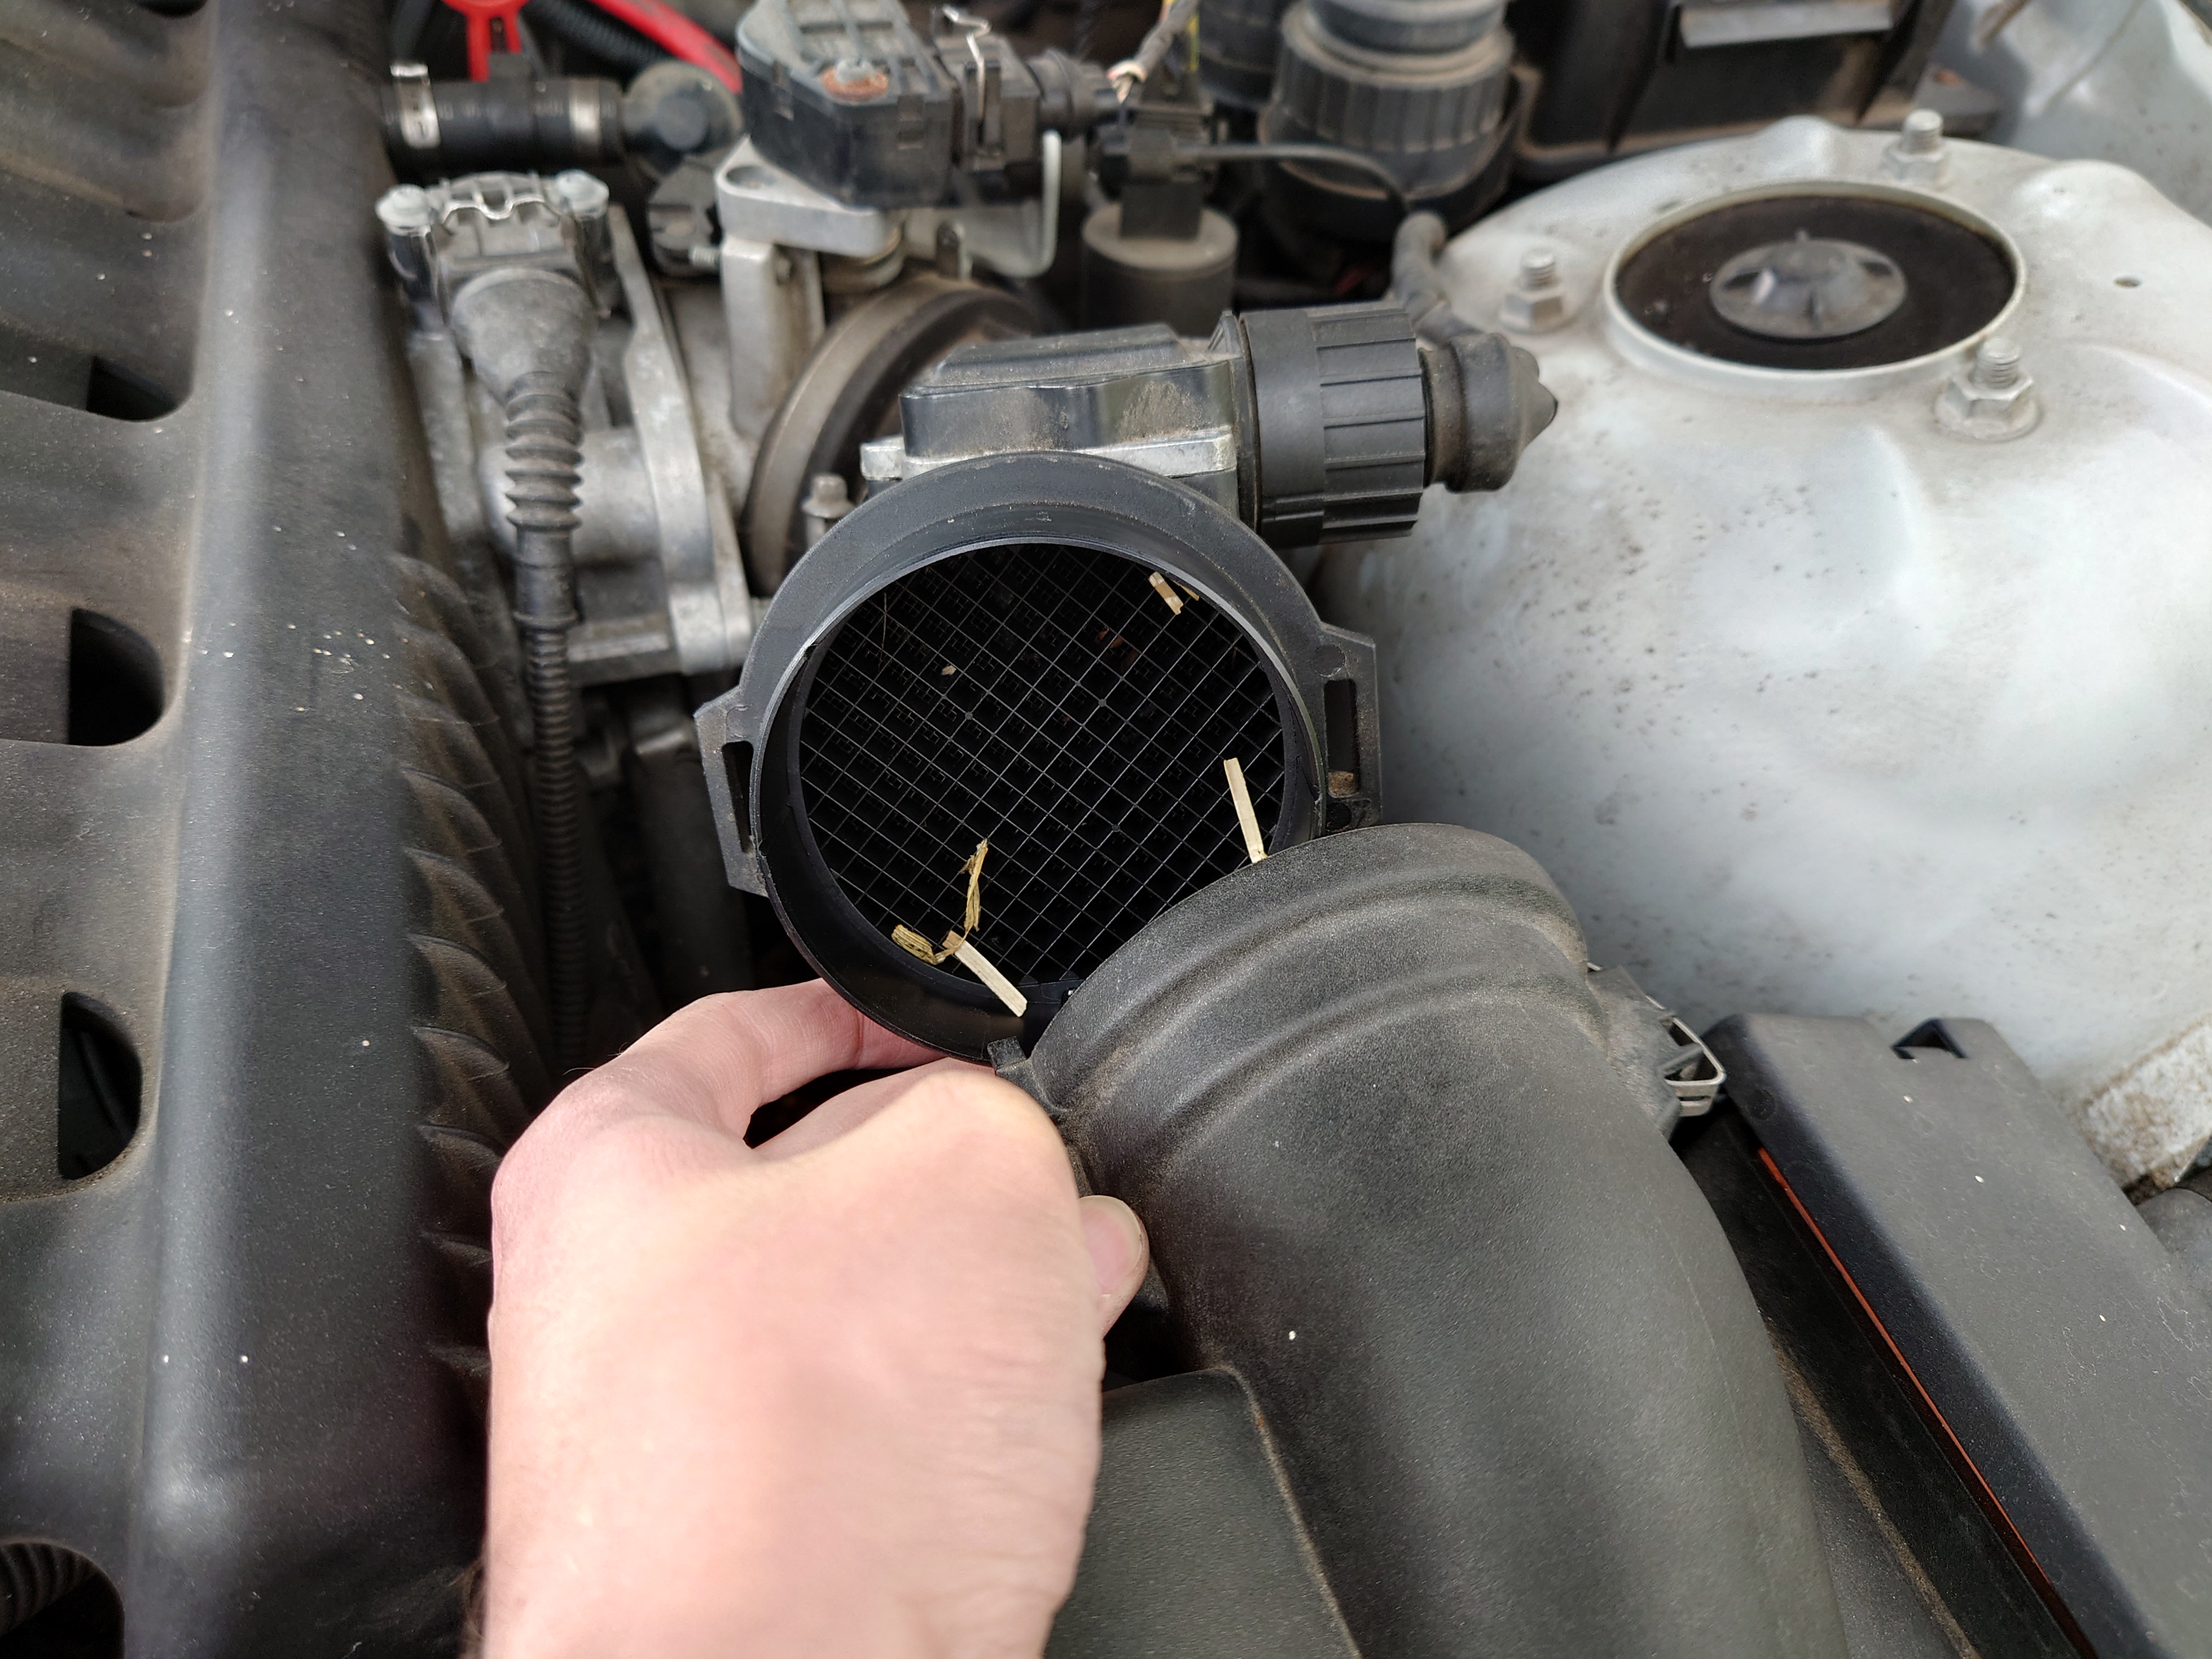
Make sure to clear out any crap that might've gotten through the air filter somehow 🤔
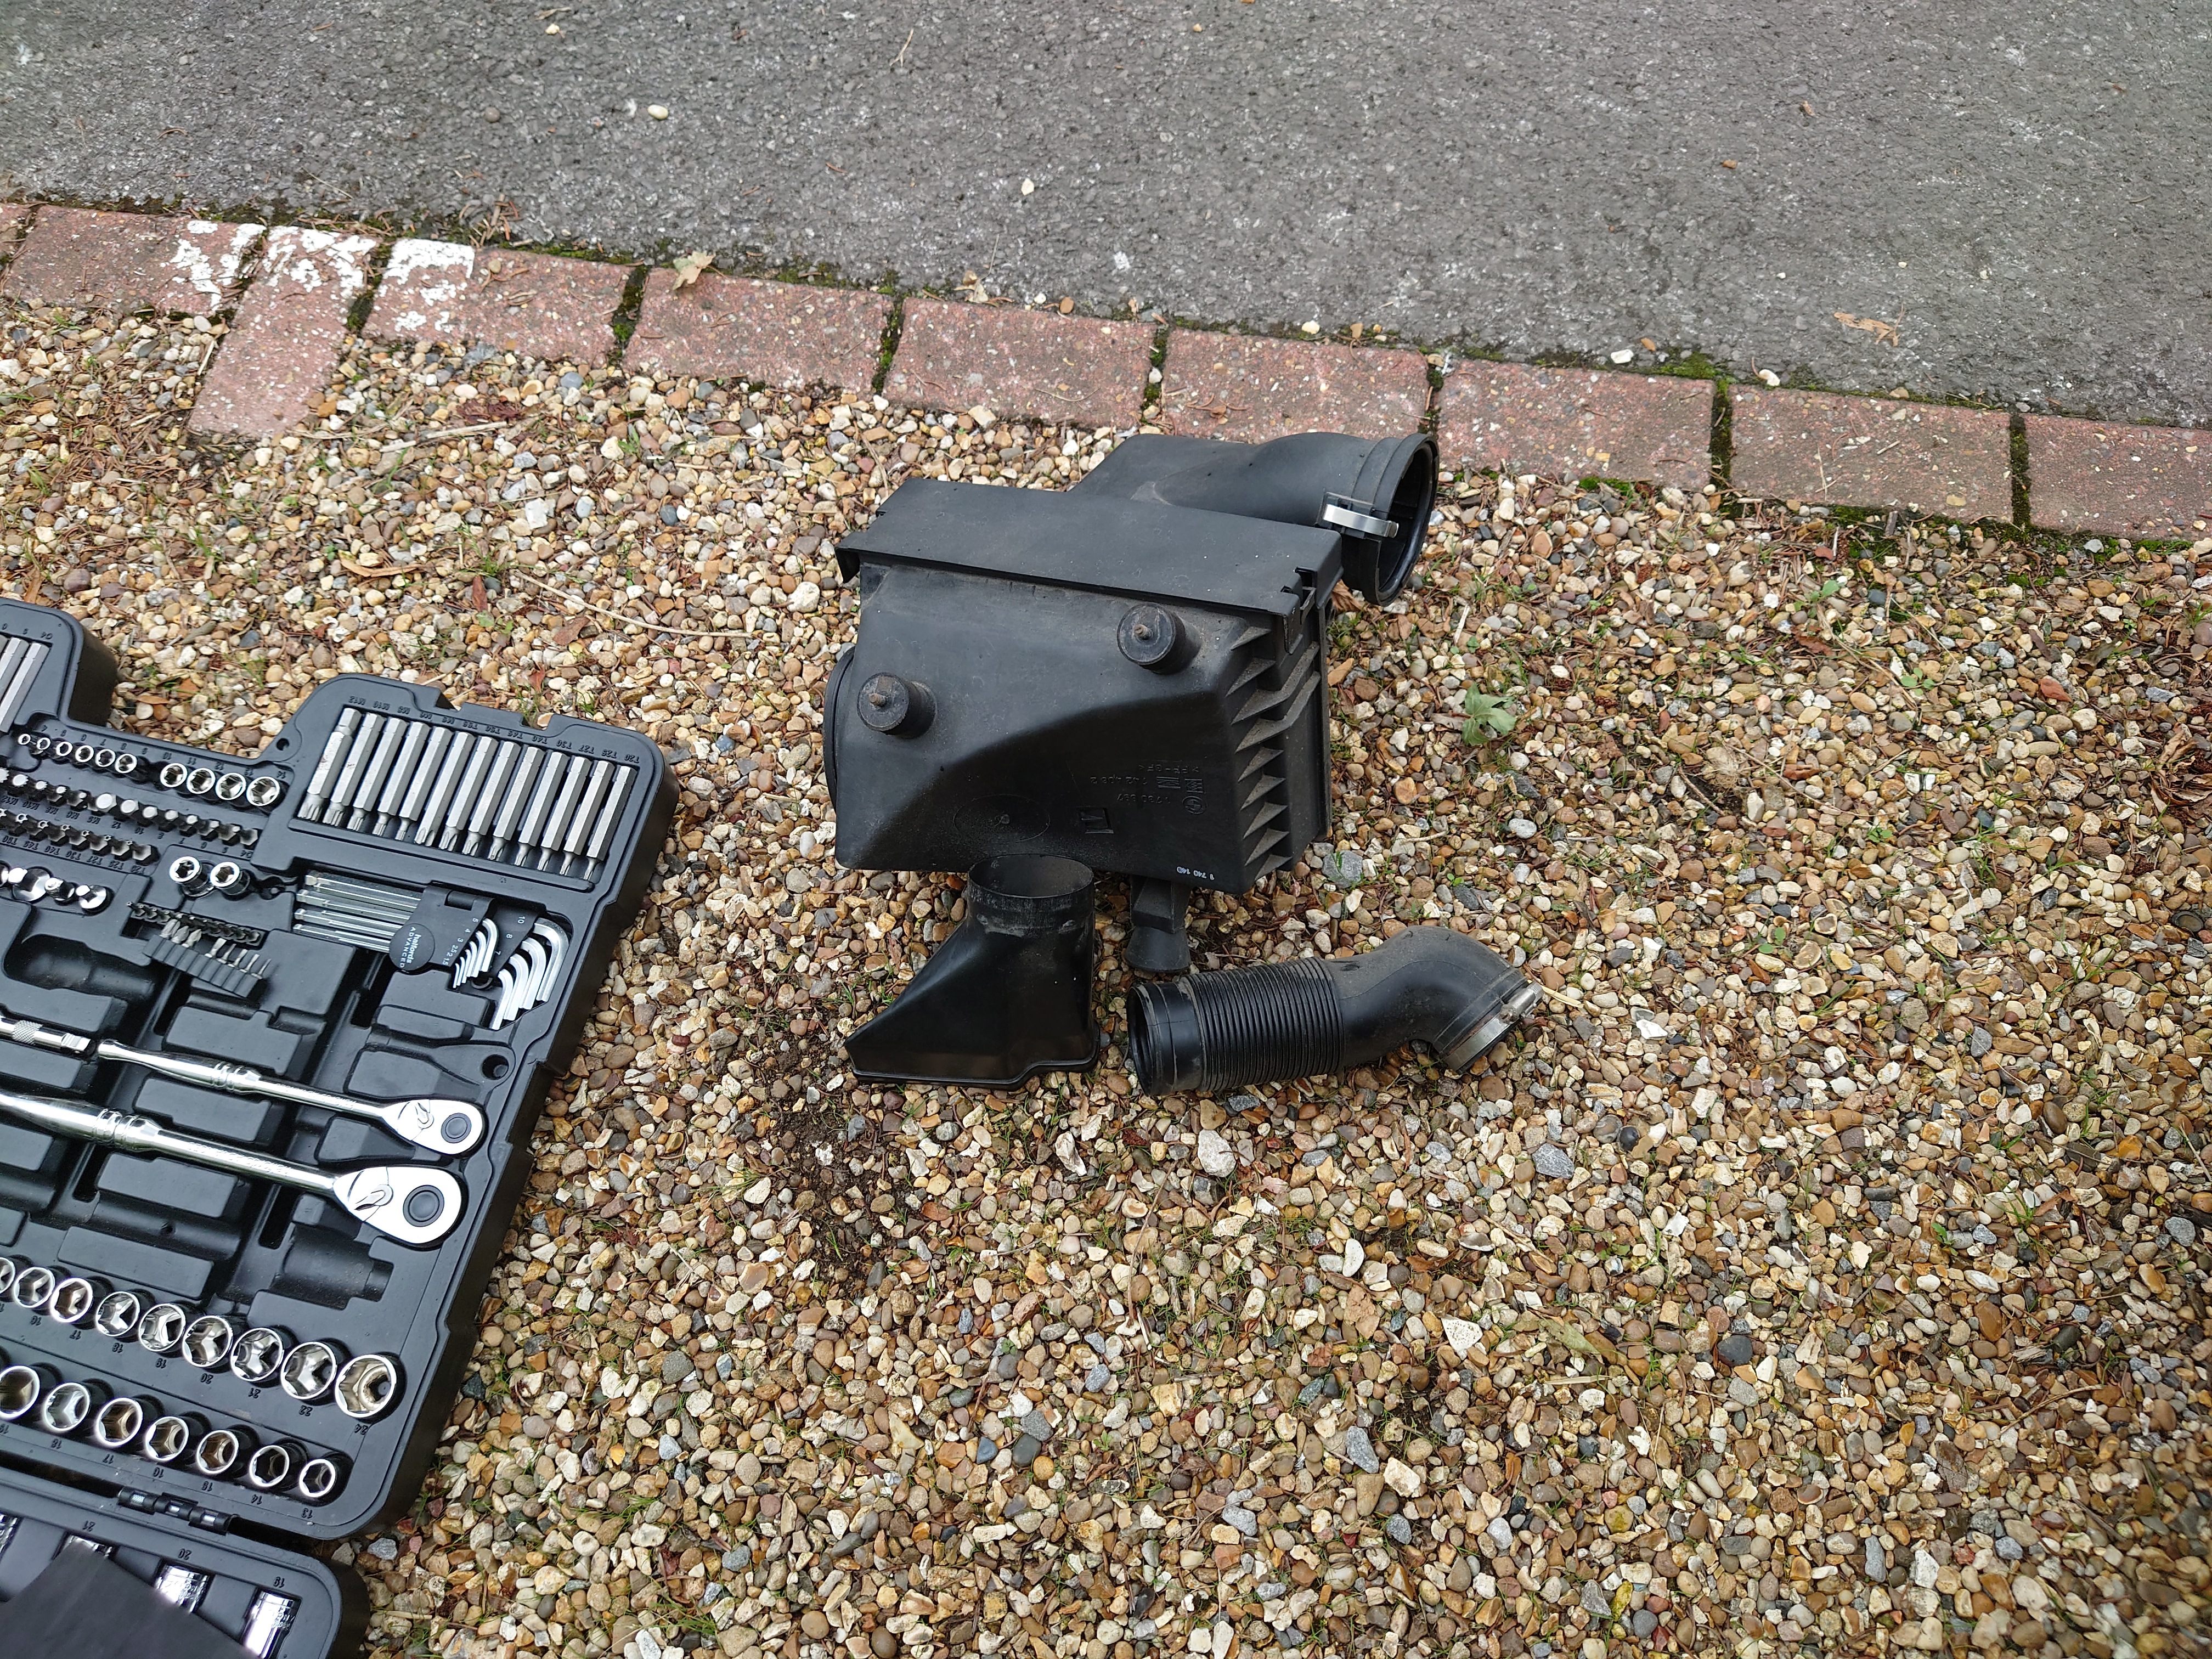
The airbox requires a bit of wiggling to remove. I unplugged the MAF sensor while doing this to avoid damaging the cable or connector should I give it too much welly. Get the airbox off of the nut brackets first, as those restrict its movement to a single axis. Then it's a matter of just wiggling the MAF and intakes out, and pulling the airbox out.
This is also a good time to check the air filter. There's no need to remove the airbox to do this, of course.
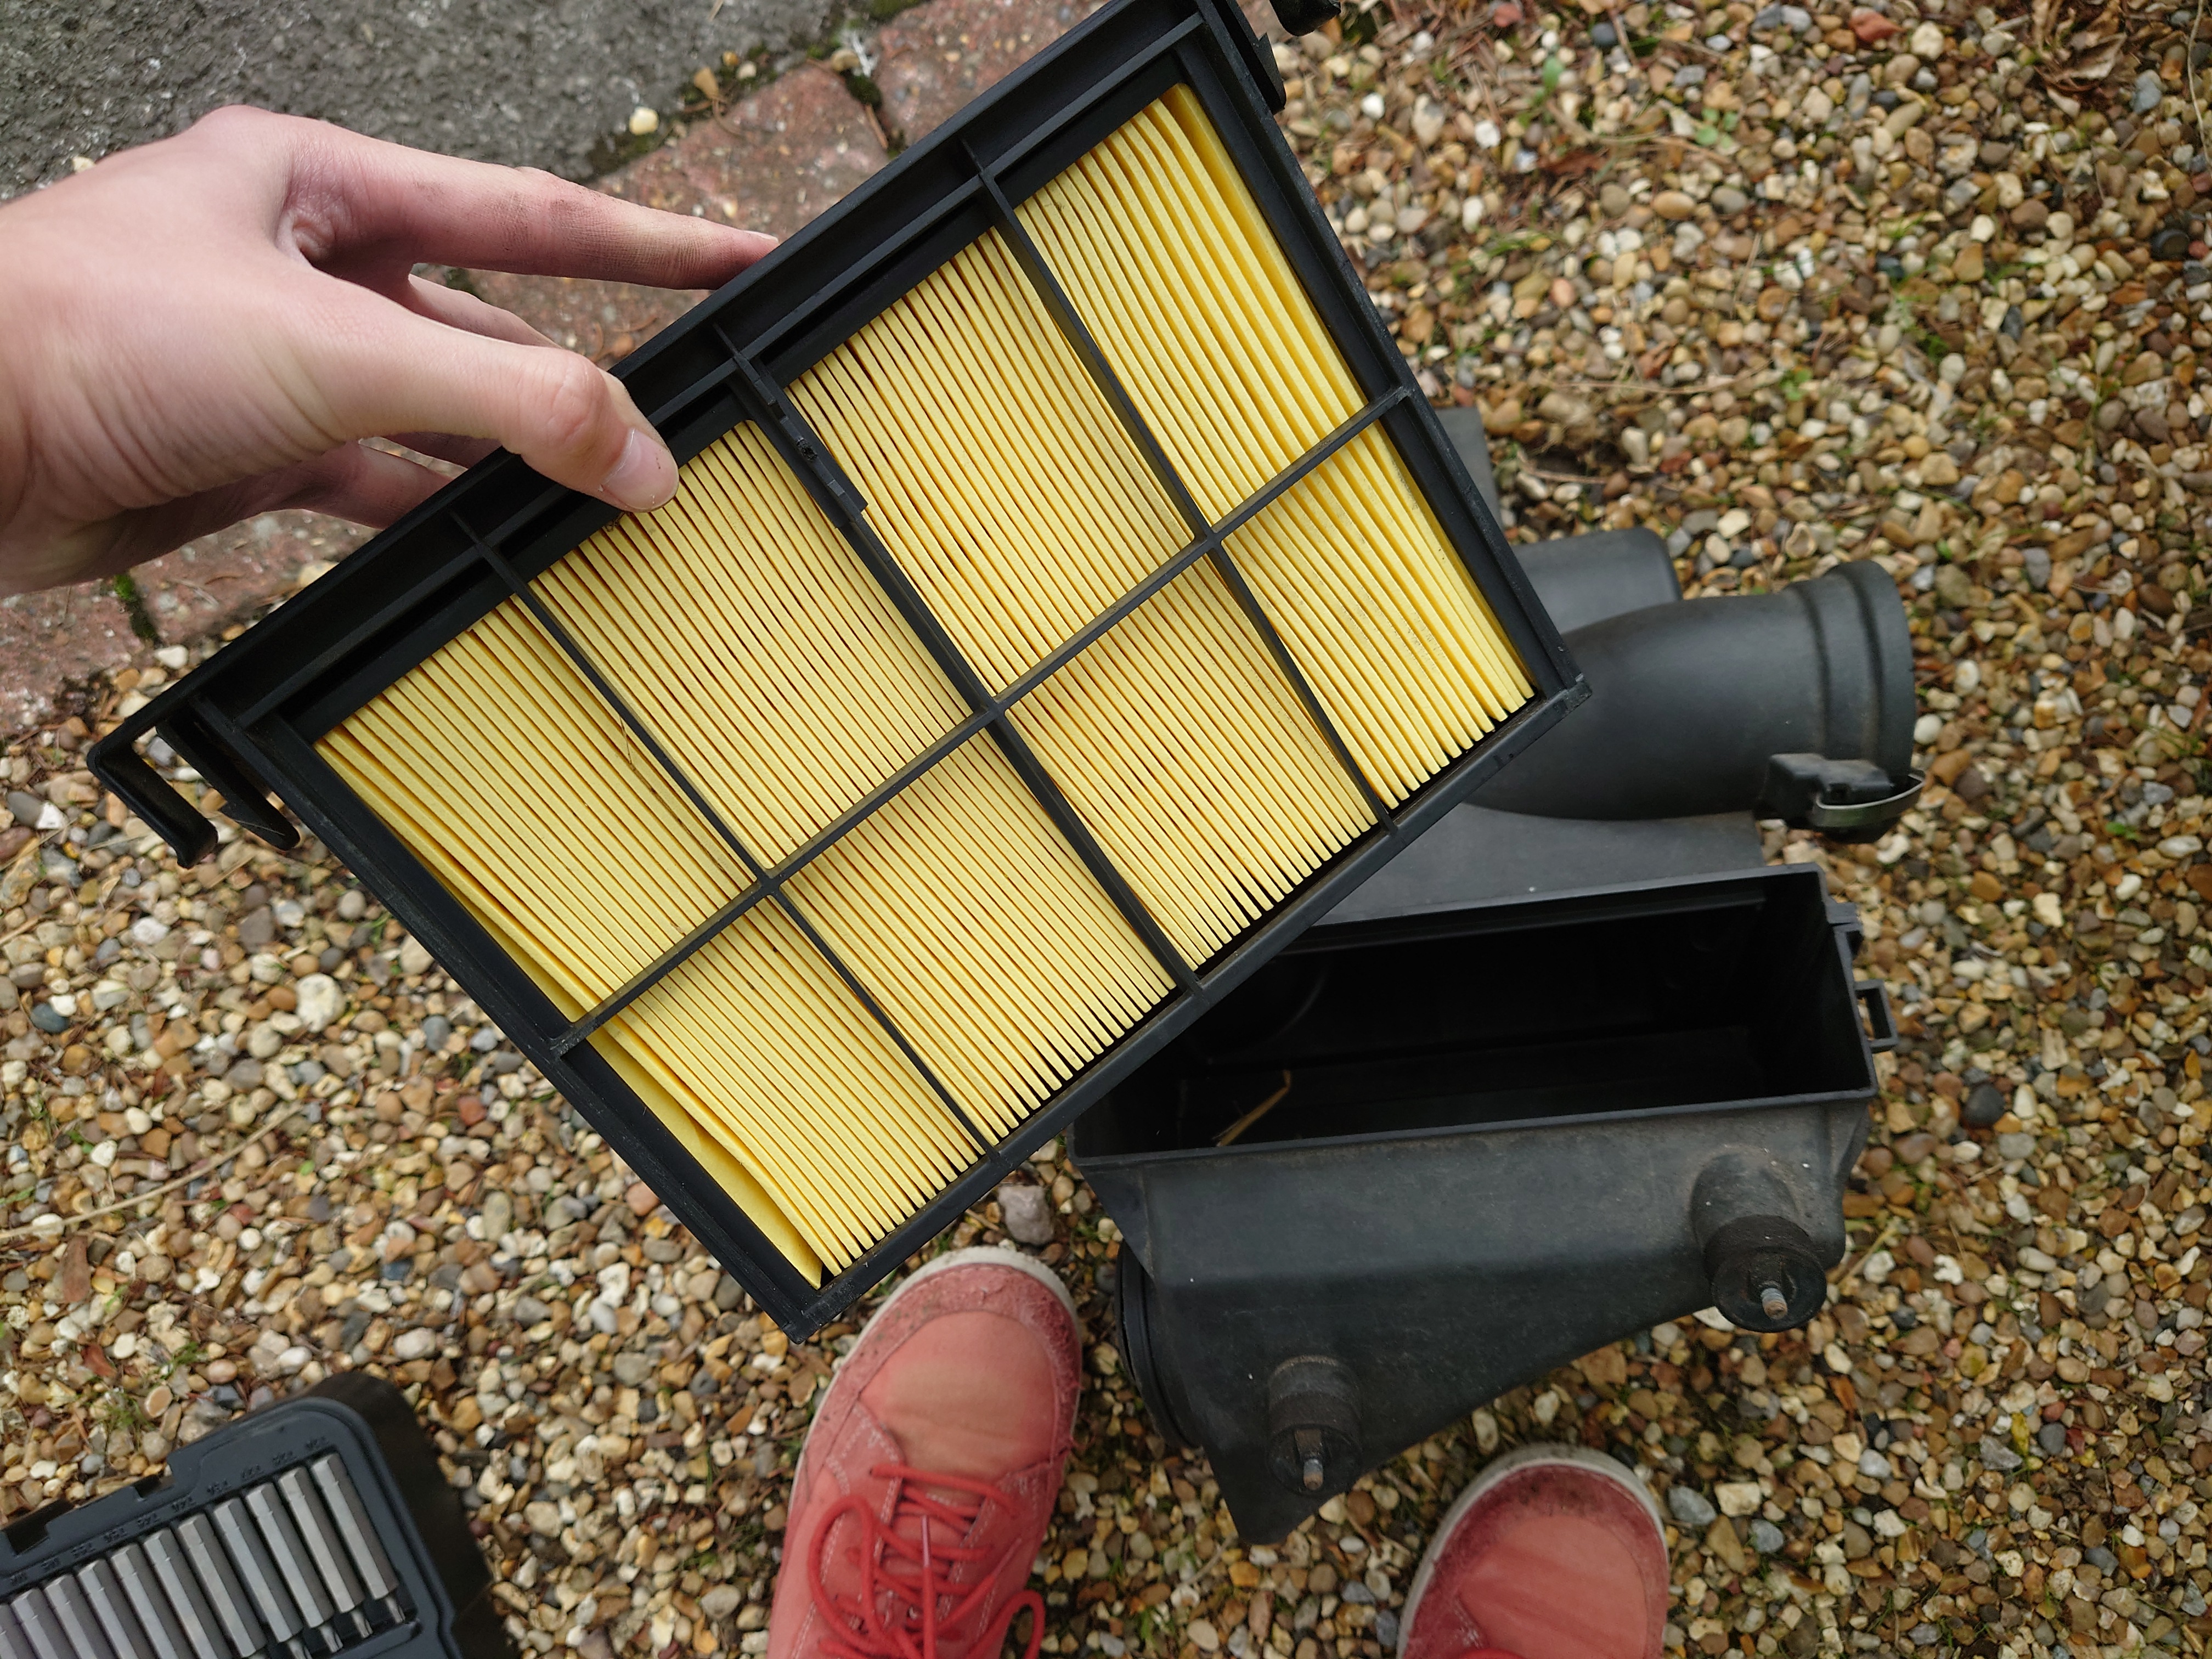
Looks clean, so we'll just put it back in :) Make sure to shake out any crap from the airbox too.
And now we have a clear view of the alternator!
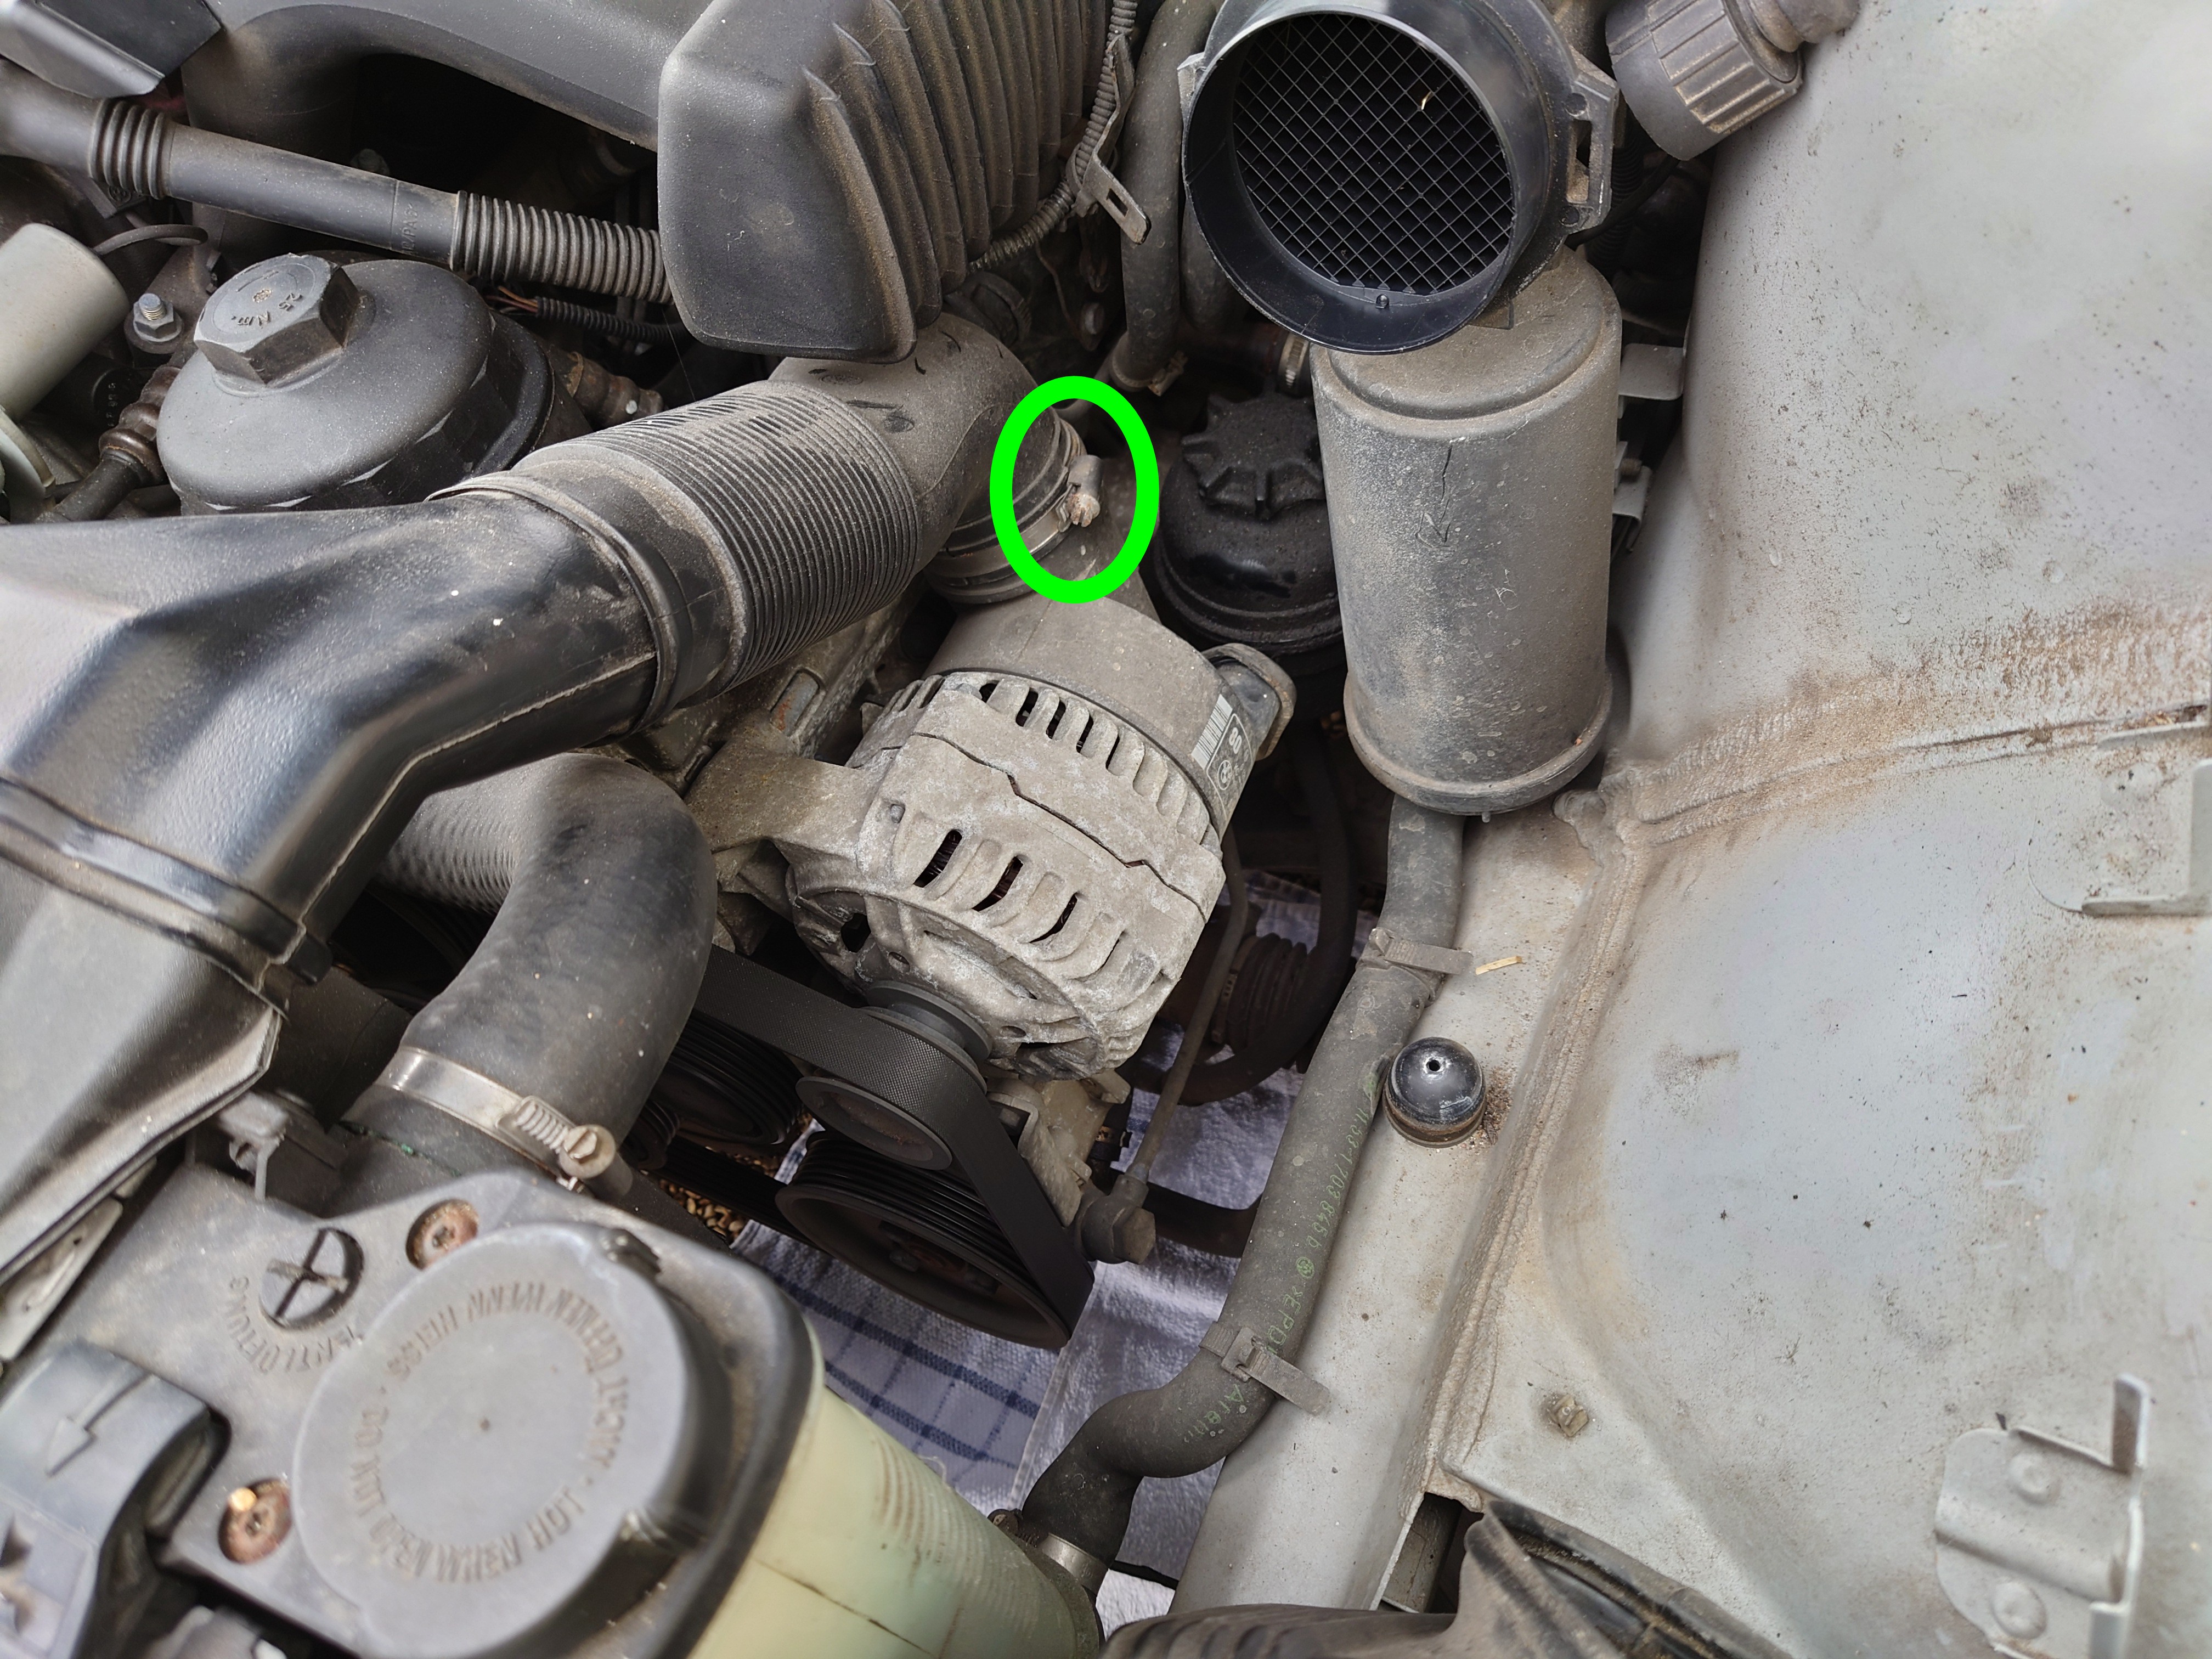
This alternator is air-cooled with its own intake, so we need to remove this. Circled in green is the hose clamp securing it. Just loosen it with a flathead screwdriver, and wiggle the hose off.
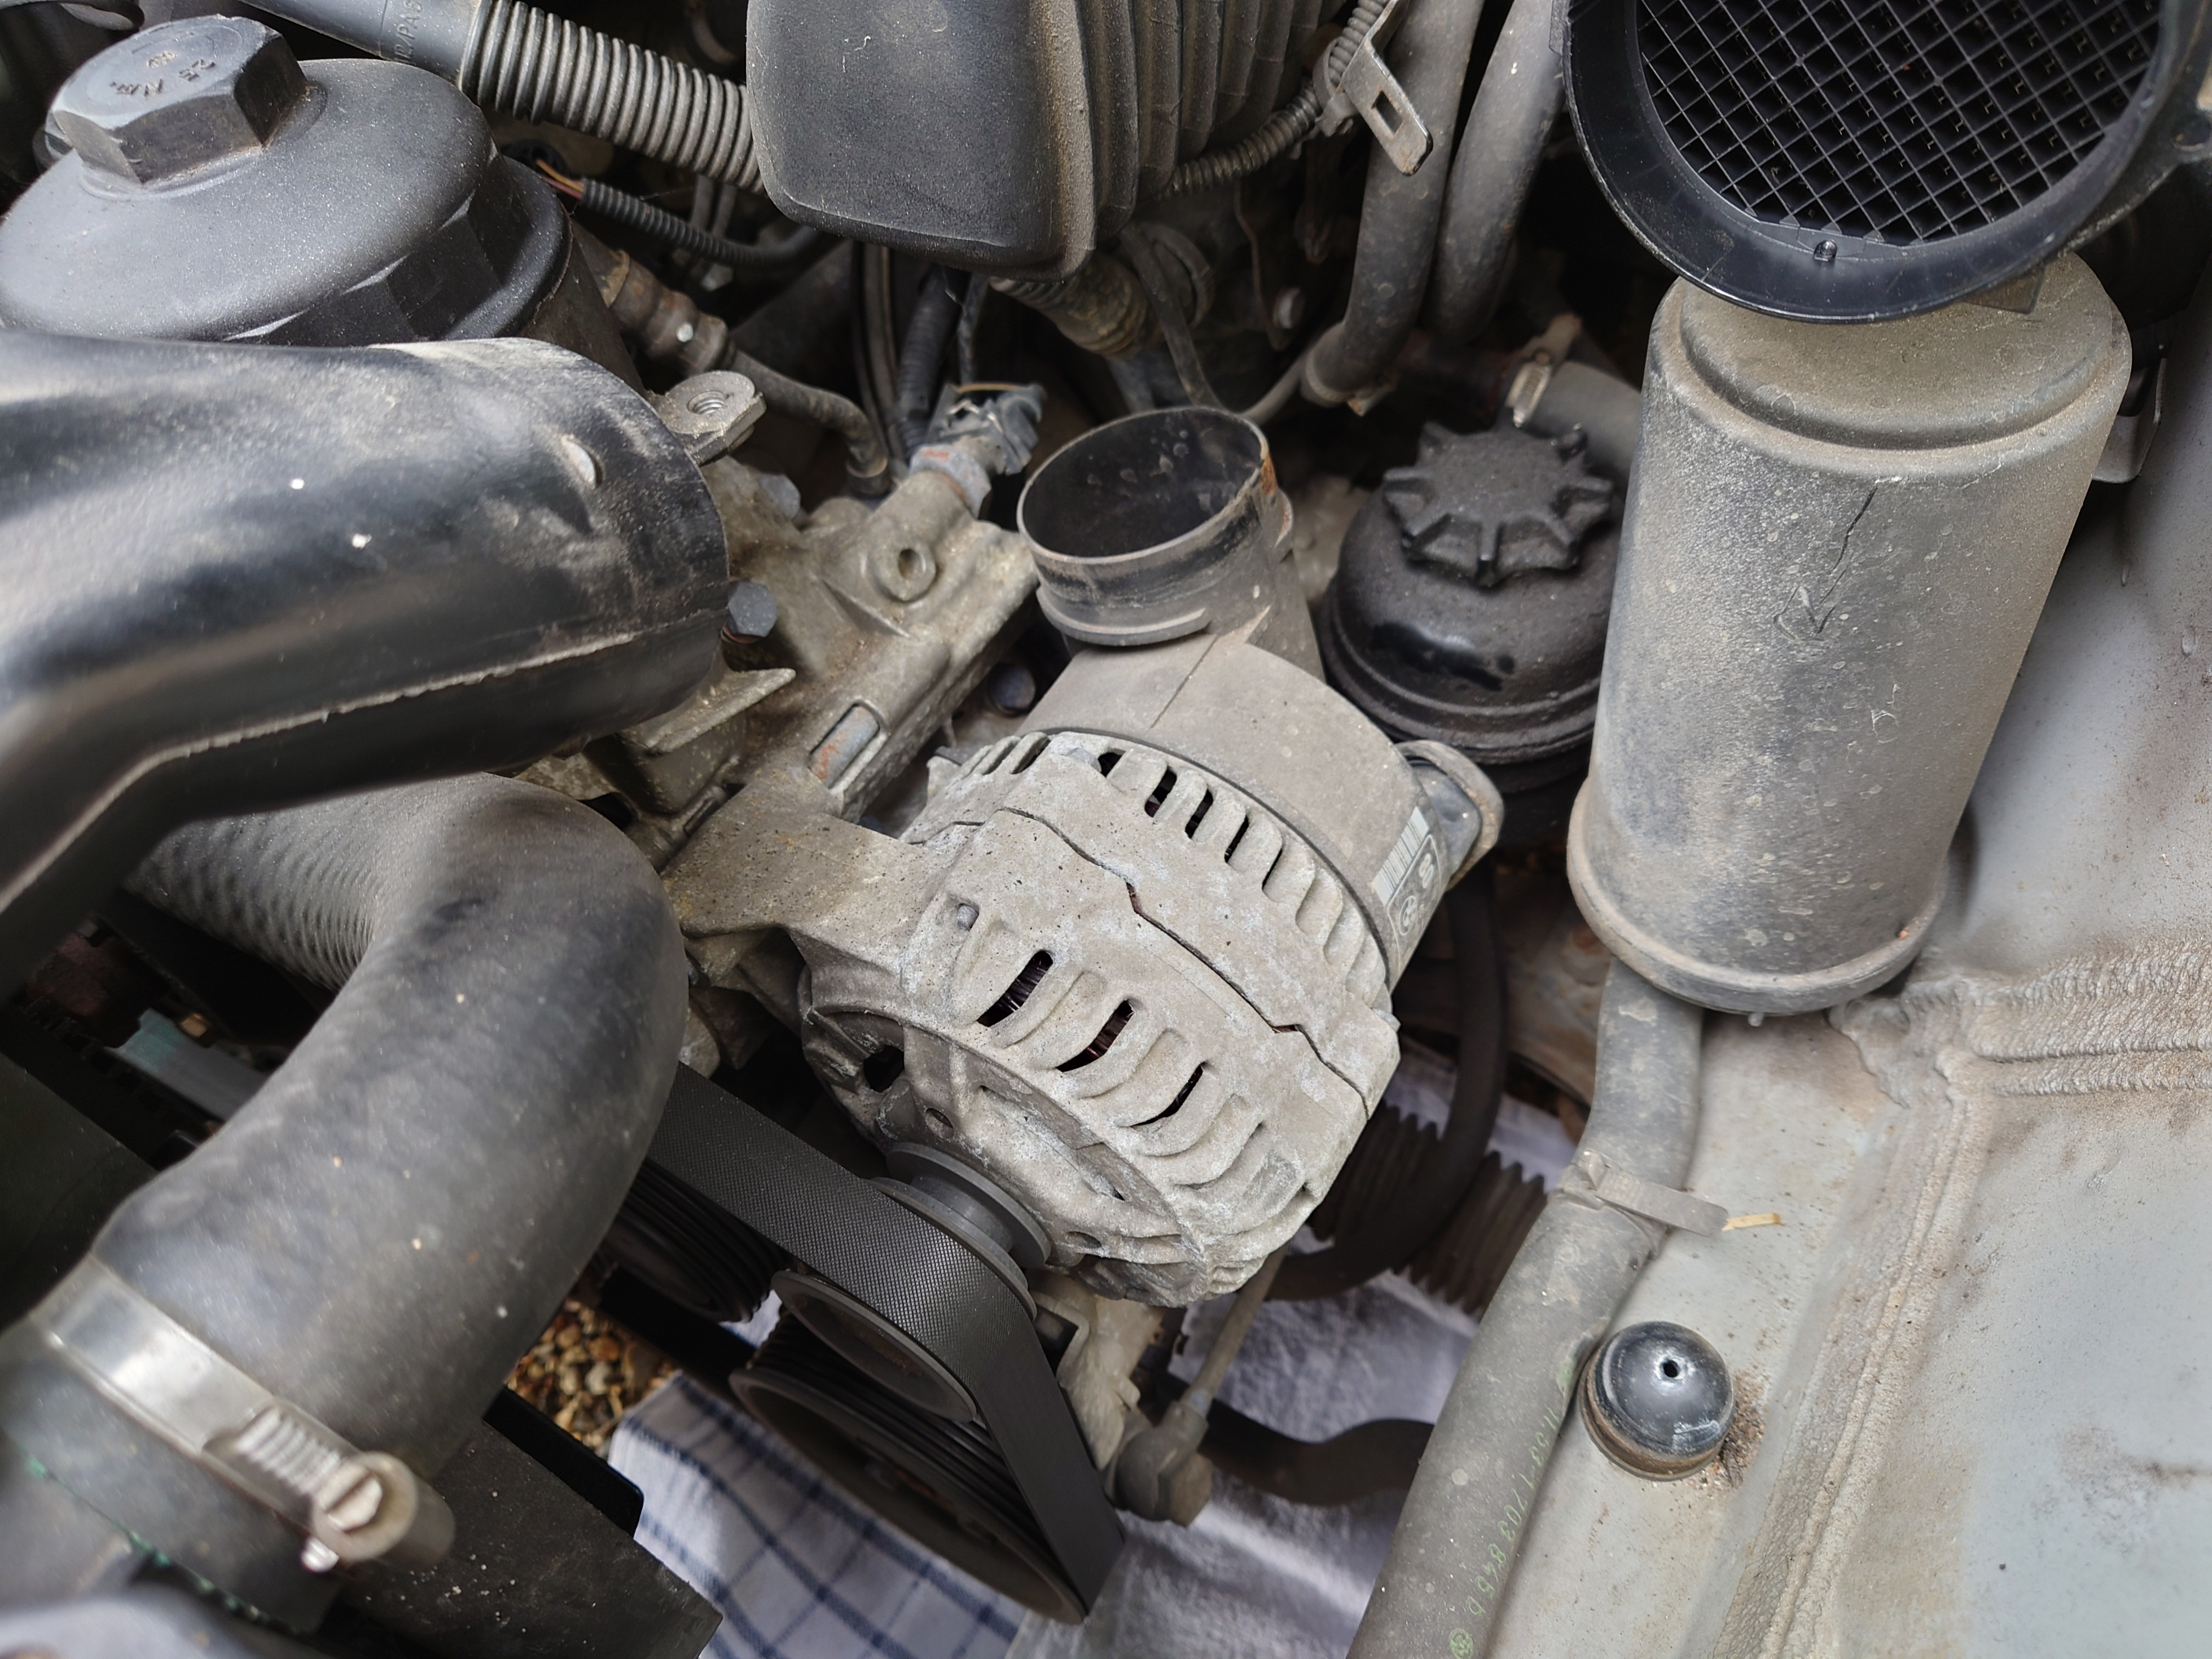
I also removed the bit of ducting before the hose, as it was loose and kinda in the way.
So before we try removing the old alternator, let's see what the new one looks like.
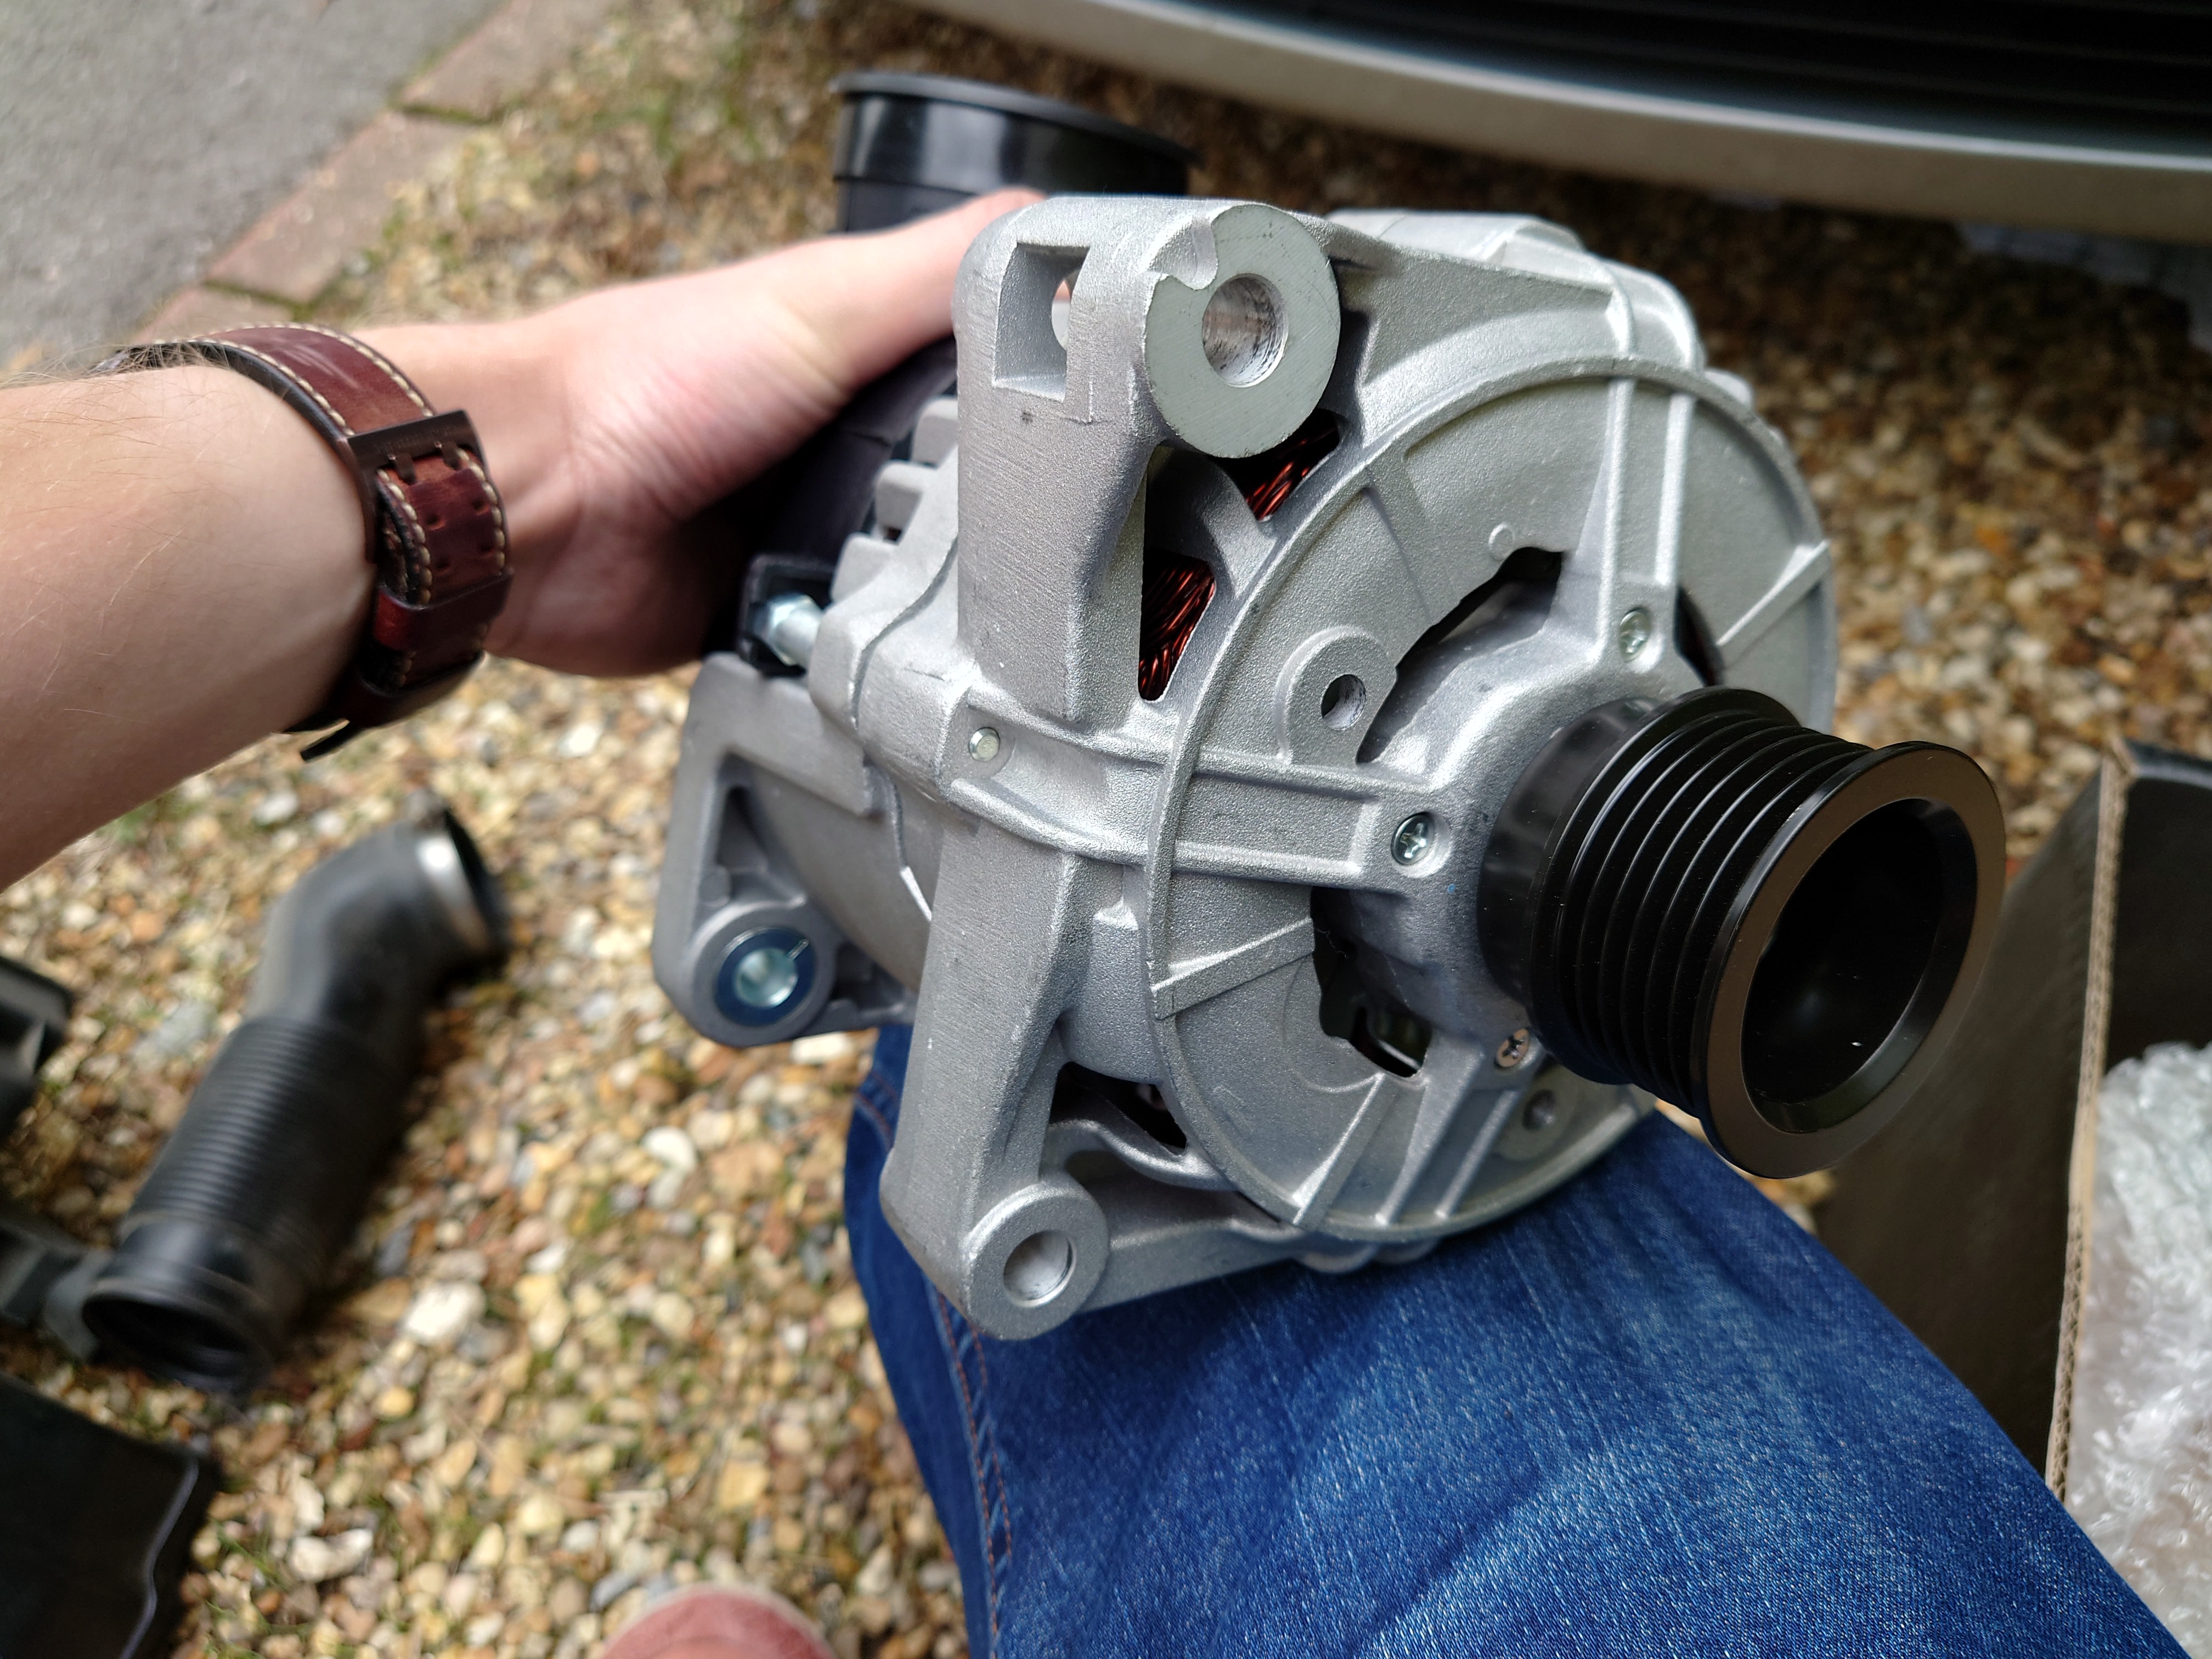
So on the front, we have the pulley, and two holes. From looking up reference videos beforehand, I also know that the hole at the back is for the same long bolt that goes through the bottom hole at the front.
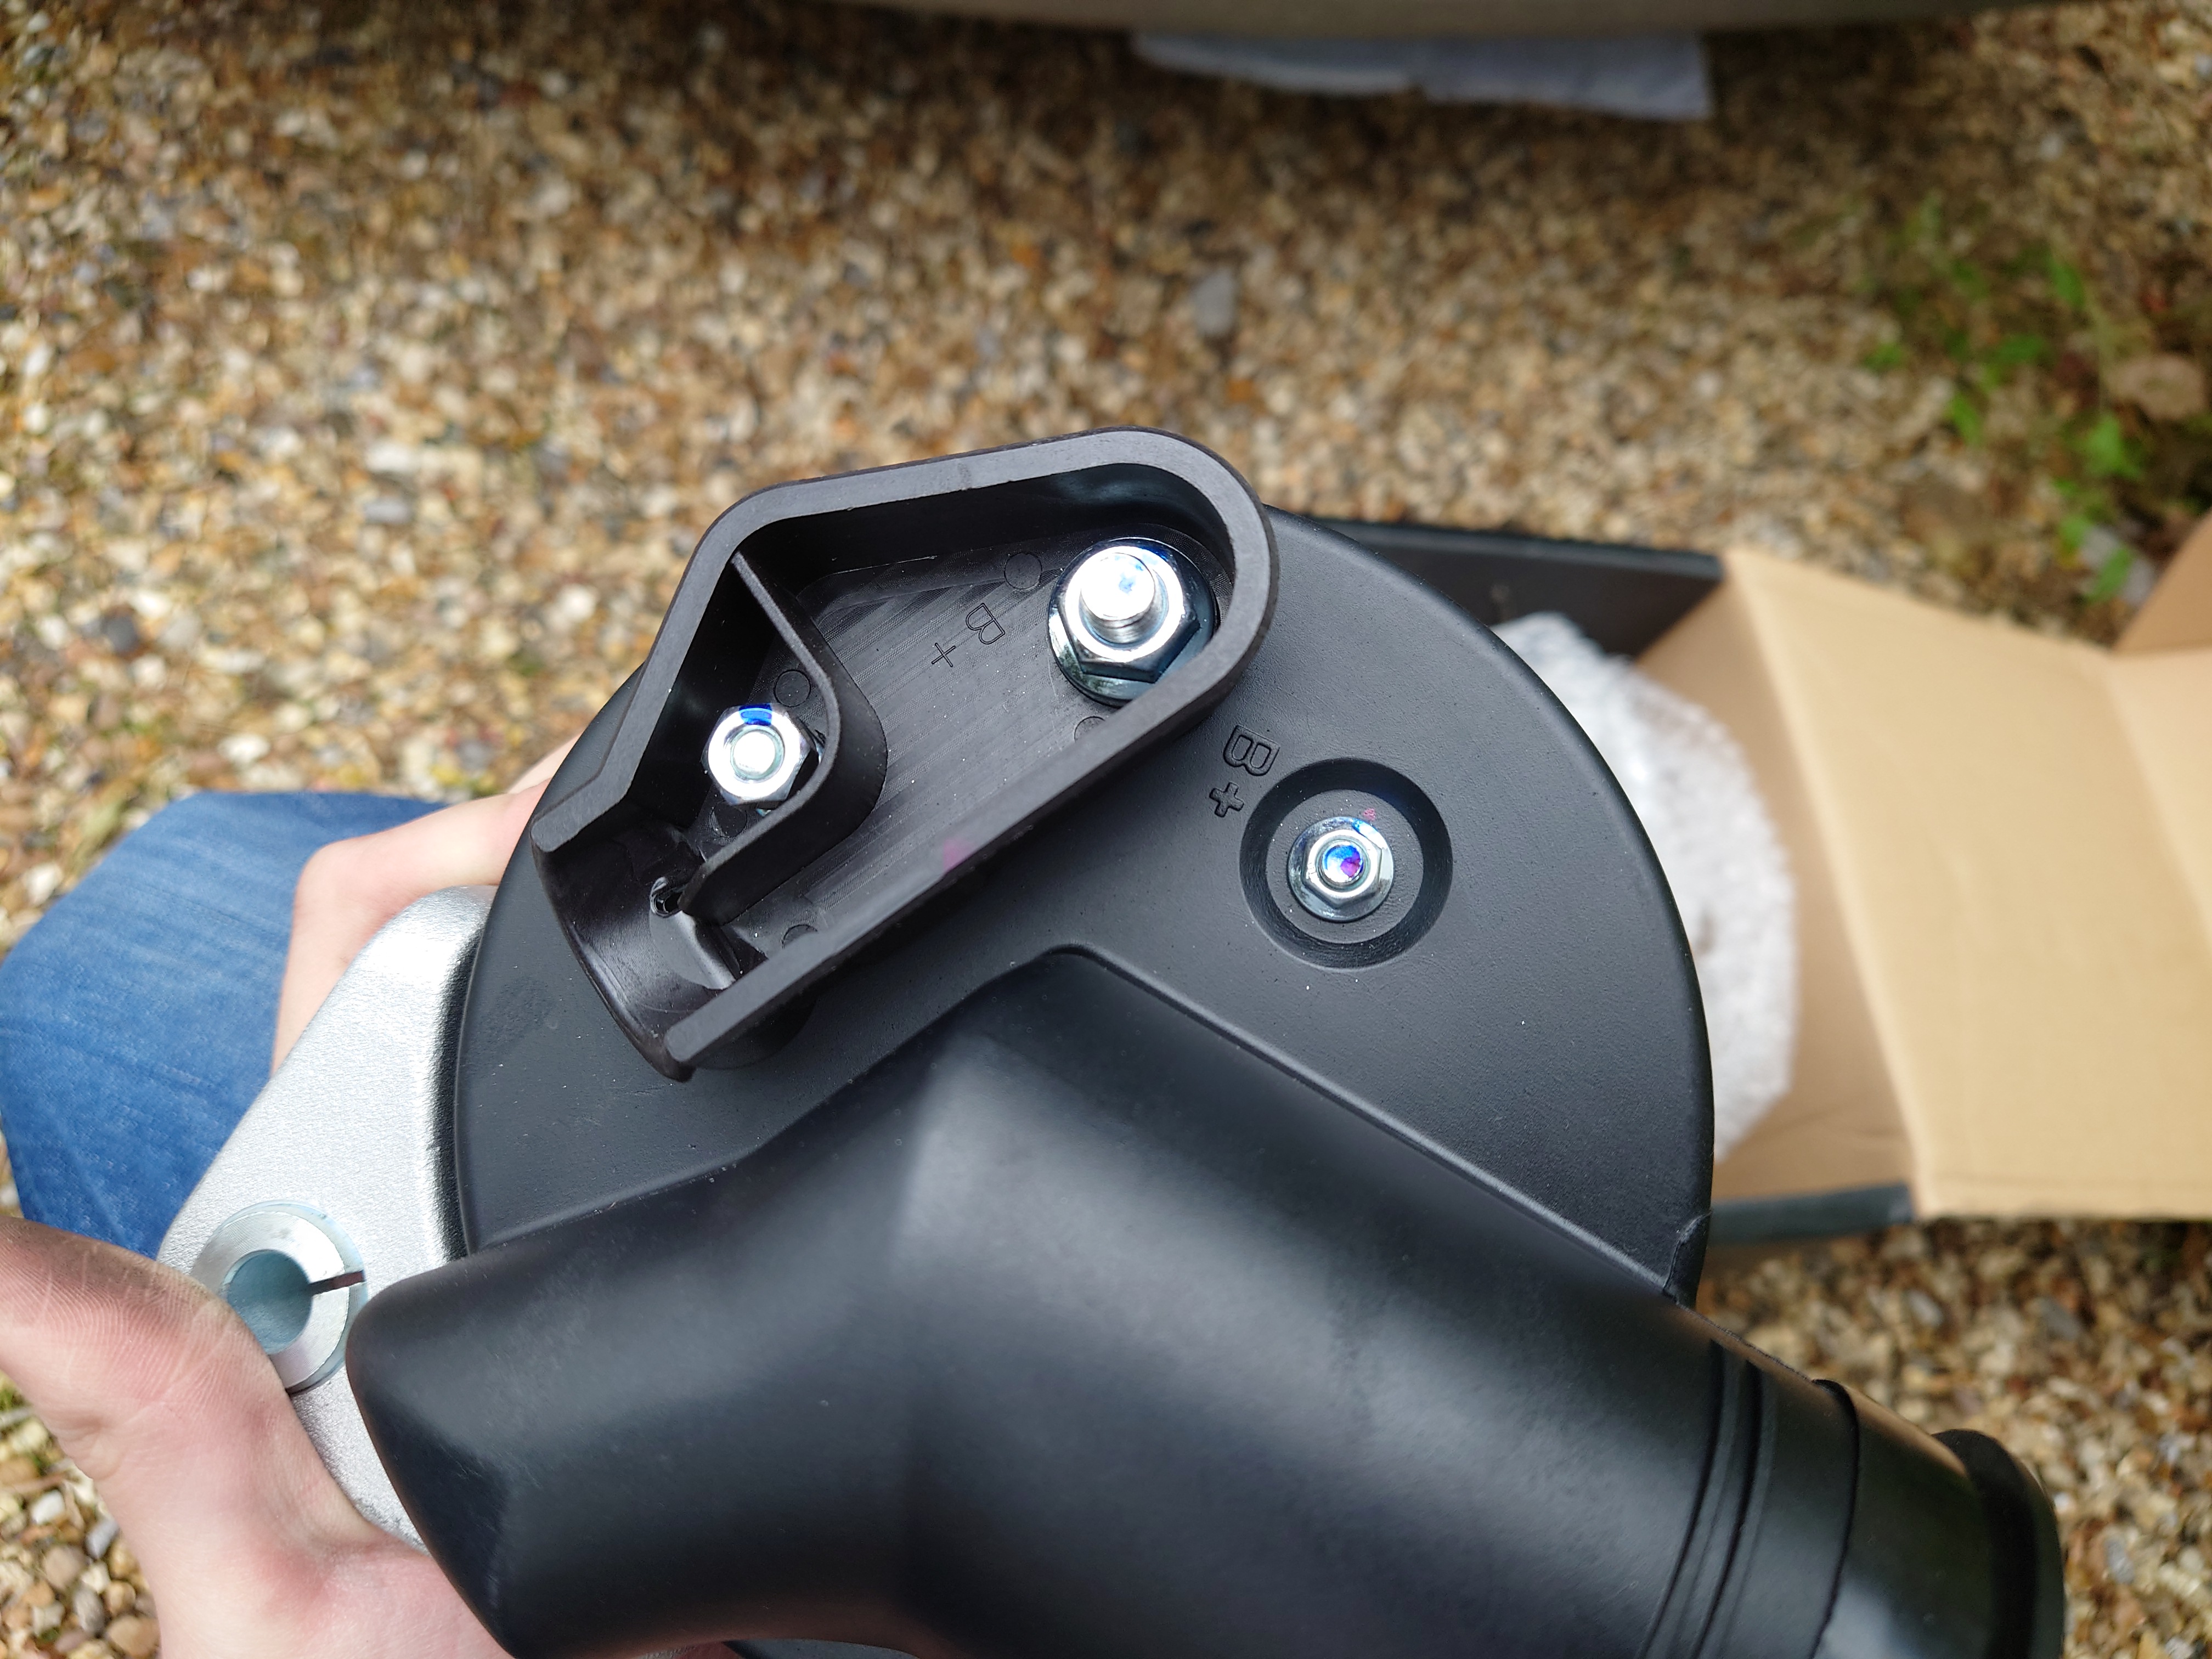
And at the back, we have what look like three terminals. Later on we'll see that it's just the two in the shrouded area.
Next, we have to remove the serpentine belt from the alternator. Most tutorials seem to remove the belt entirely, but I don't think this is really necessary unless you're replacing the belt as well. Mine seems to be in good condition, so I'll leave it alone.
Circled in green is the tensioner pulley. Currently, it has a plastic cover obscuring the 16mm hex head we need to latch on to in order to loosen the belt.
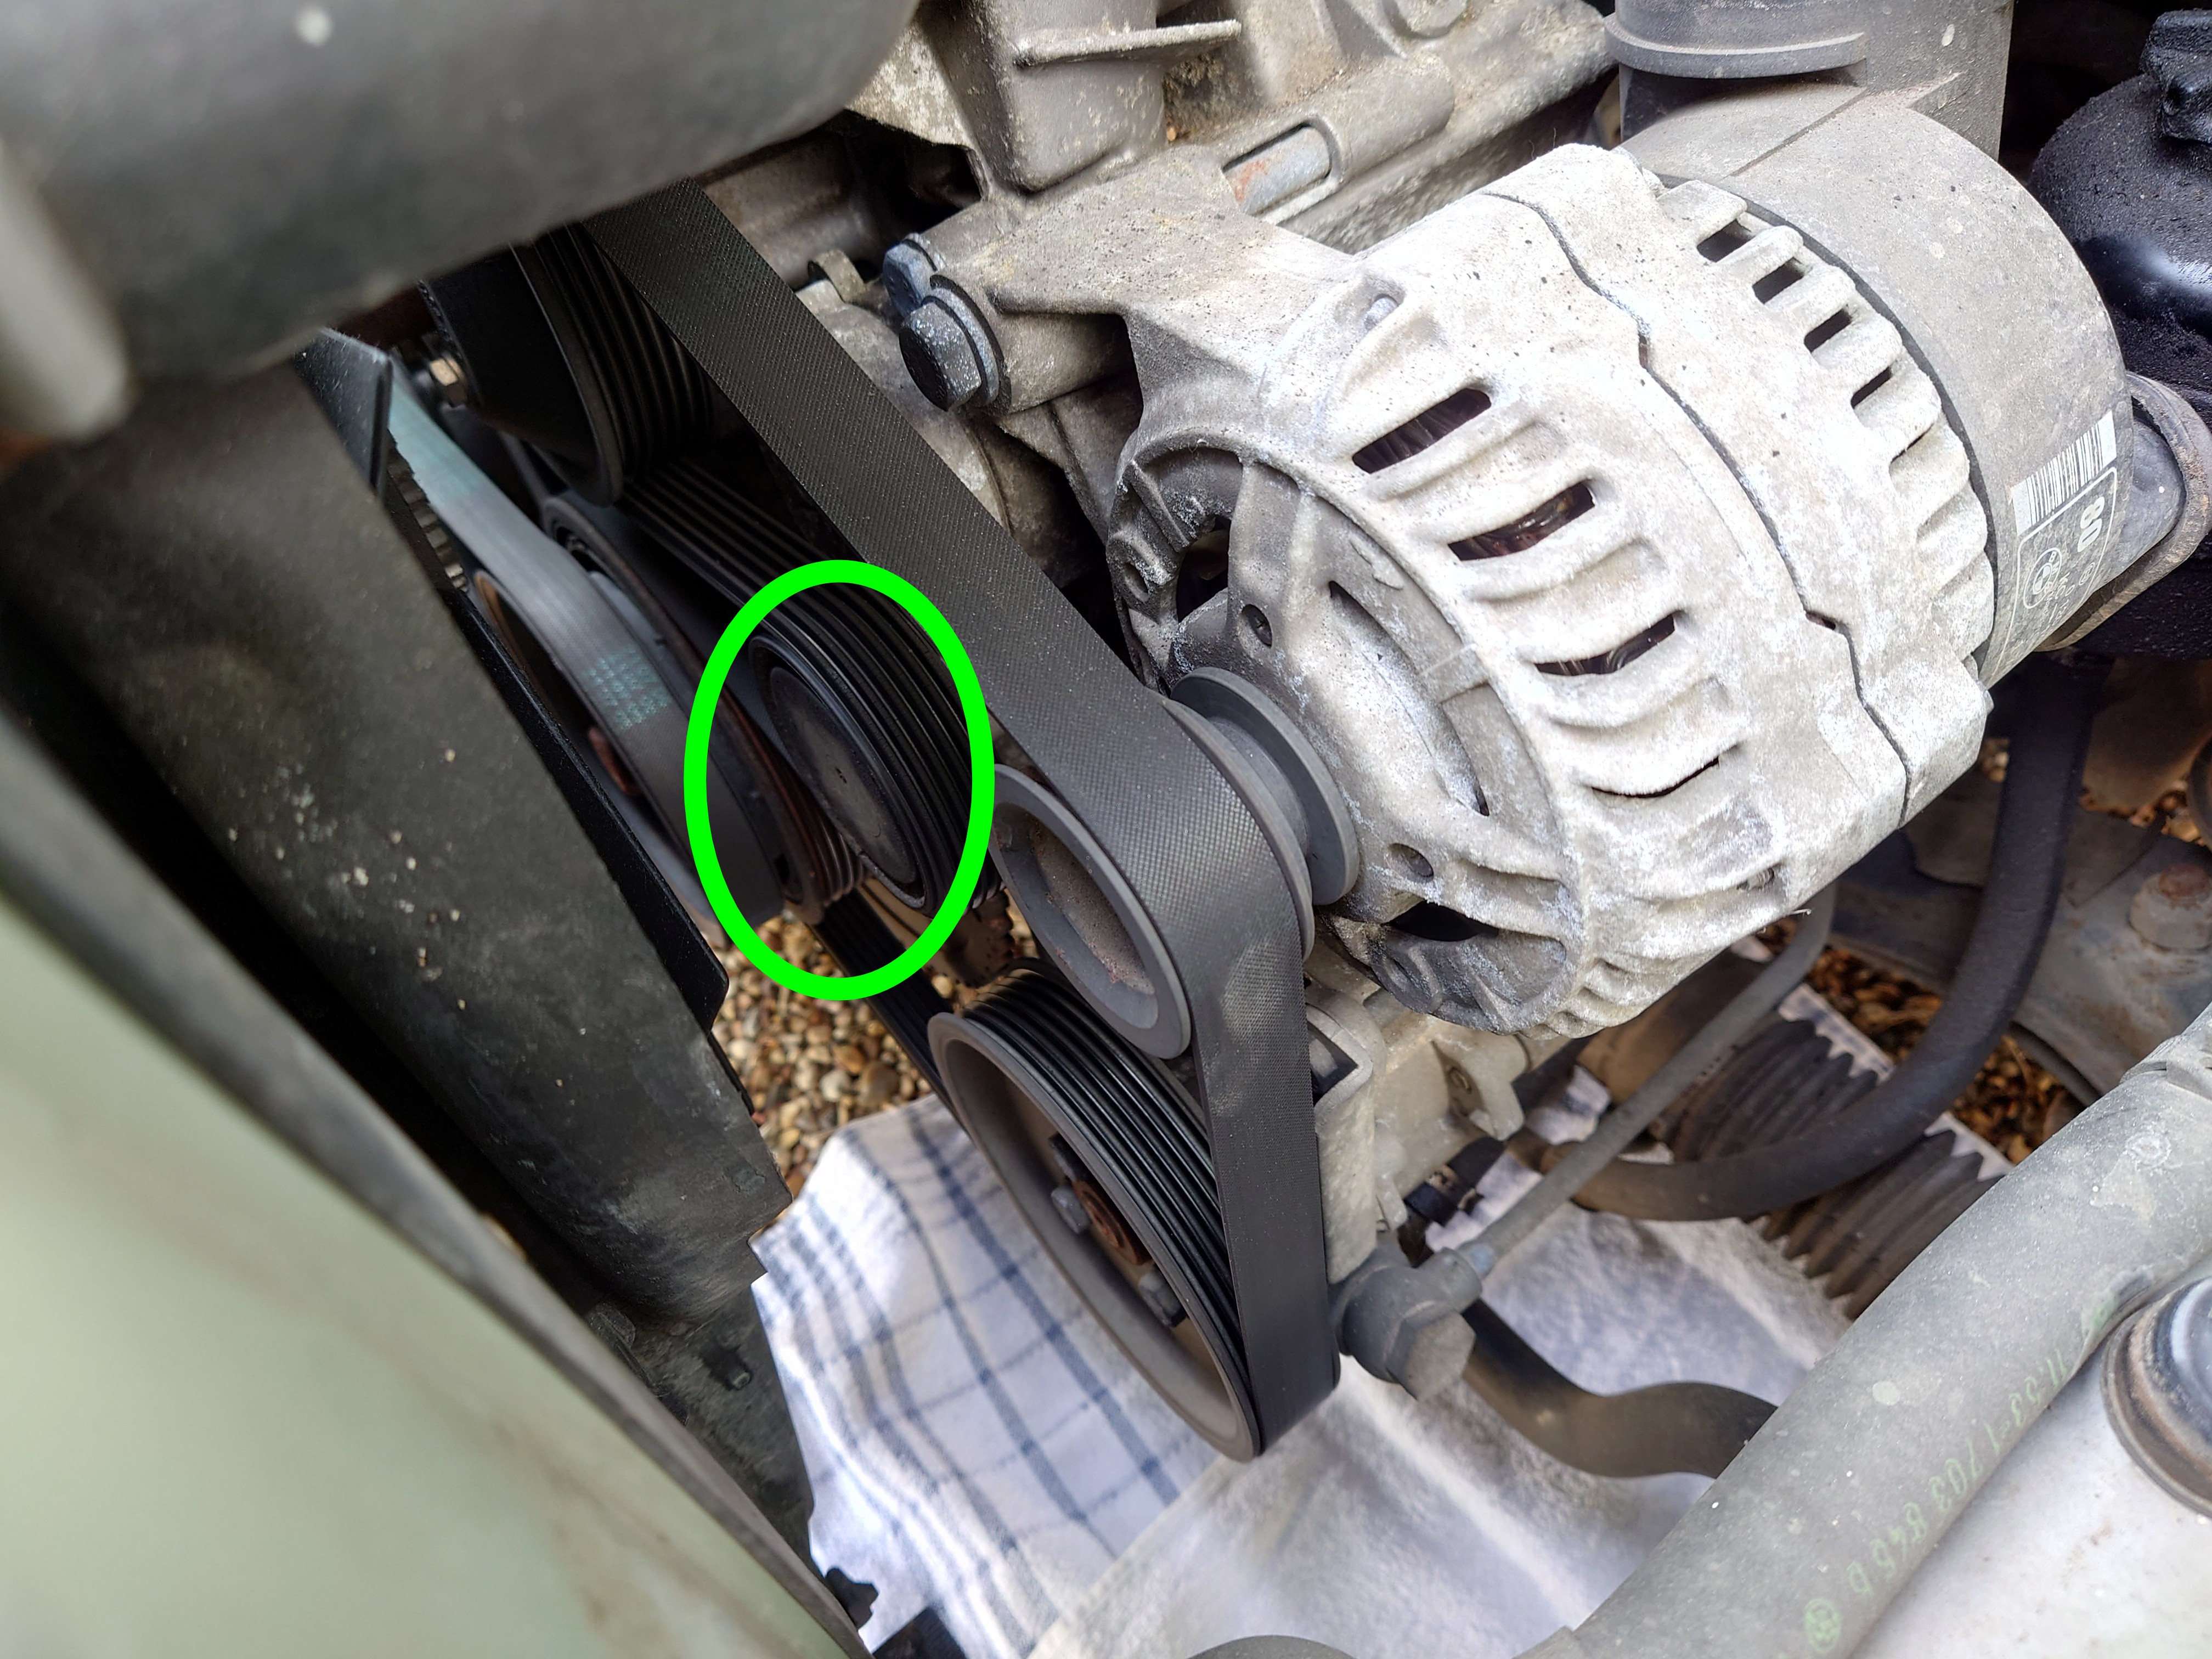
You can use a flathead screwdrive to remove it. I used a plastic trim removal tool to avoid damaging the pulley.
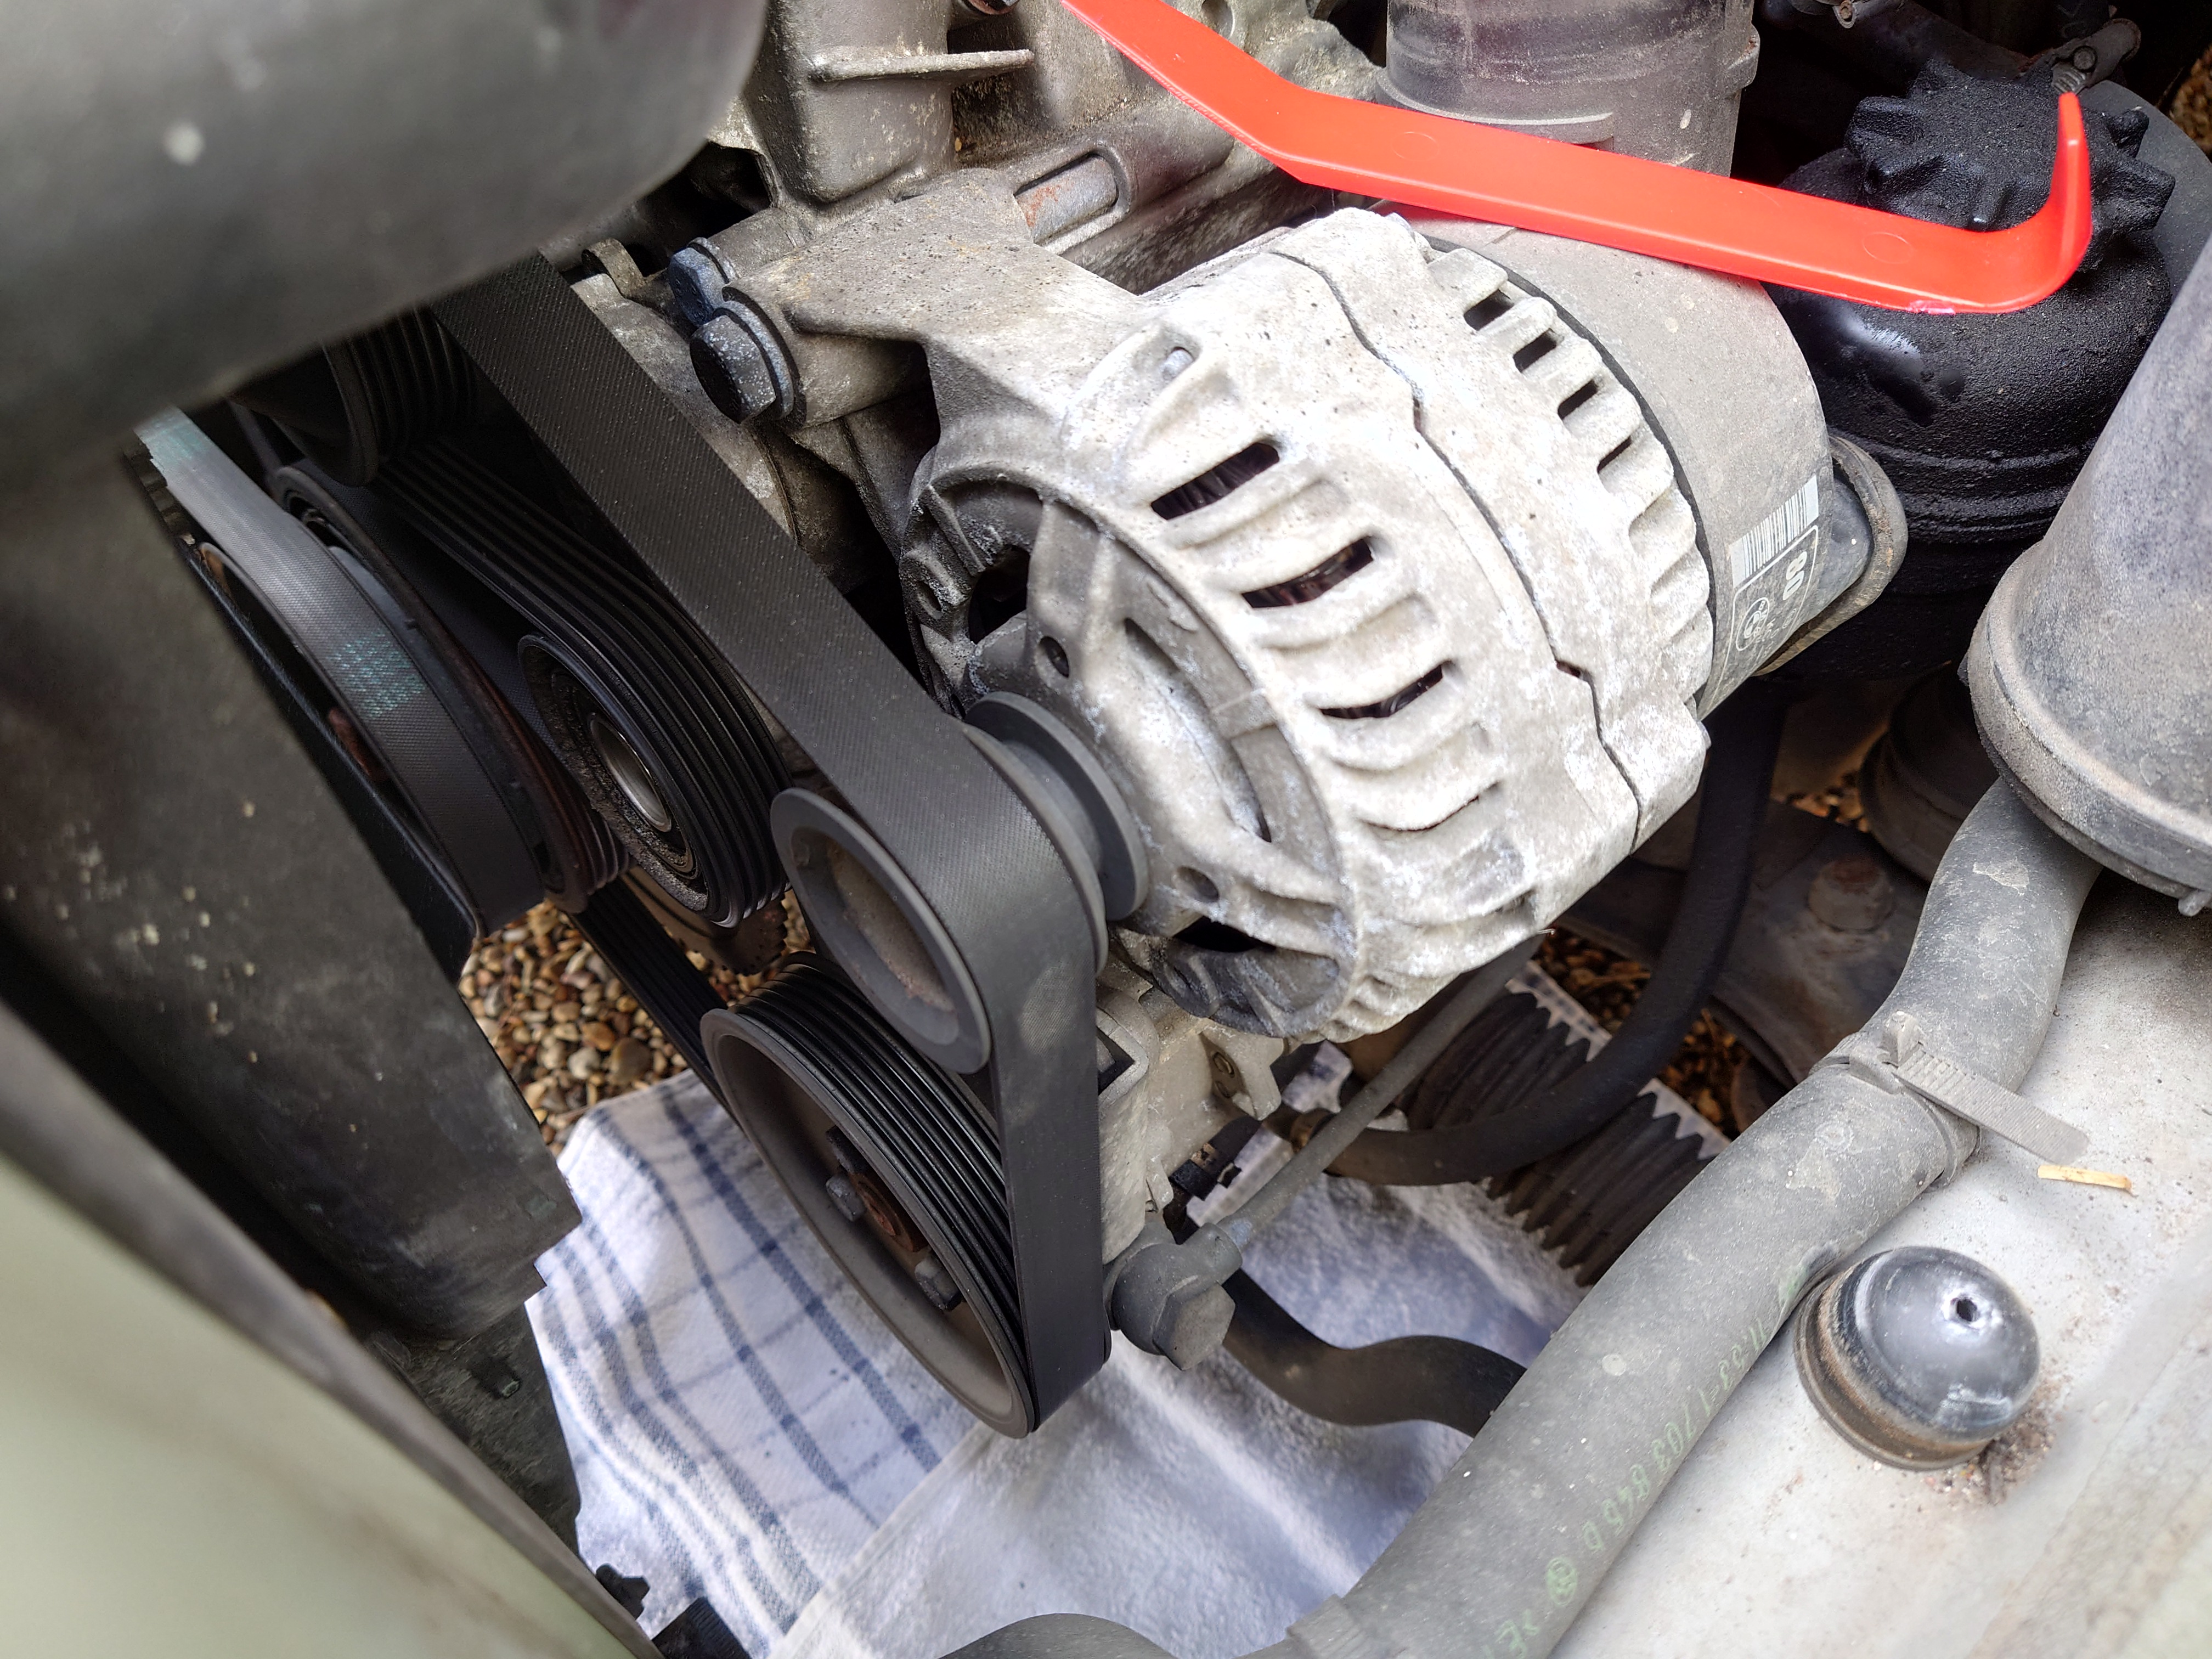
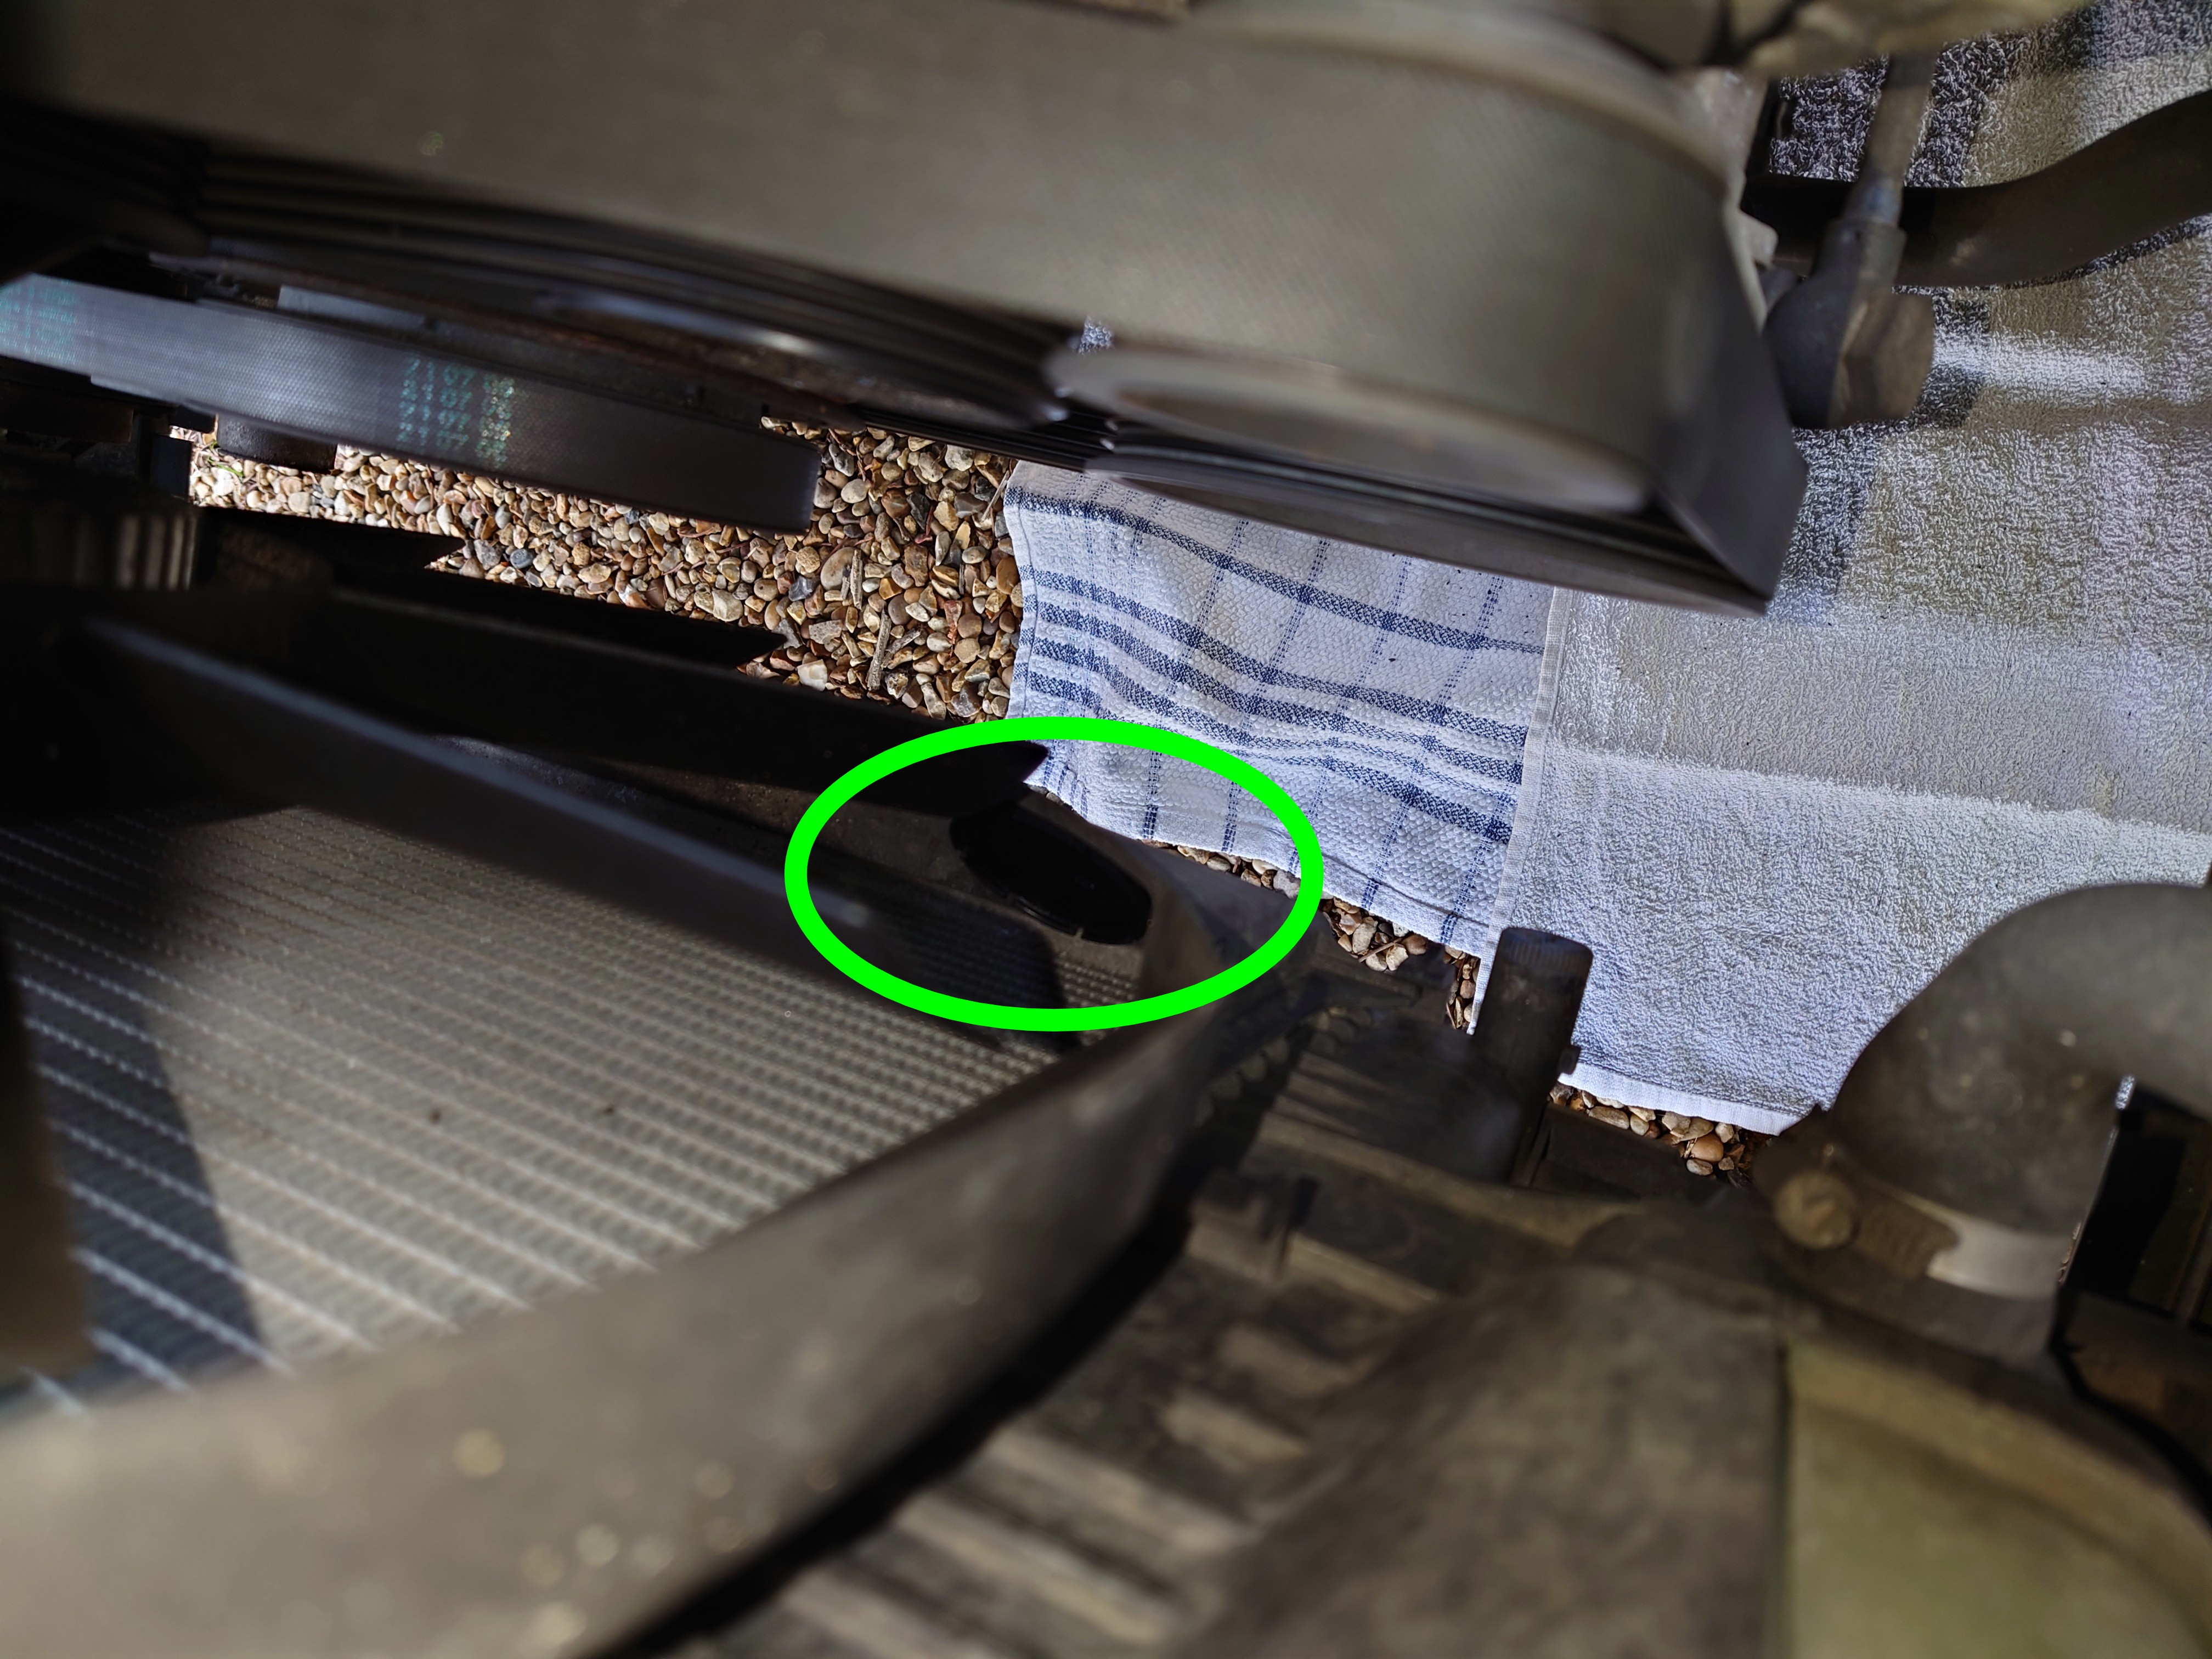
Make sure not to lose the cap! It protects the tensioner from the elements, and don't leave it inside the radiator fan shroud should it ping itself inside there. The radiator fans are quite fragile on E36s.
Now to loosen the belt, all you need to do is get a 16mm socket onto the tensioner, and lever it clockwise. It's sprung, so as soon as you stop pushing down, it'll tension right back up. While it's held there, the belt is loose. I can't rotate the tensioner and remove the belt with one hand, but you should get the gist from the video.
So instead of removing the belt, I just slipped it off, and left it like this. Circled in green we also have the front top bolt holding the alternator in place.
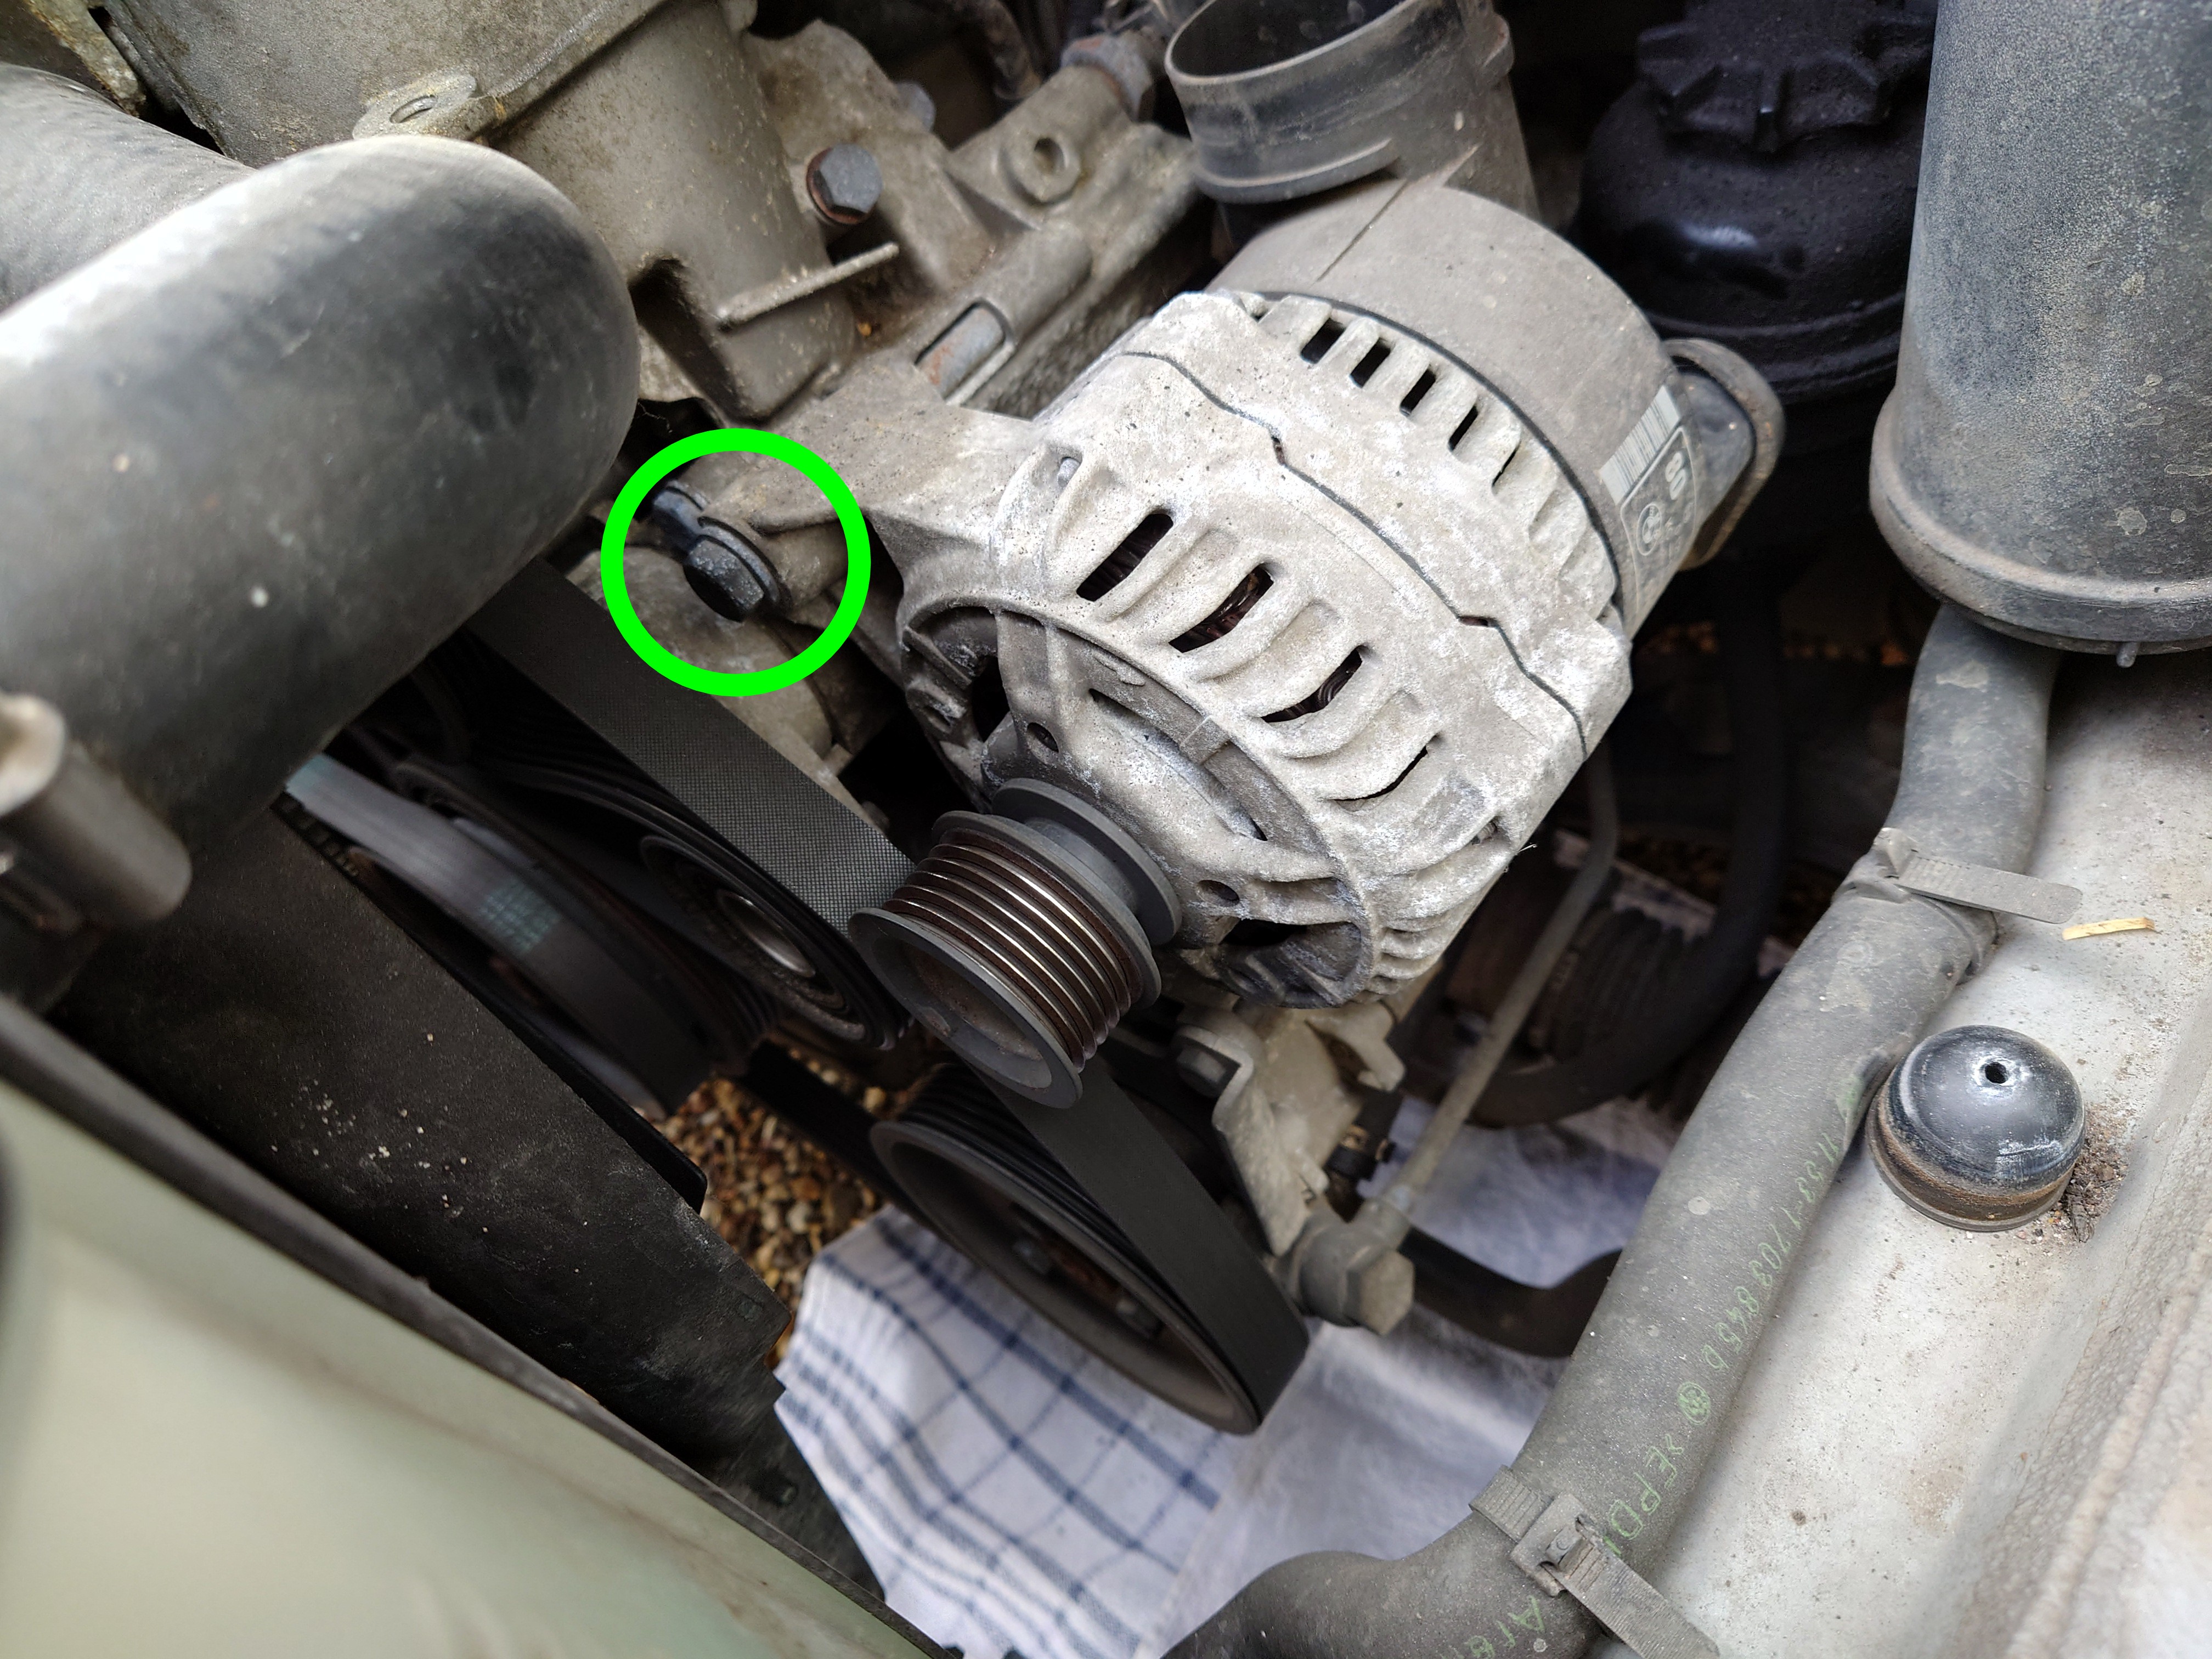
We can also just about see the bottom bolt. The serpentine belt is slightly in the way, but it's flexible, so it's okay.
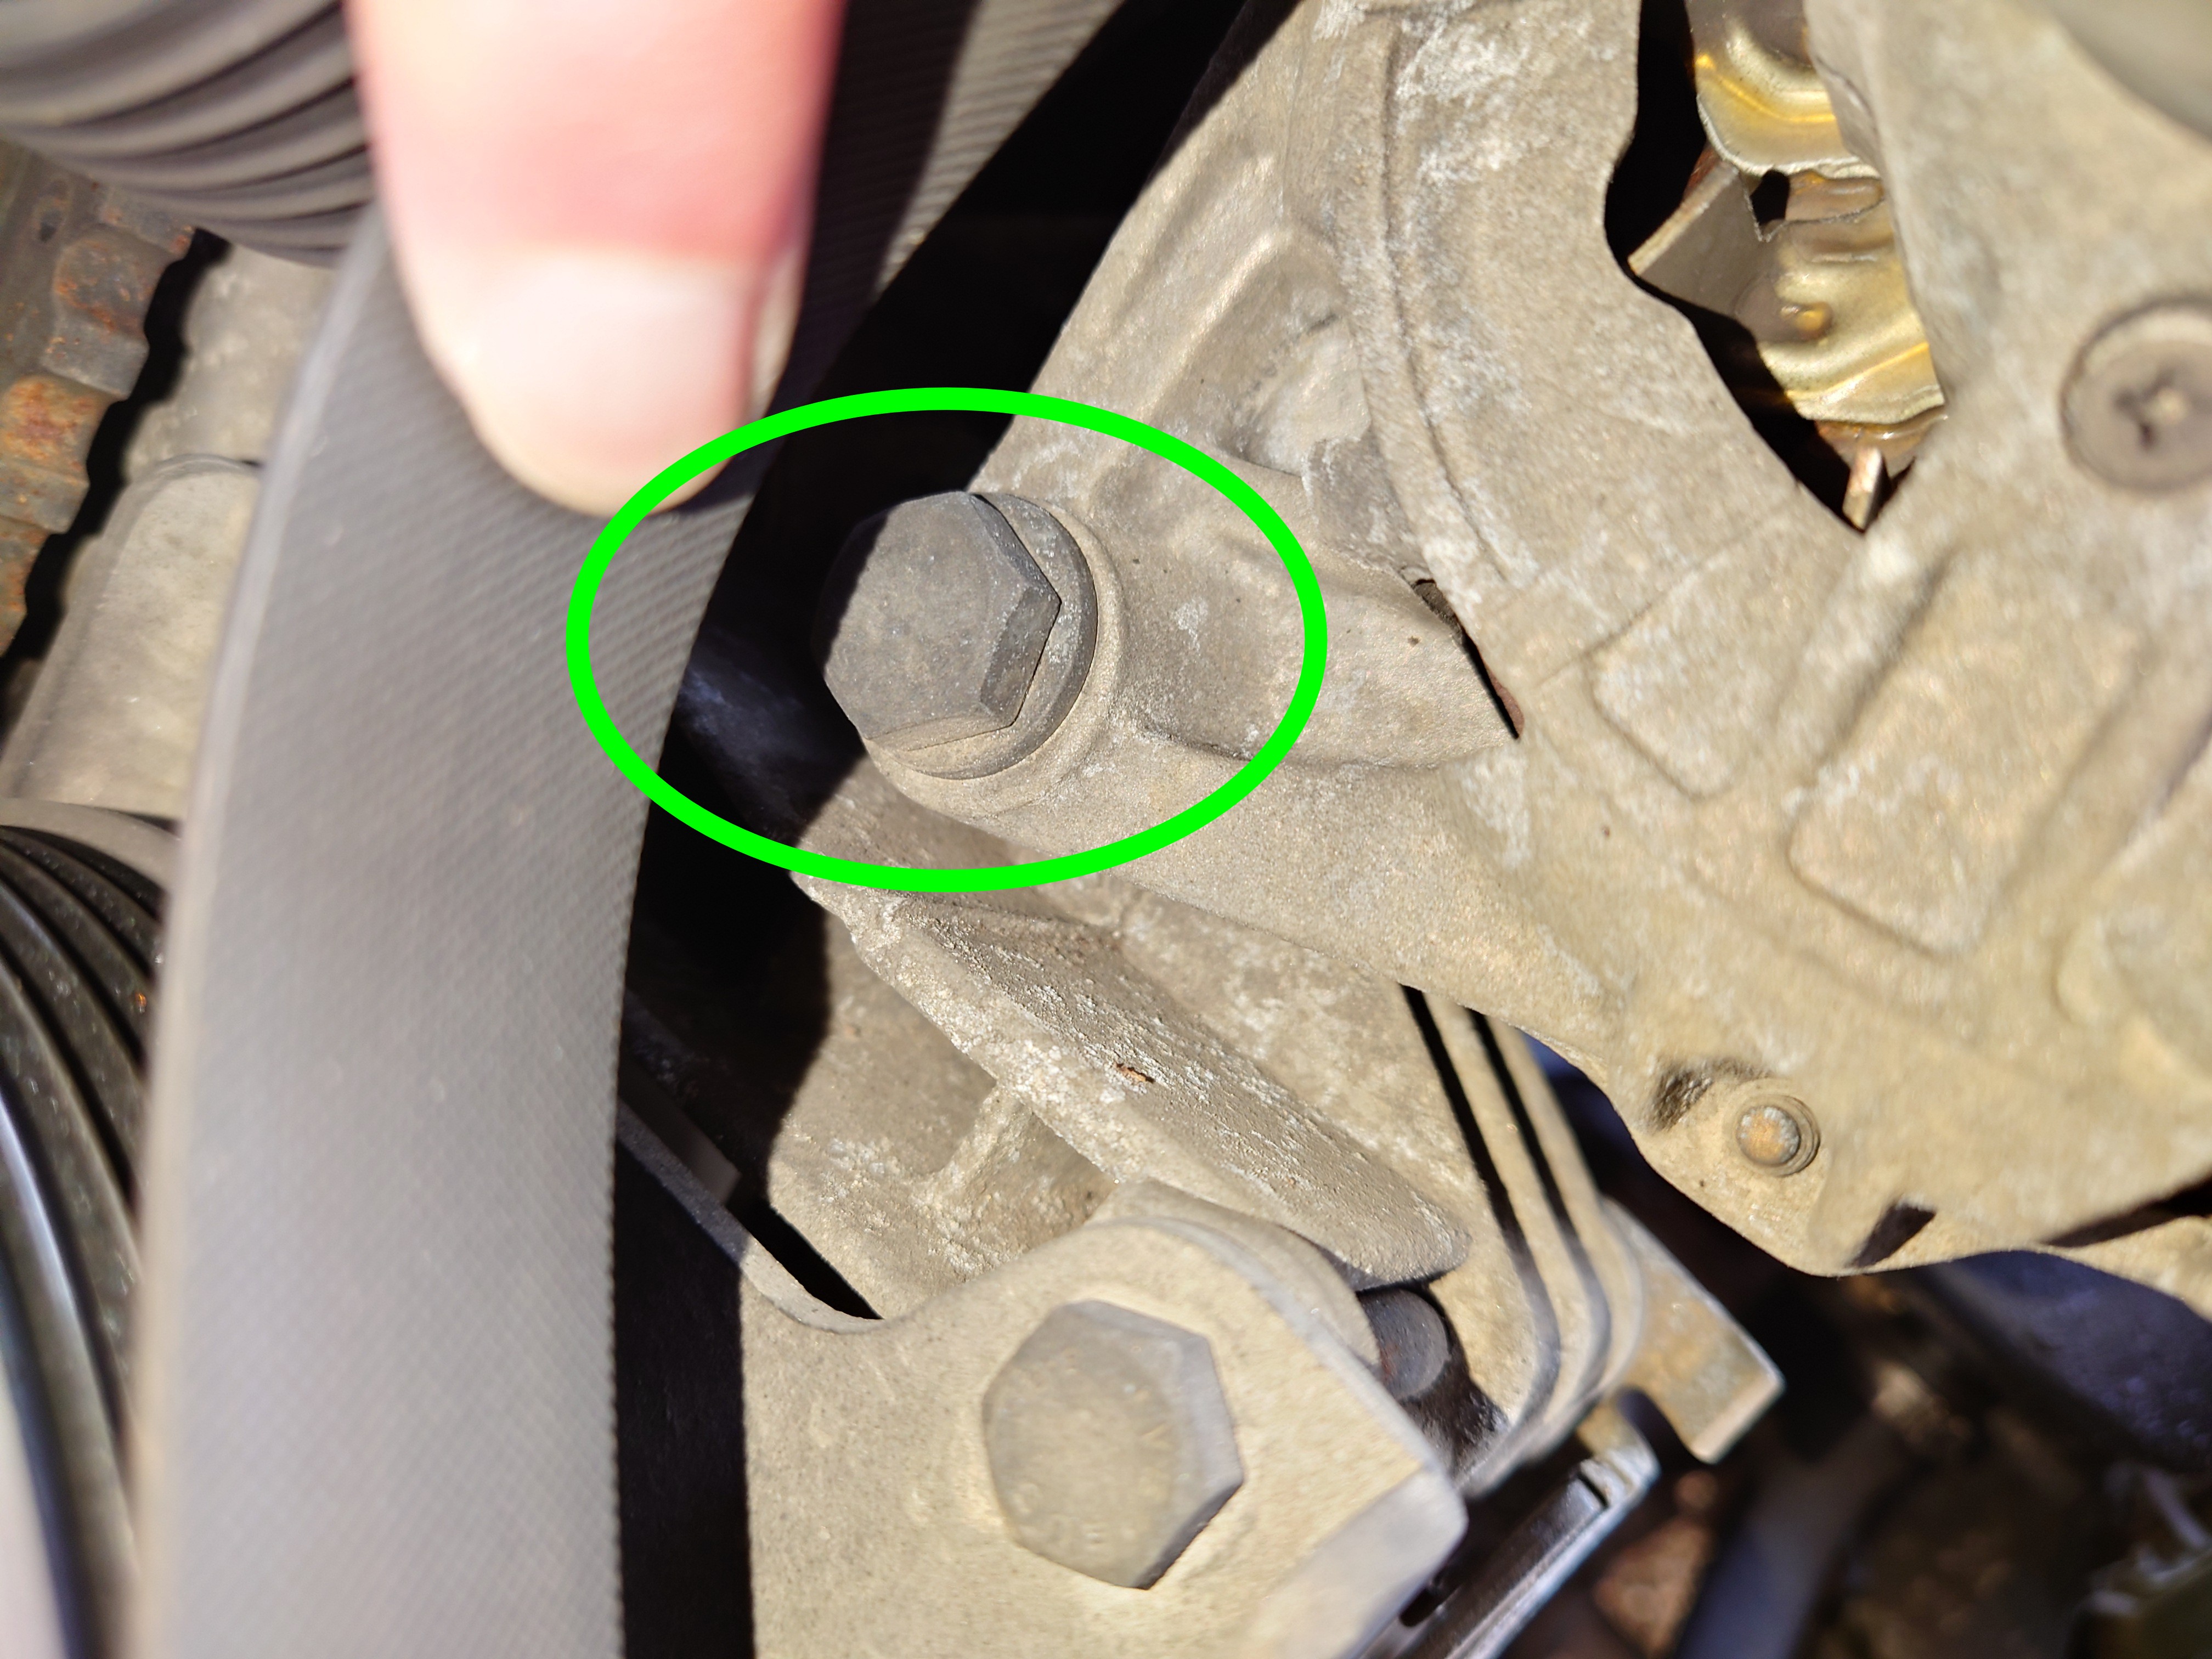
Both of the bolts are 16mm hex heads. You'll probably need an extension to reach the bottom one.
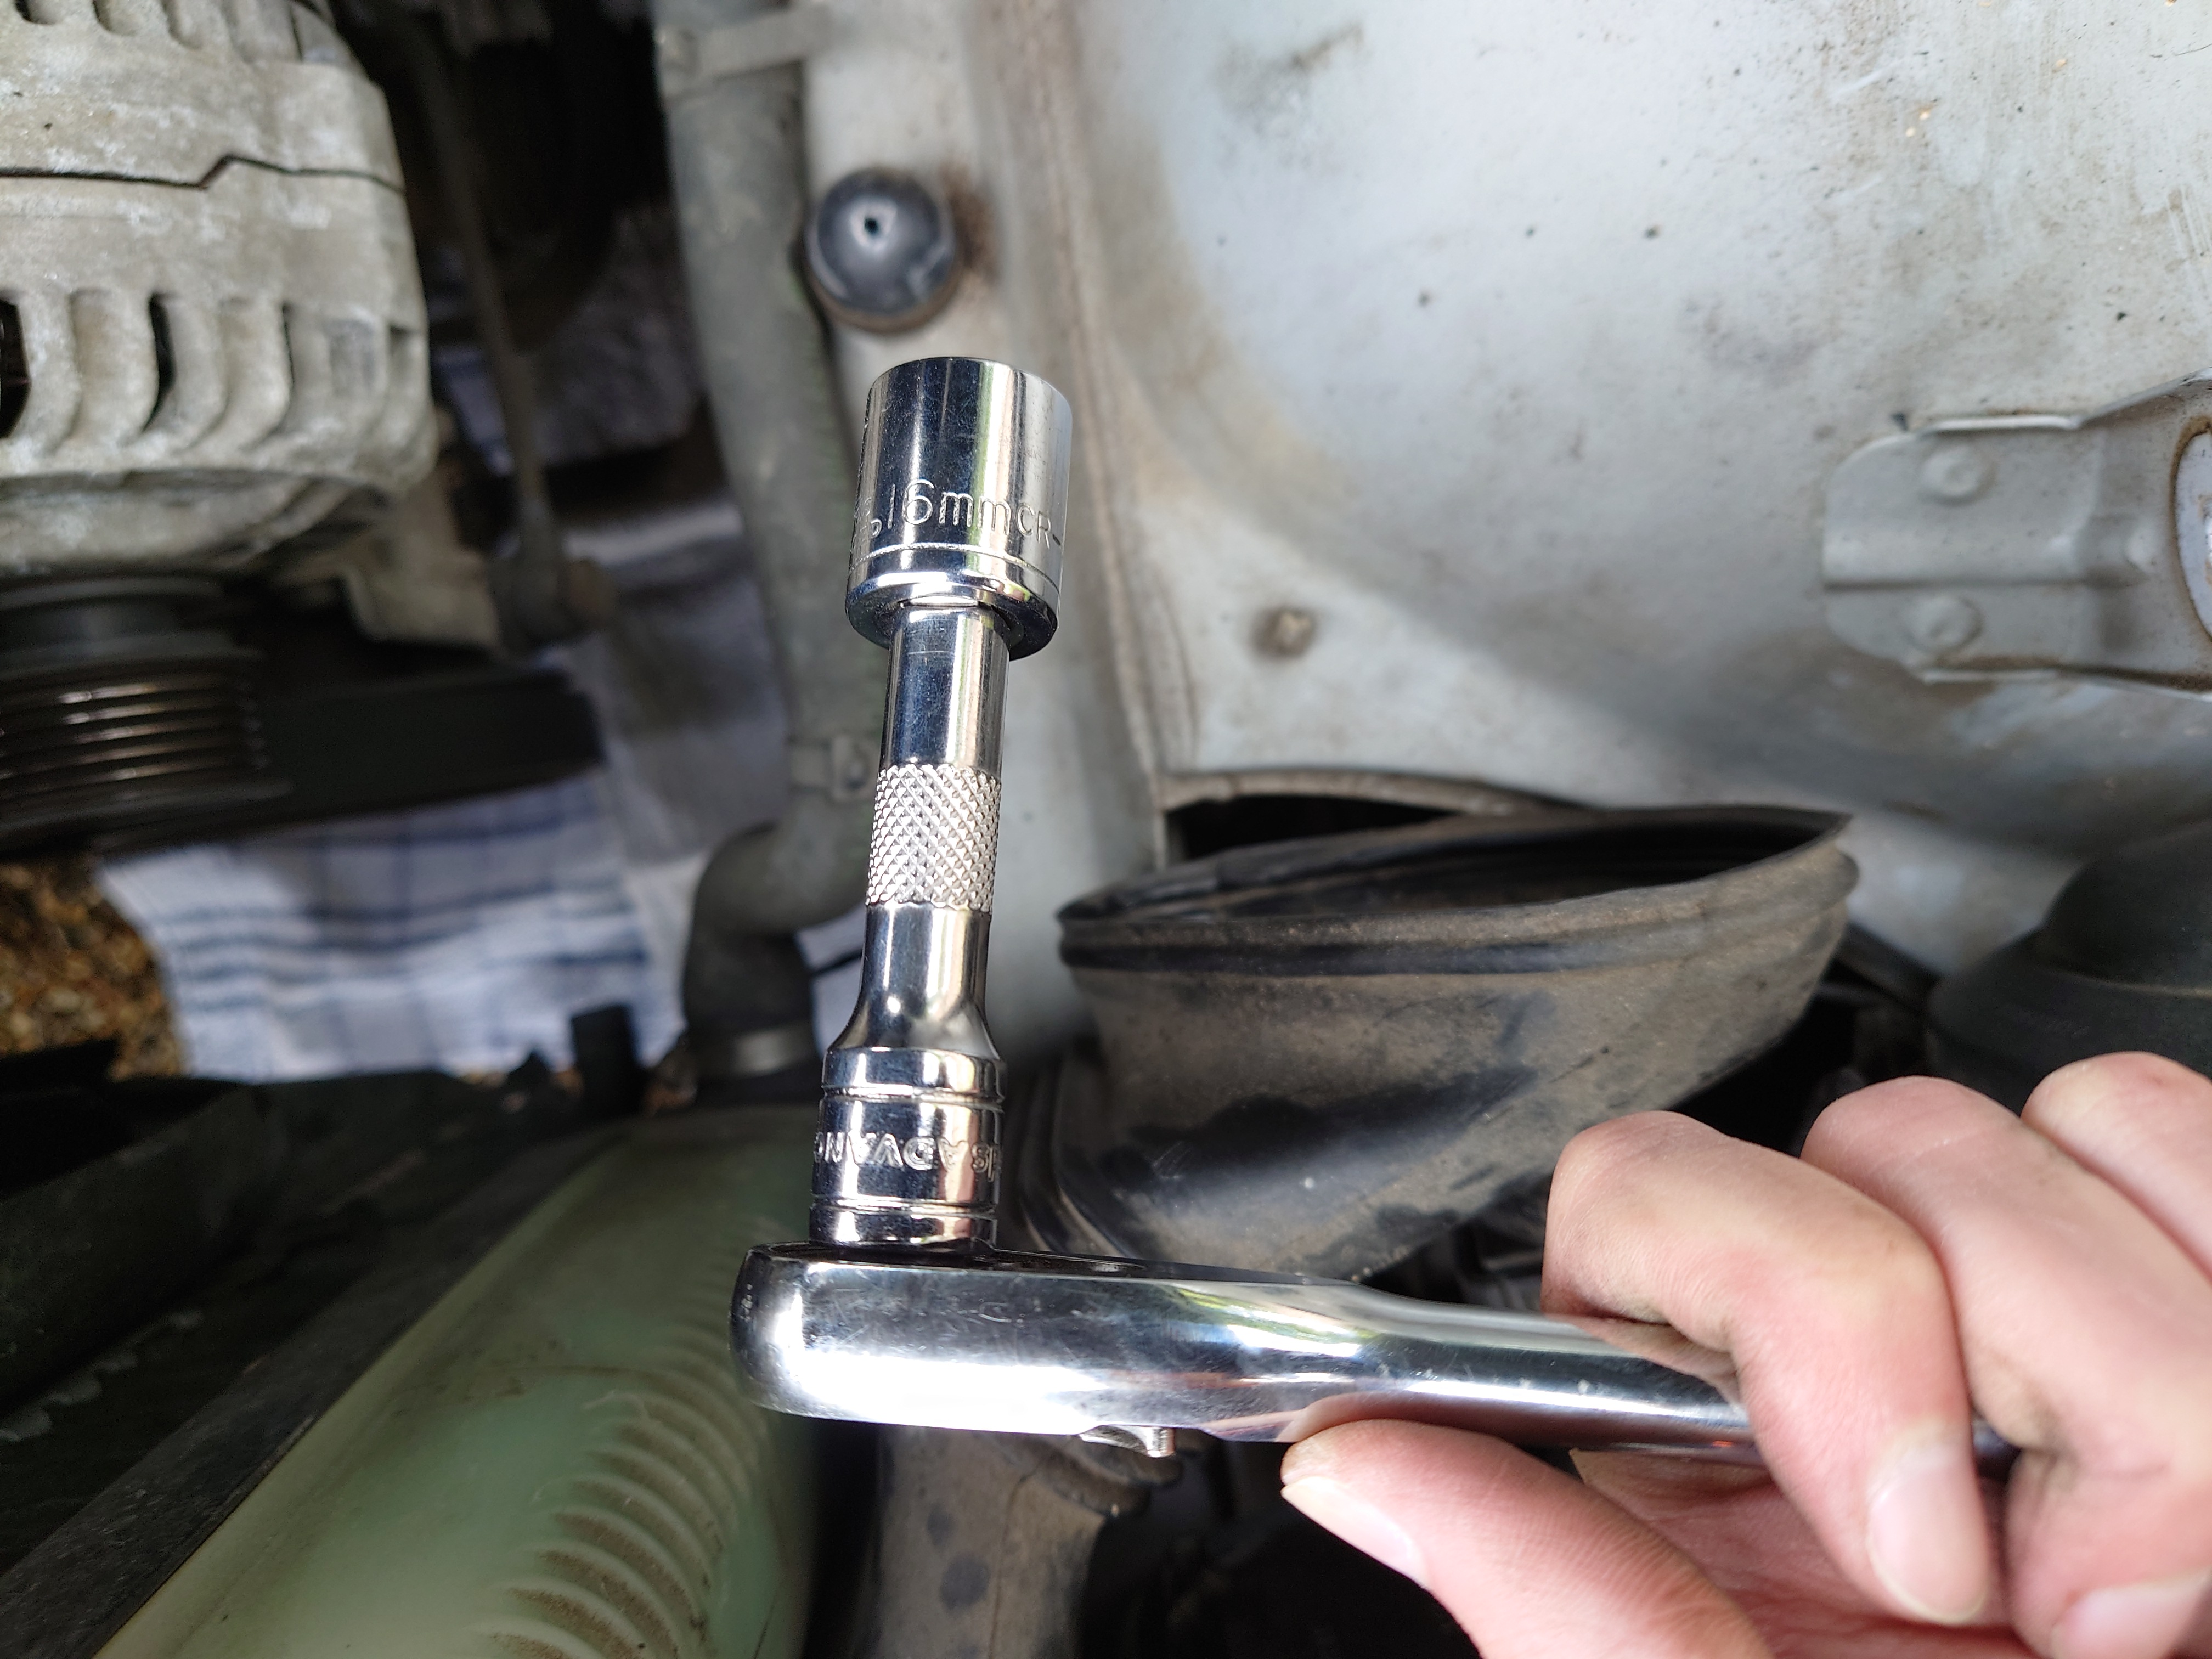
Now these bolts have been in there for quite a long time (26 years in my case), and they are long. It's probably a good idea to spray them with some penetrating fluid and letting it sit for a while, but I didn't. Fortunately, even though they screeched a bit, none of them snapped.
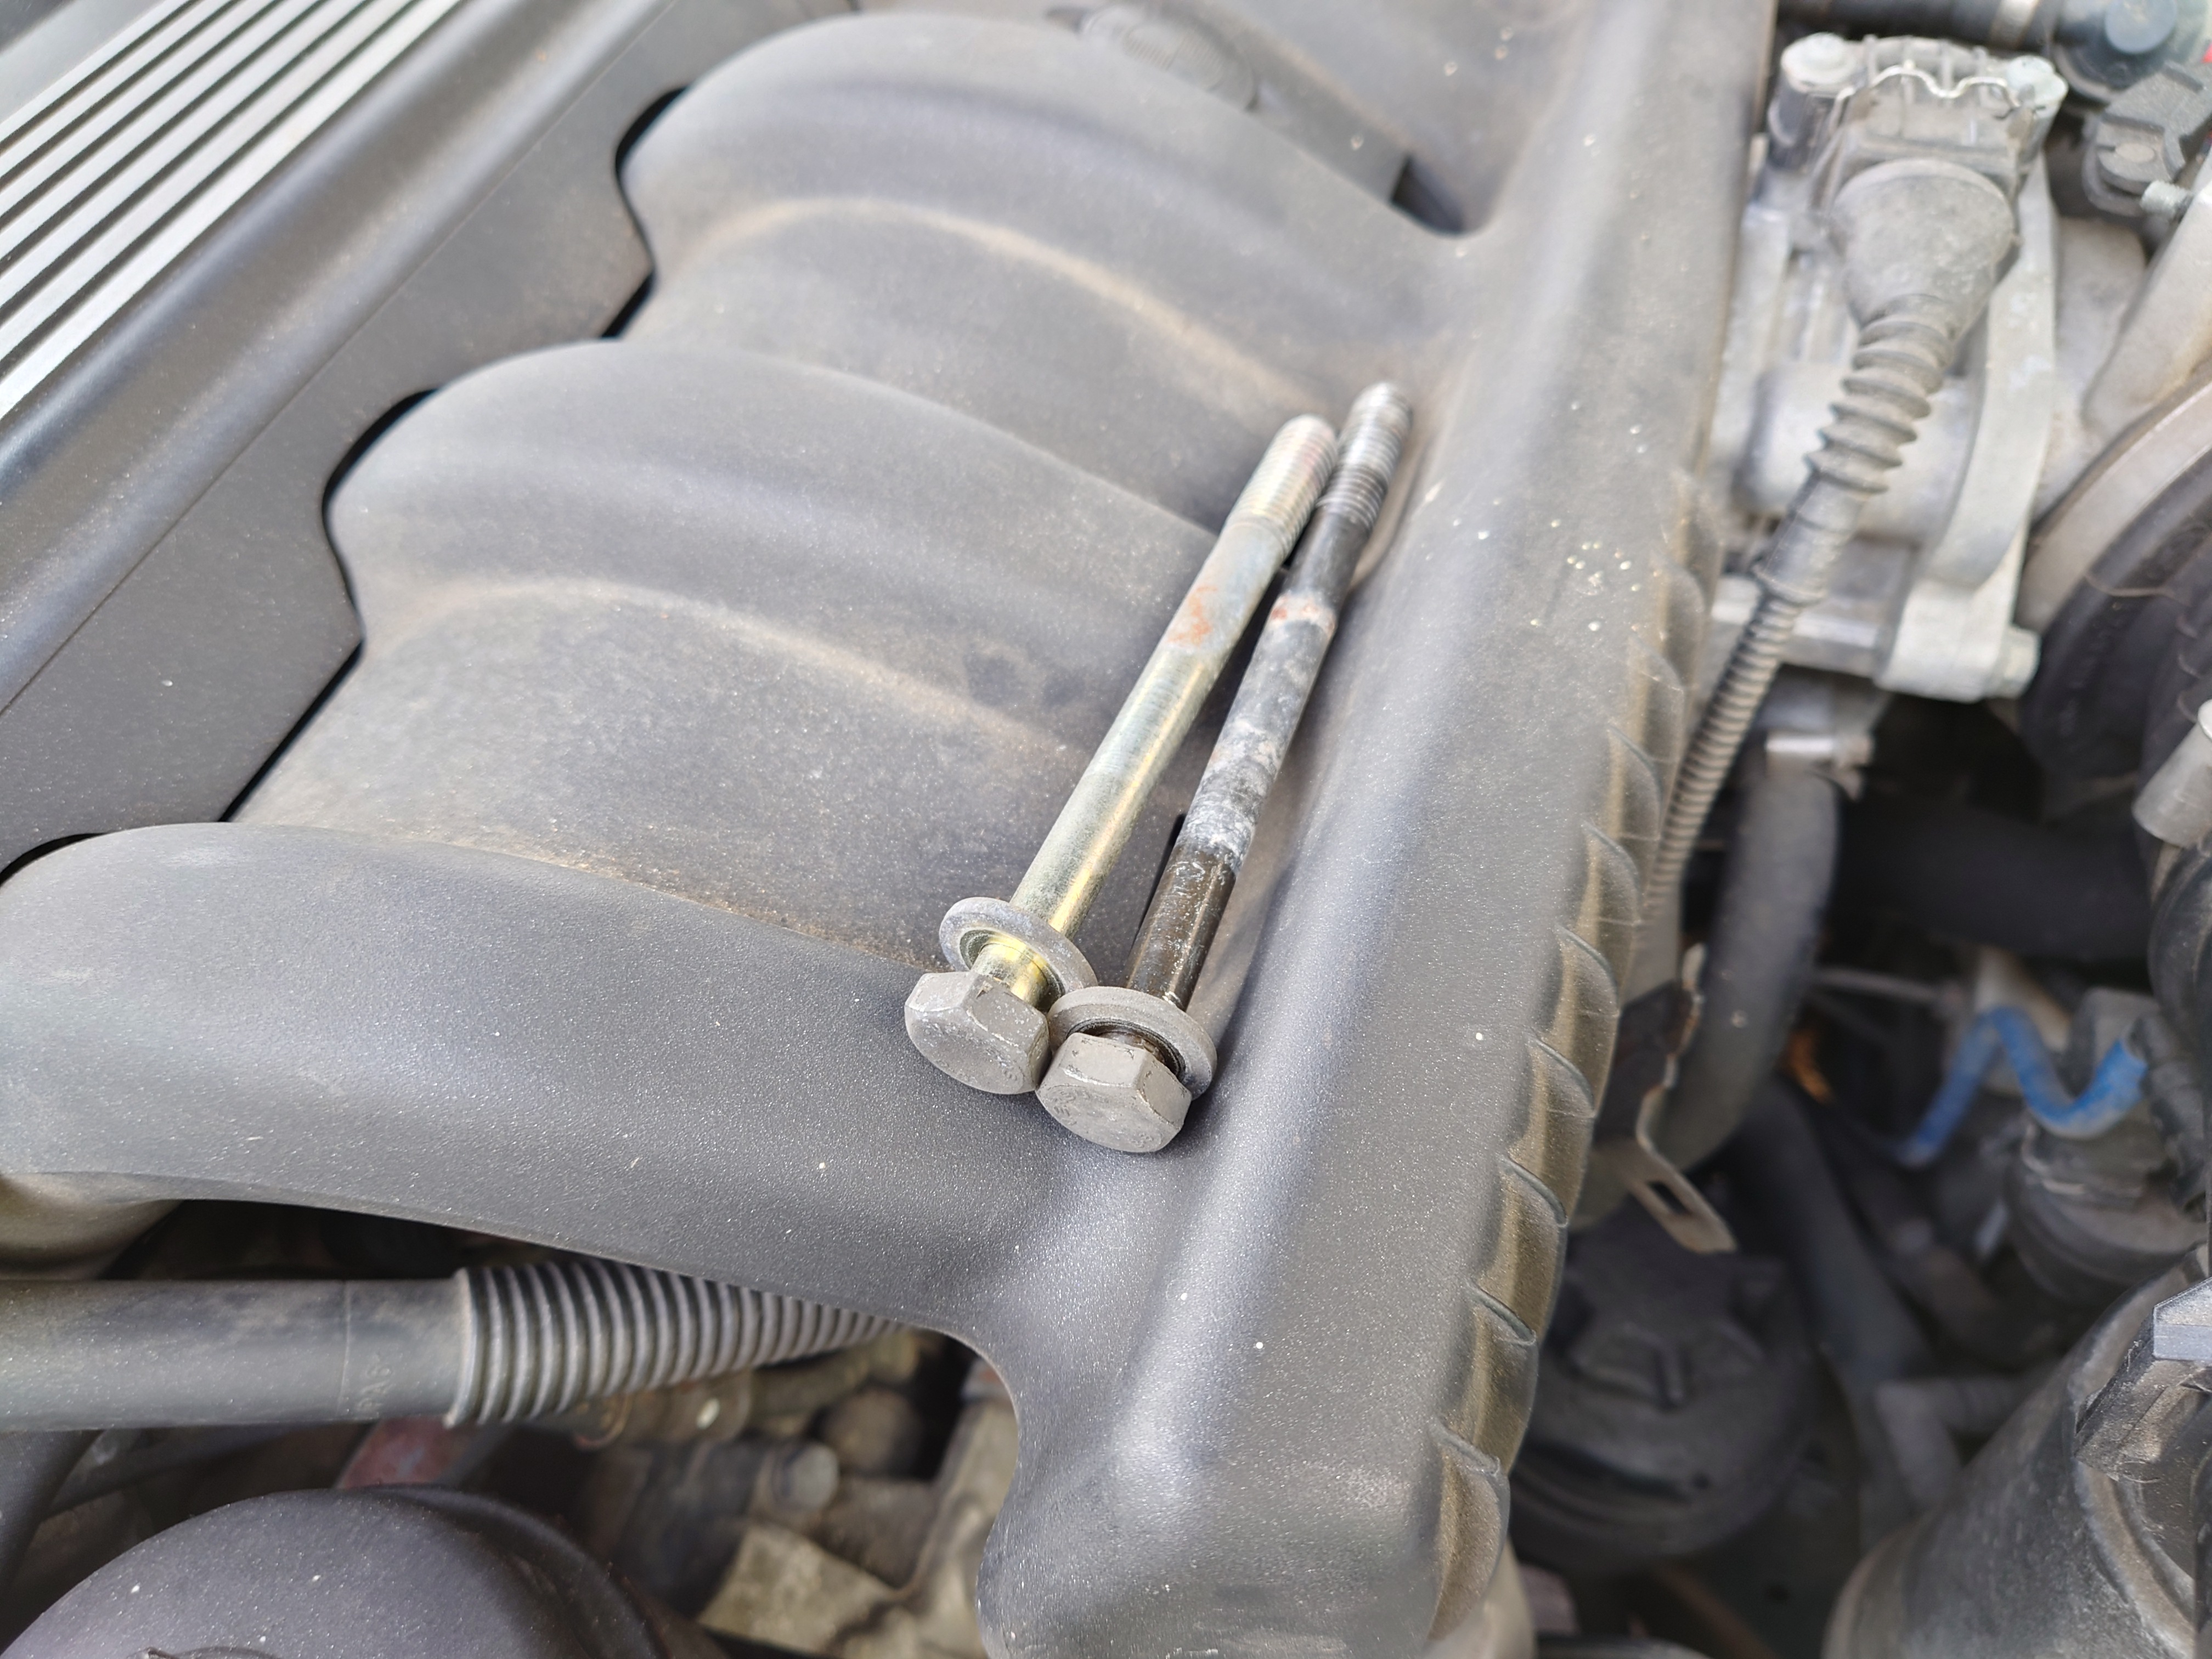
You can take the bolts out all the way. The alternator isn't going anywhere. The shorter bolt is the top one, and the longer the bottom one. They are plain bolts, so they're only threaded at the end. It wouldn't matter if they're fully threaded, as the tapped holes are only at the back of the mounting system. It would make them more difficult to insert/remove though.
As far as I can tell (I don't have a set of calipers on me), the shorter one is an M10x110 mm, and the longer one is M10x125 mm. The washers are 3 mm thick, and have an outer diameter of around 22 mm. Both bolts are 8.8 high tensile steel.
Now you should be able to wiggle the alternator free, by essentially rotating it around the bottom mounting points until it comes loose. Mine wasn't having any of that, so I resorted to levering it out with some flat spanners.
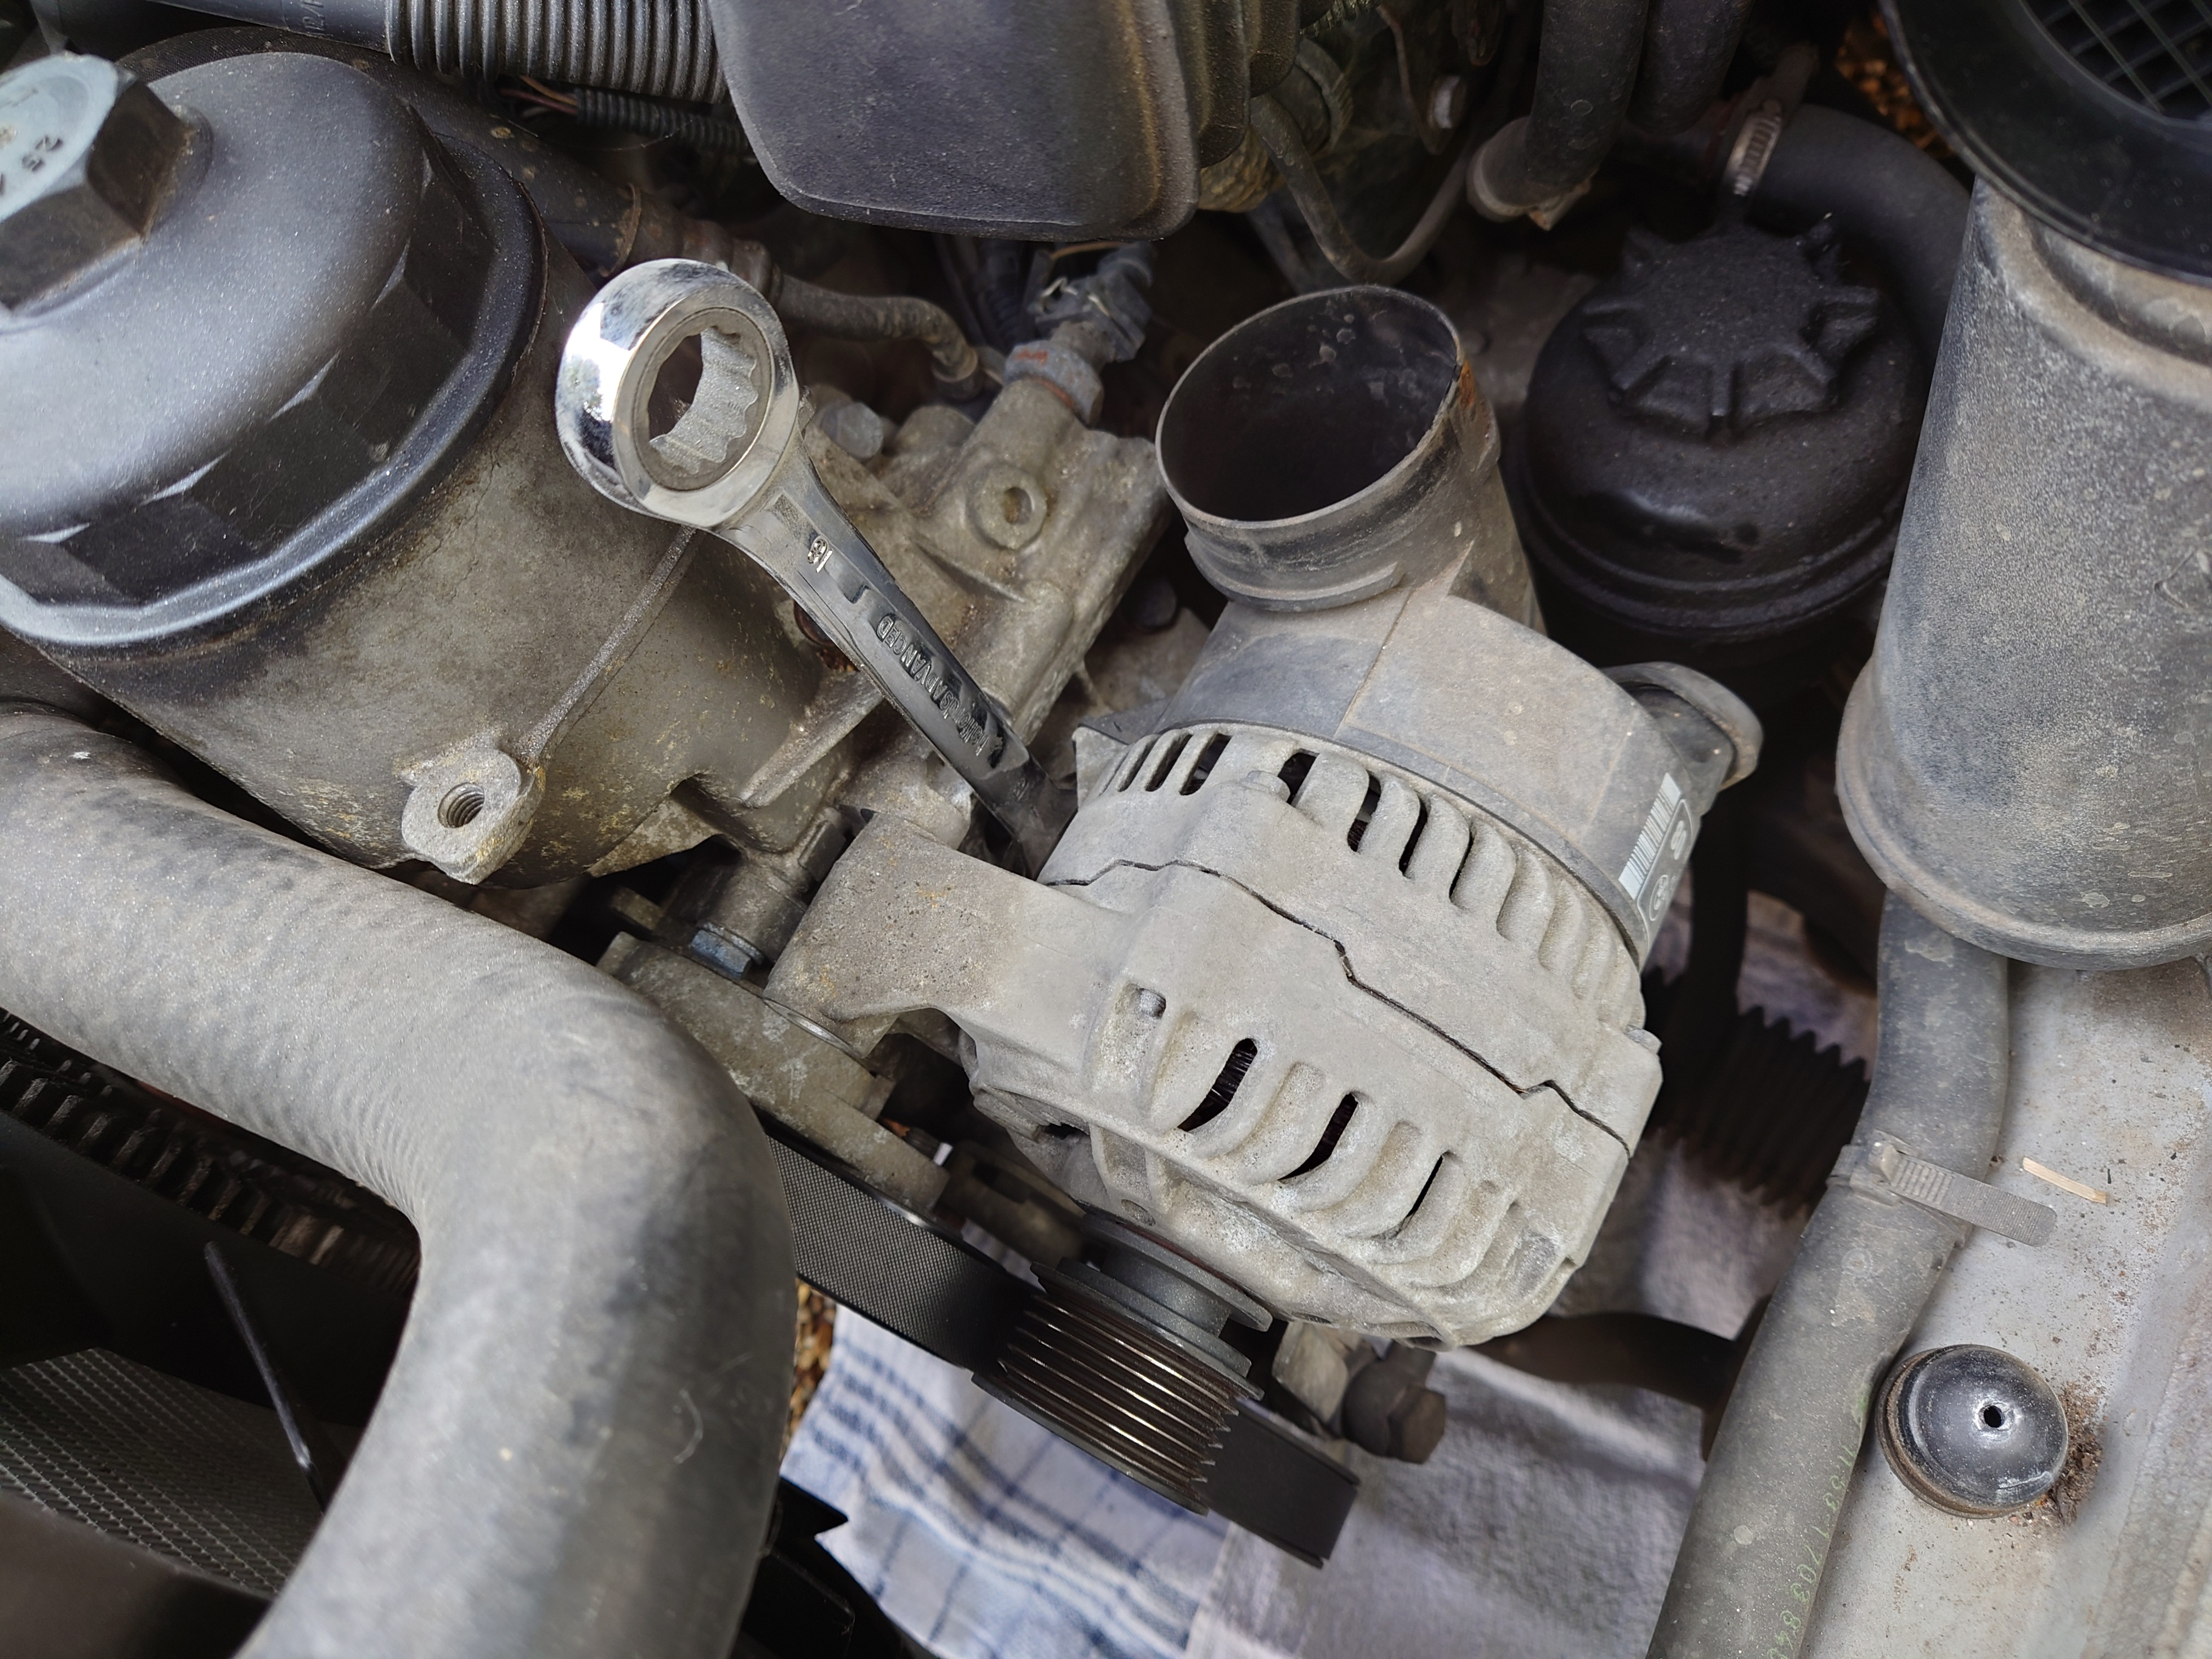
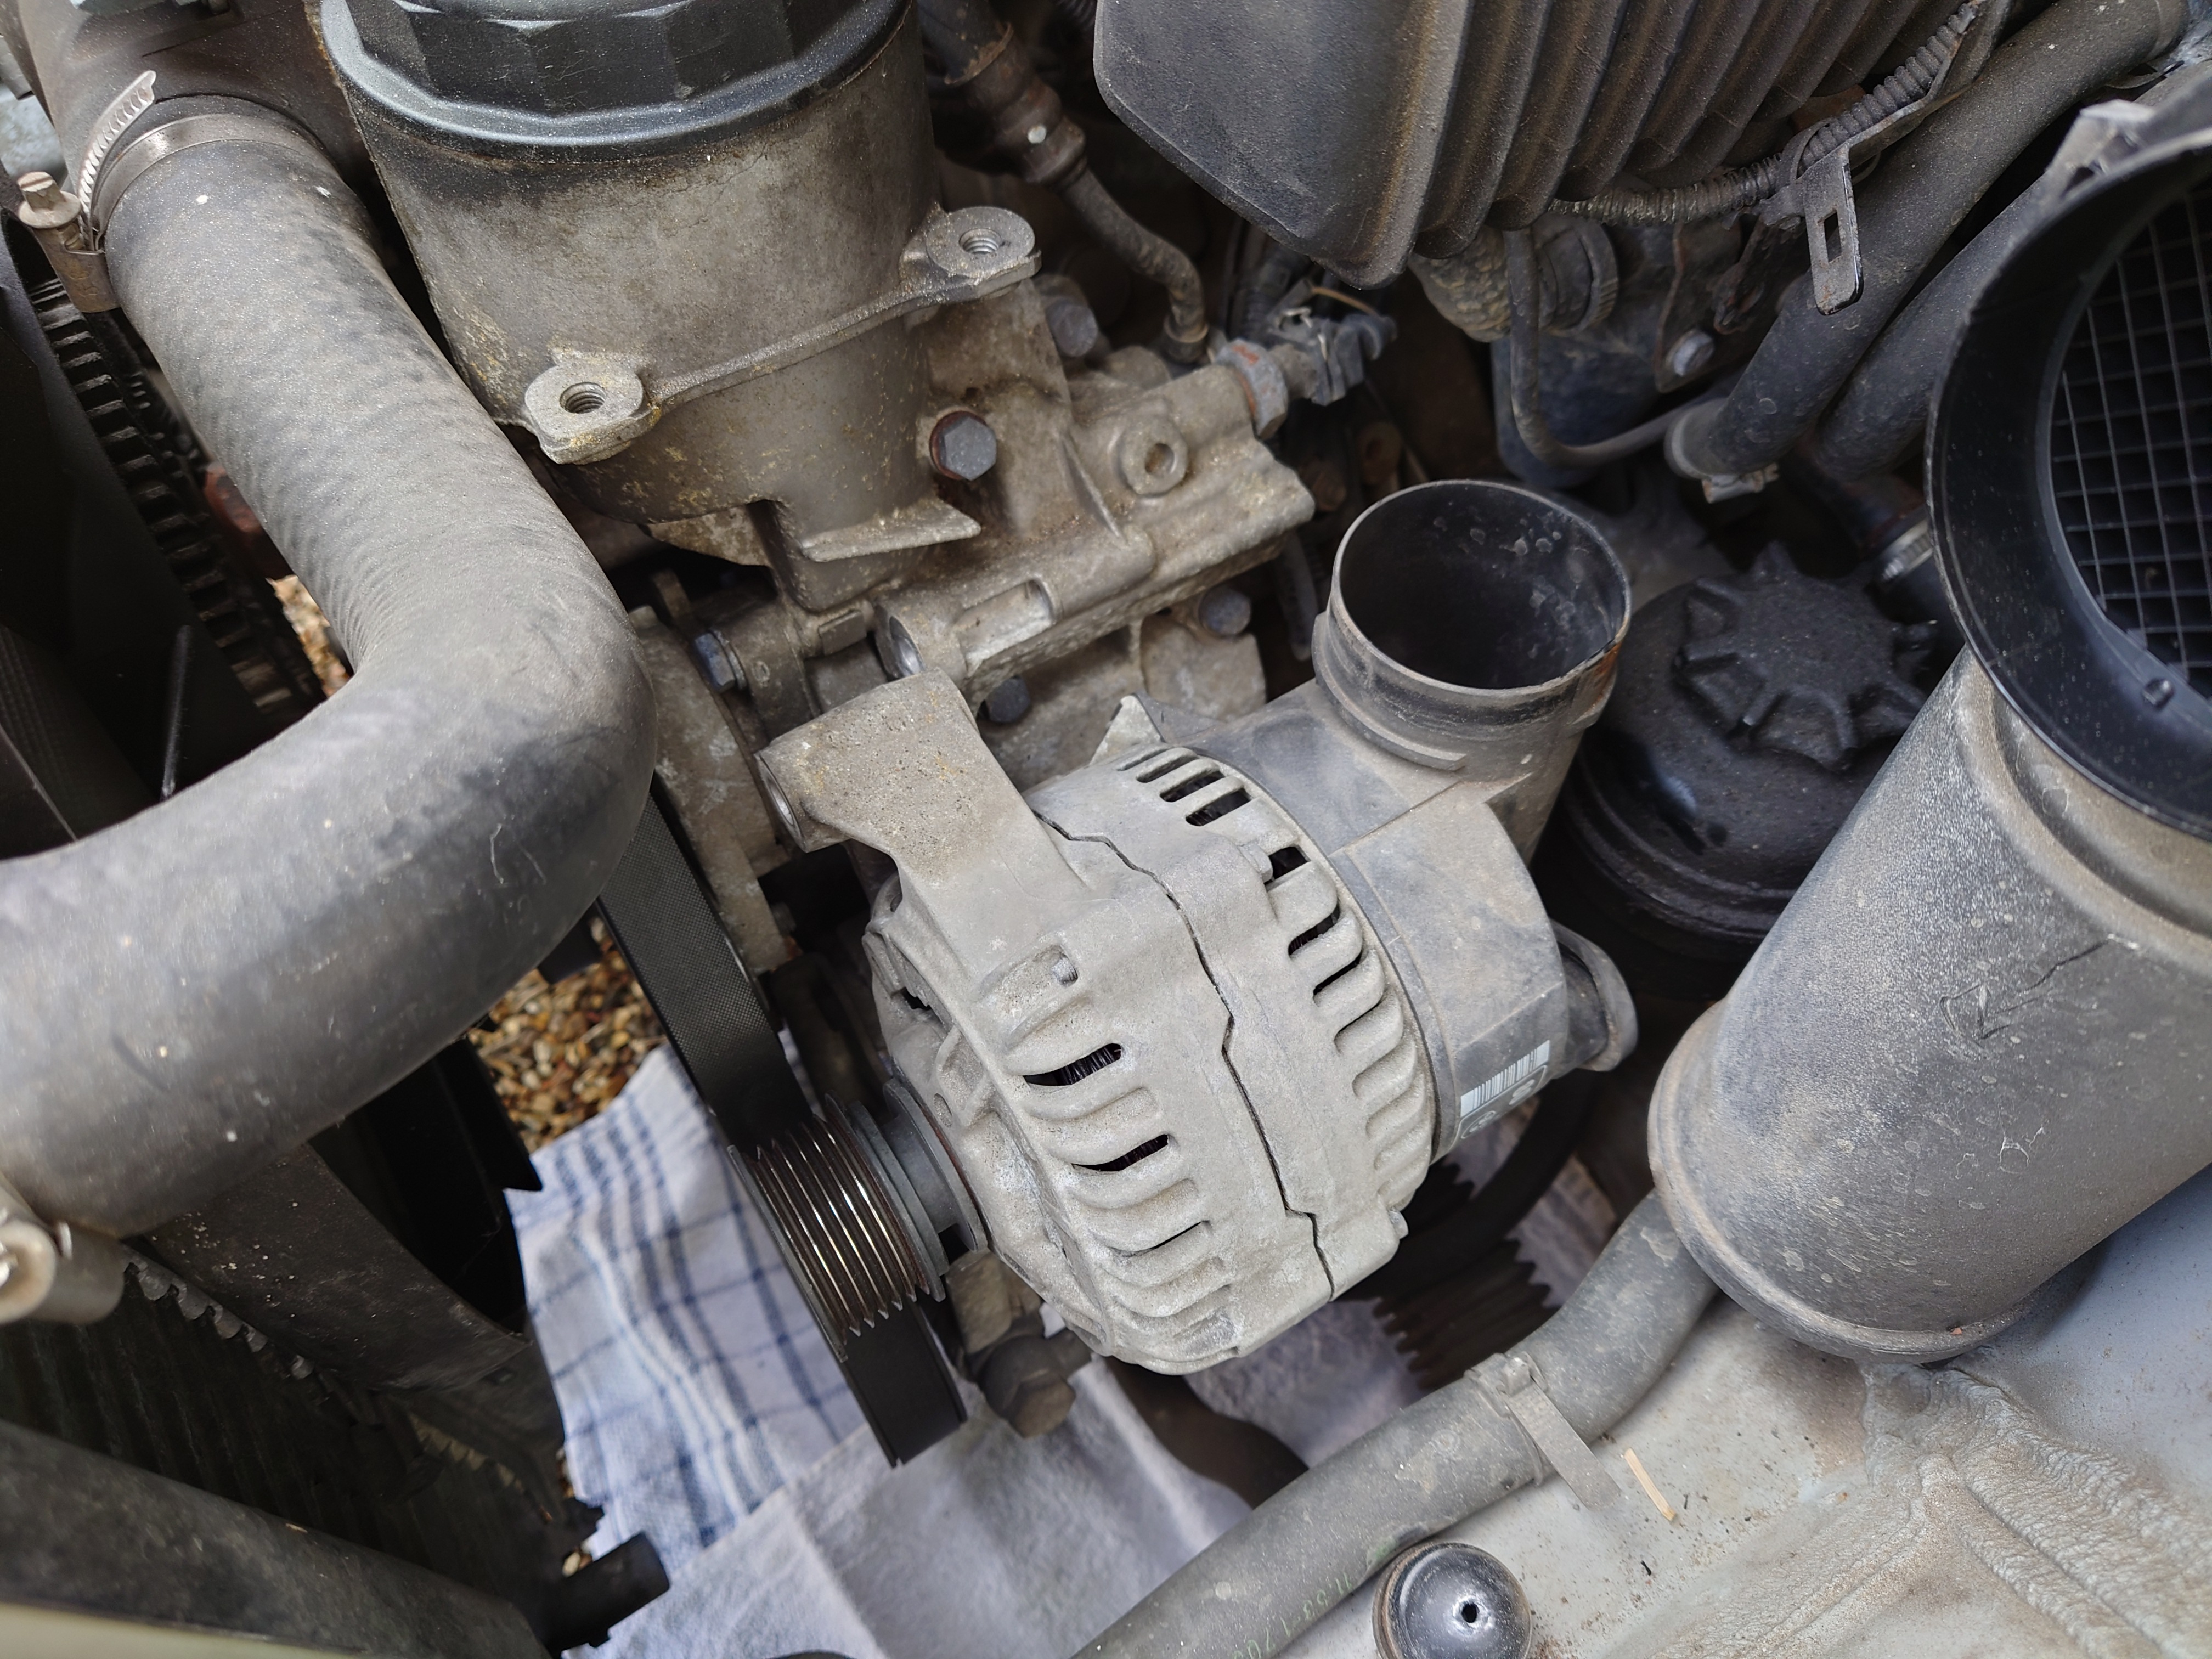
Once it finally comes out, you can tilt it forward, and you should be able to rest it. This will reveal the two cables feeding the elecrical system and battery going into the the shrouded bit on the back of the alternator. It also has a rubber weather seal on it that you can pull up to reveal the contacts.
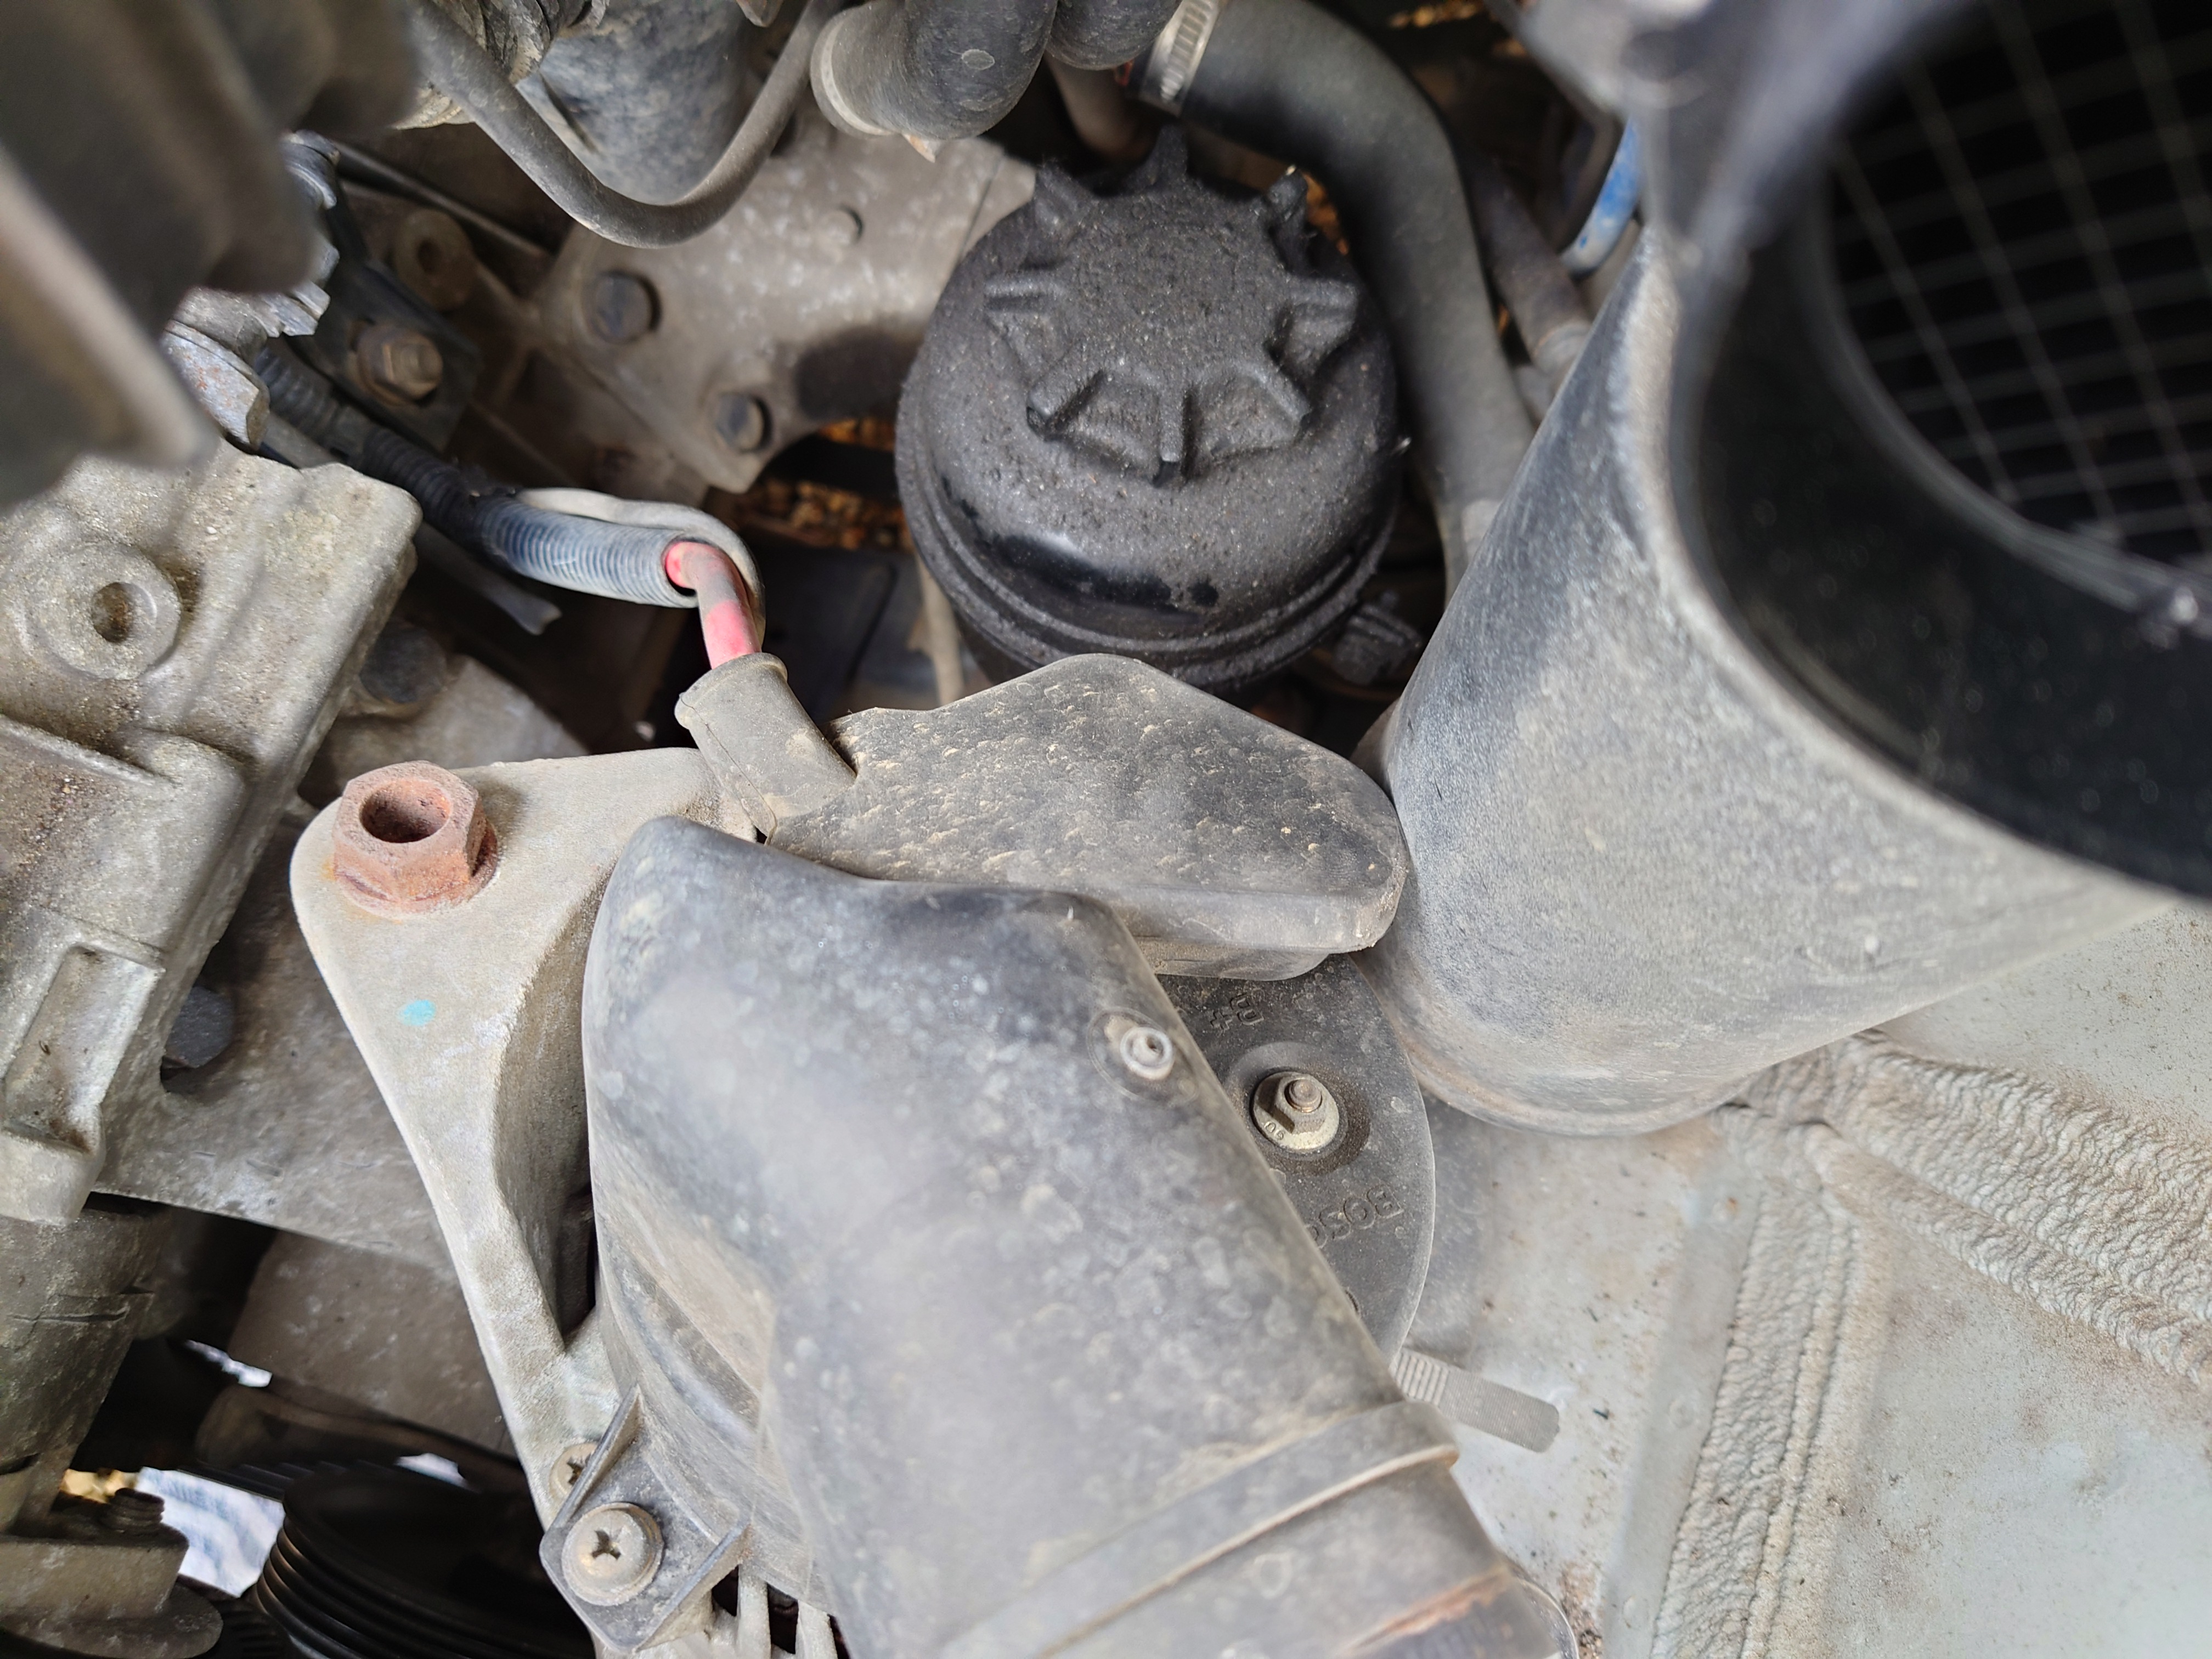
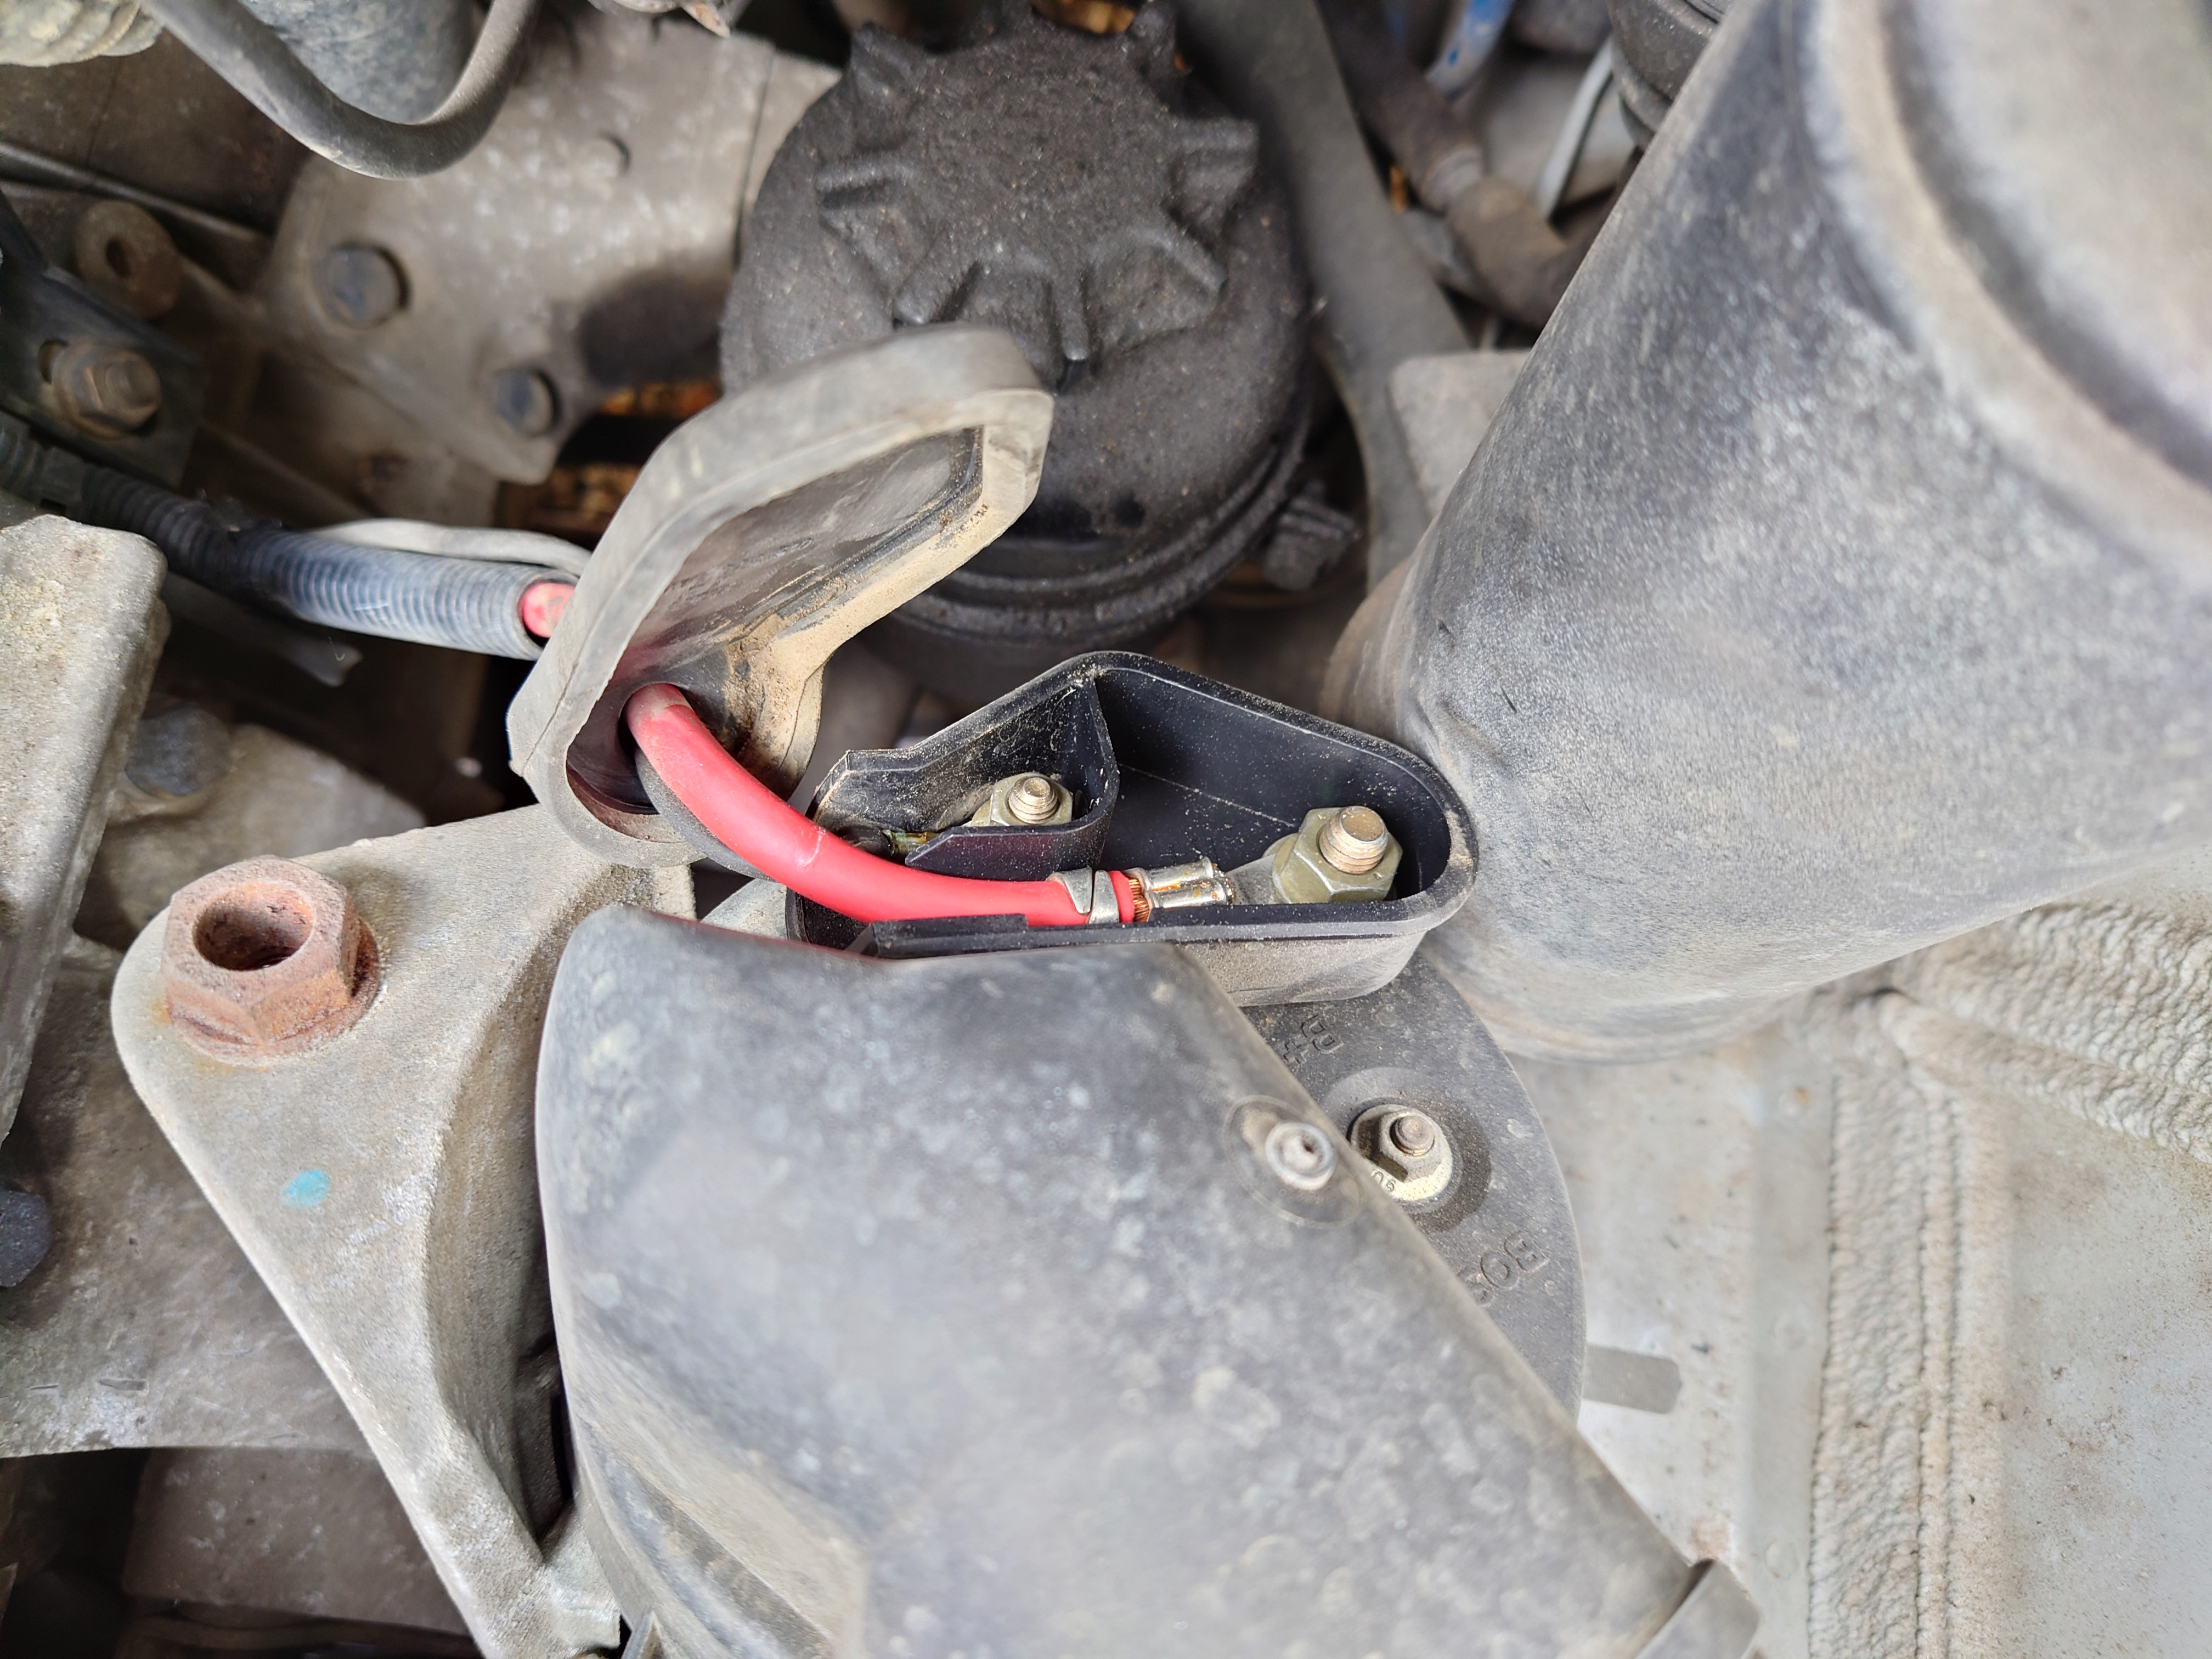
We have a similar arrangement to the new alternator, and we can see that the larger termainal (13 mm hex) is for the positive cable, while the smaller (10 mm hex) is for the negative. What looked like the third post is actually irrelevant.
Since we disconnected the battery earlier, we can safely remove these, and finally take the old alternator out of the car. If you haven't disconnected the battery yet, do so before disconnecting these cables, otherwise you could end up shorting them to each other, or to the chassis, potentially killing the electronics.
With the alternator removed, we can more clearly see the mounting system for the alternator.
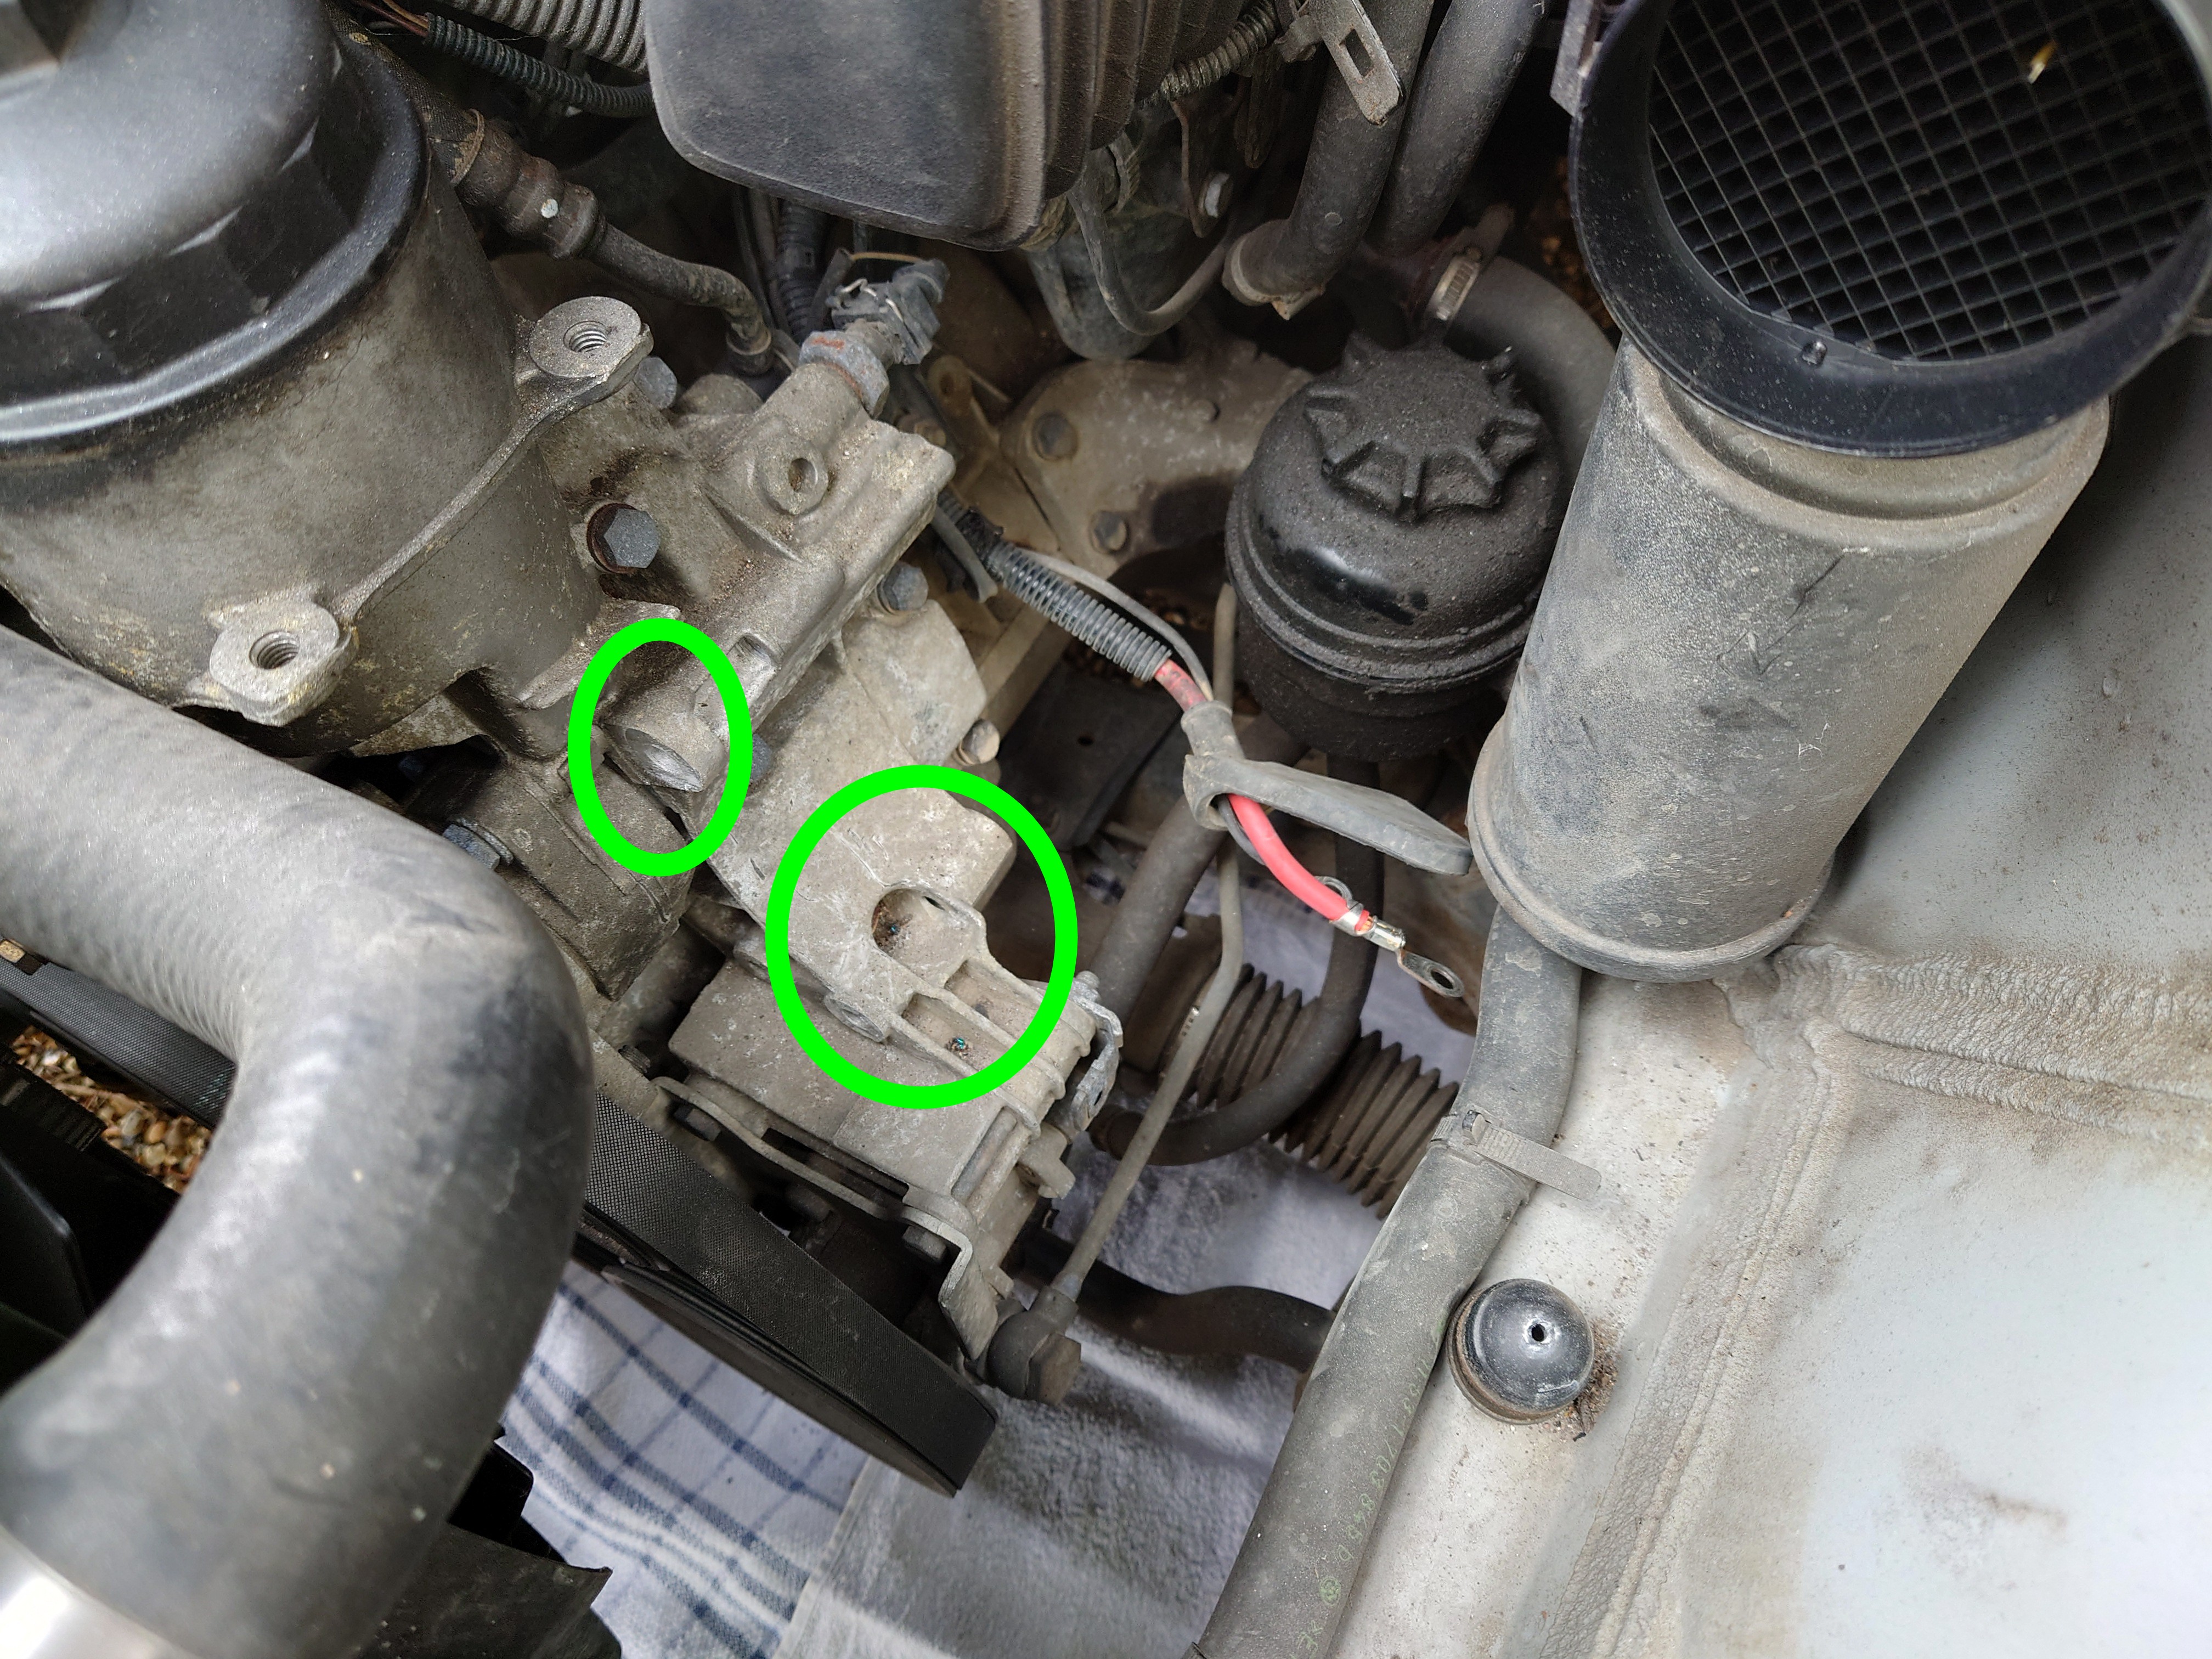
Here we have the old alternator.
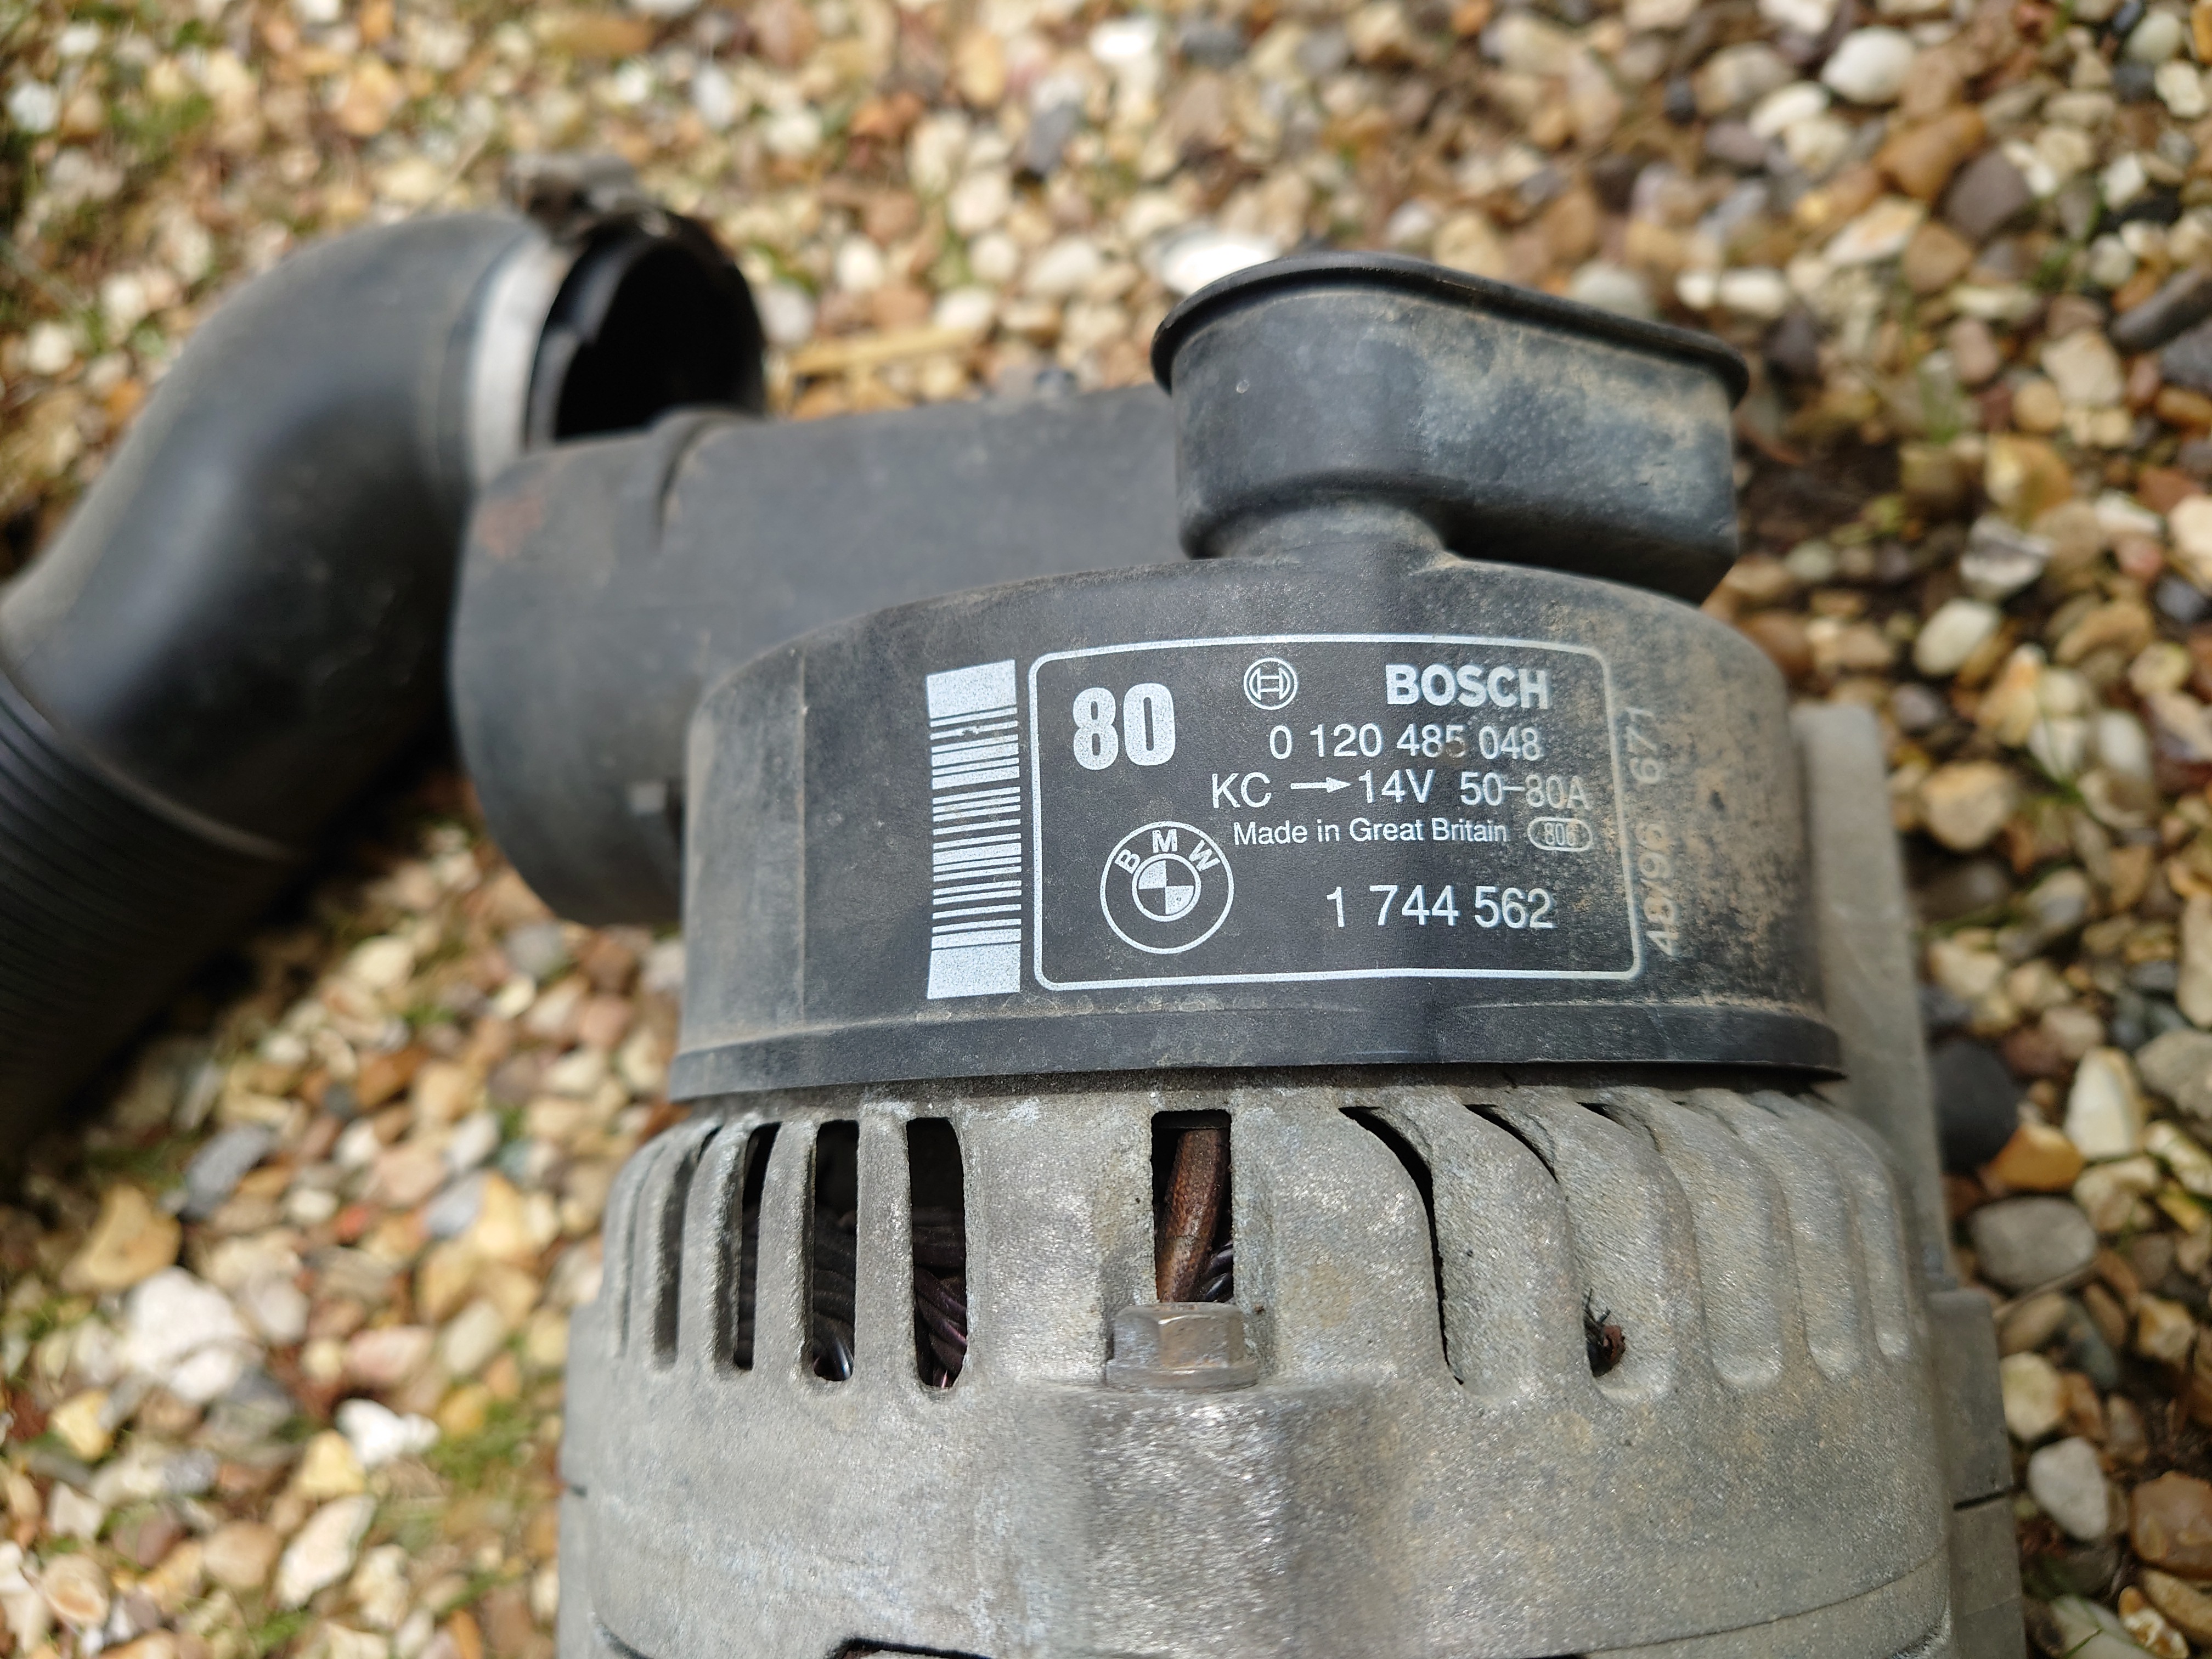
It even seems to spin fine, which is surprising. Maybe that's just because it's no longer under tension from the belt. Either way, I was expecting it to be more difficult to turn, or some roughness. Oh well.
Now we're ready to put the new alternator in! The process is basically the same, but in reverse. So rest the new alternator like we did the old one, and wire in the cables like we saw before. The sizes and lengths are different anyway, so you'd have to be impressively stupid to get them the wrong way around.
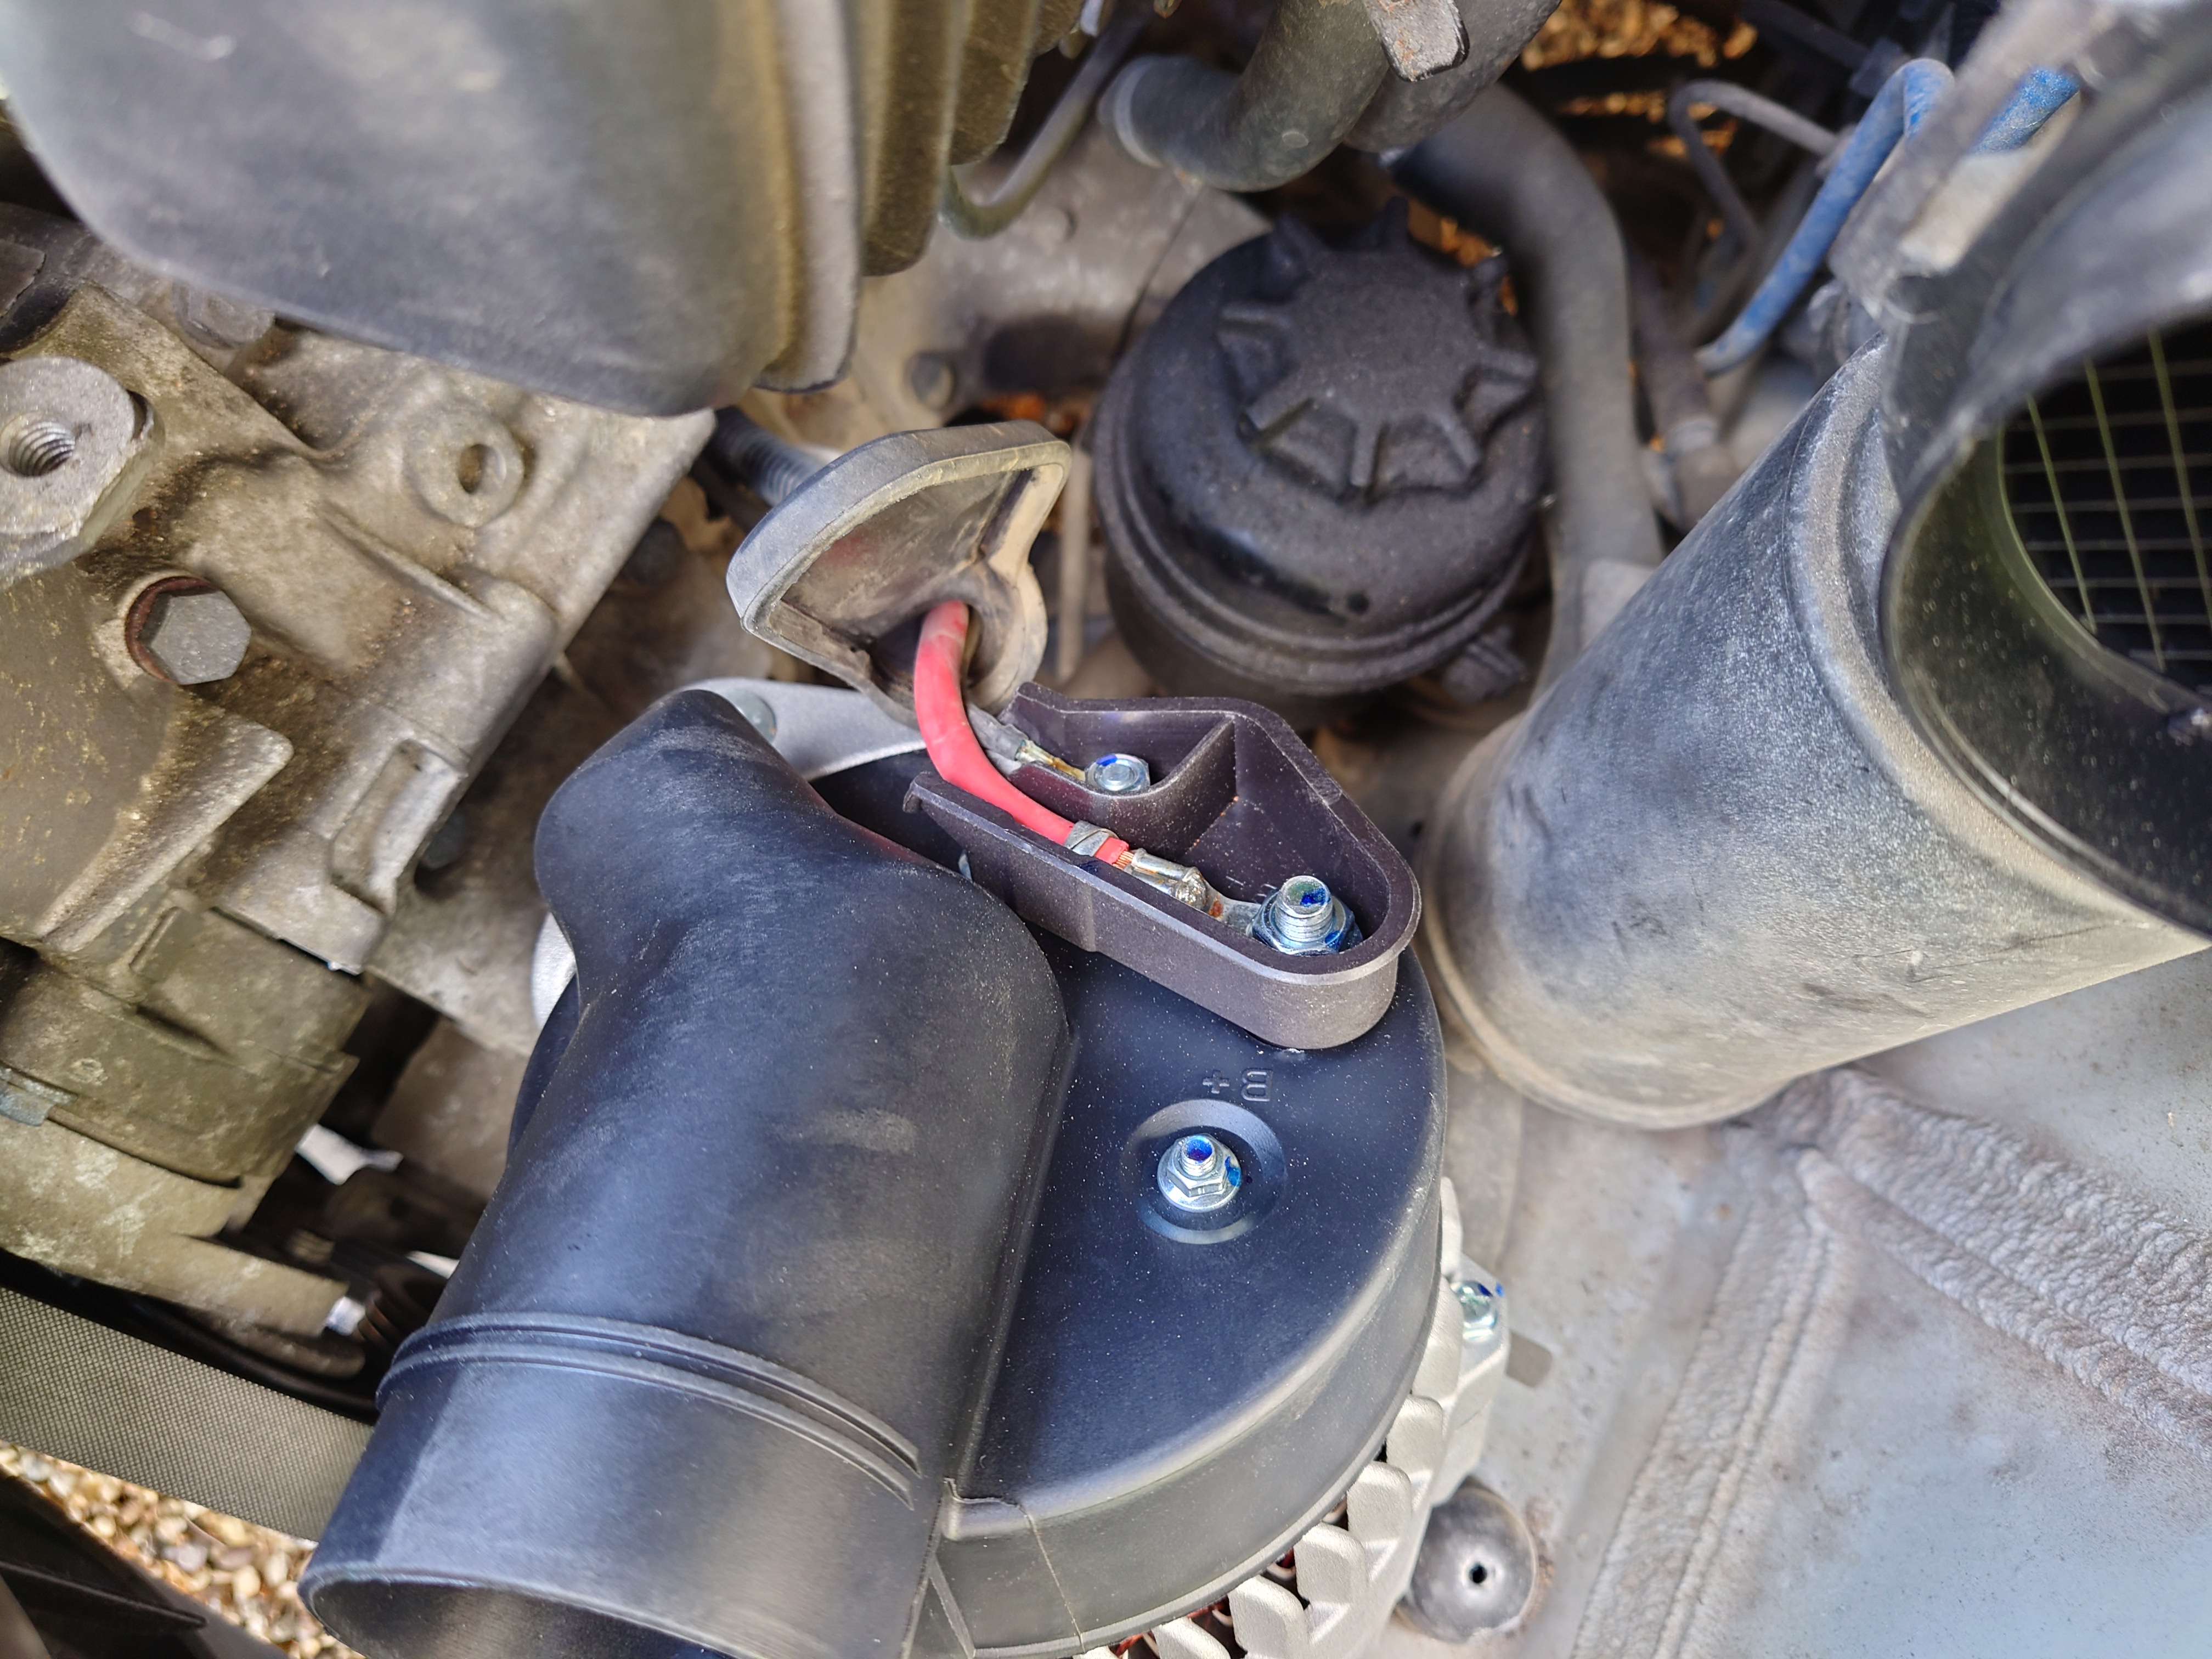
Now, here's the part where I would be showing the alternator sitting in its mount. However, there is a problem. The more mechanically astute may have noticed that the bolts are only threaded on the end, and the chunk of metal the bottom part of the alternator fits in actually fits within the two holes. This means that for the bolt to properly hold the alternator, the bottom rear hole on the alternator must be tapped, otherwise the bolt is just gonna sit there, until it vibrates itself out.
Now let's take another look at the new alternator. Here's the front bottom hole. No threads in this one - they would be pointless anyway since the bolts aren't fully threaded. And even if they were, as this hole goes in front of the hole on the mount, the bolt would not actually secure the alternator any better. So we're all good here.
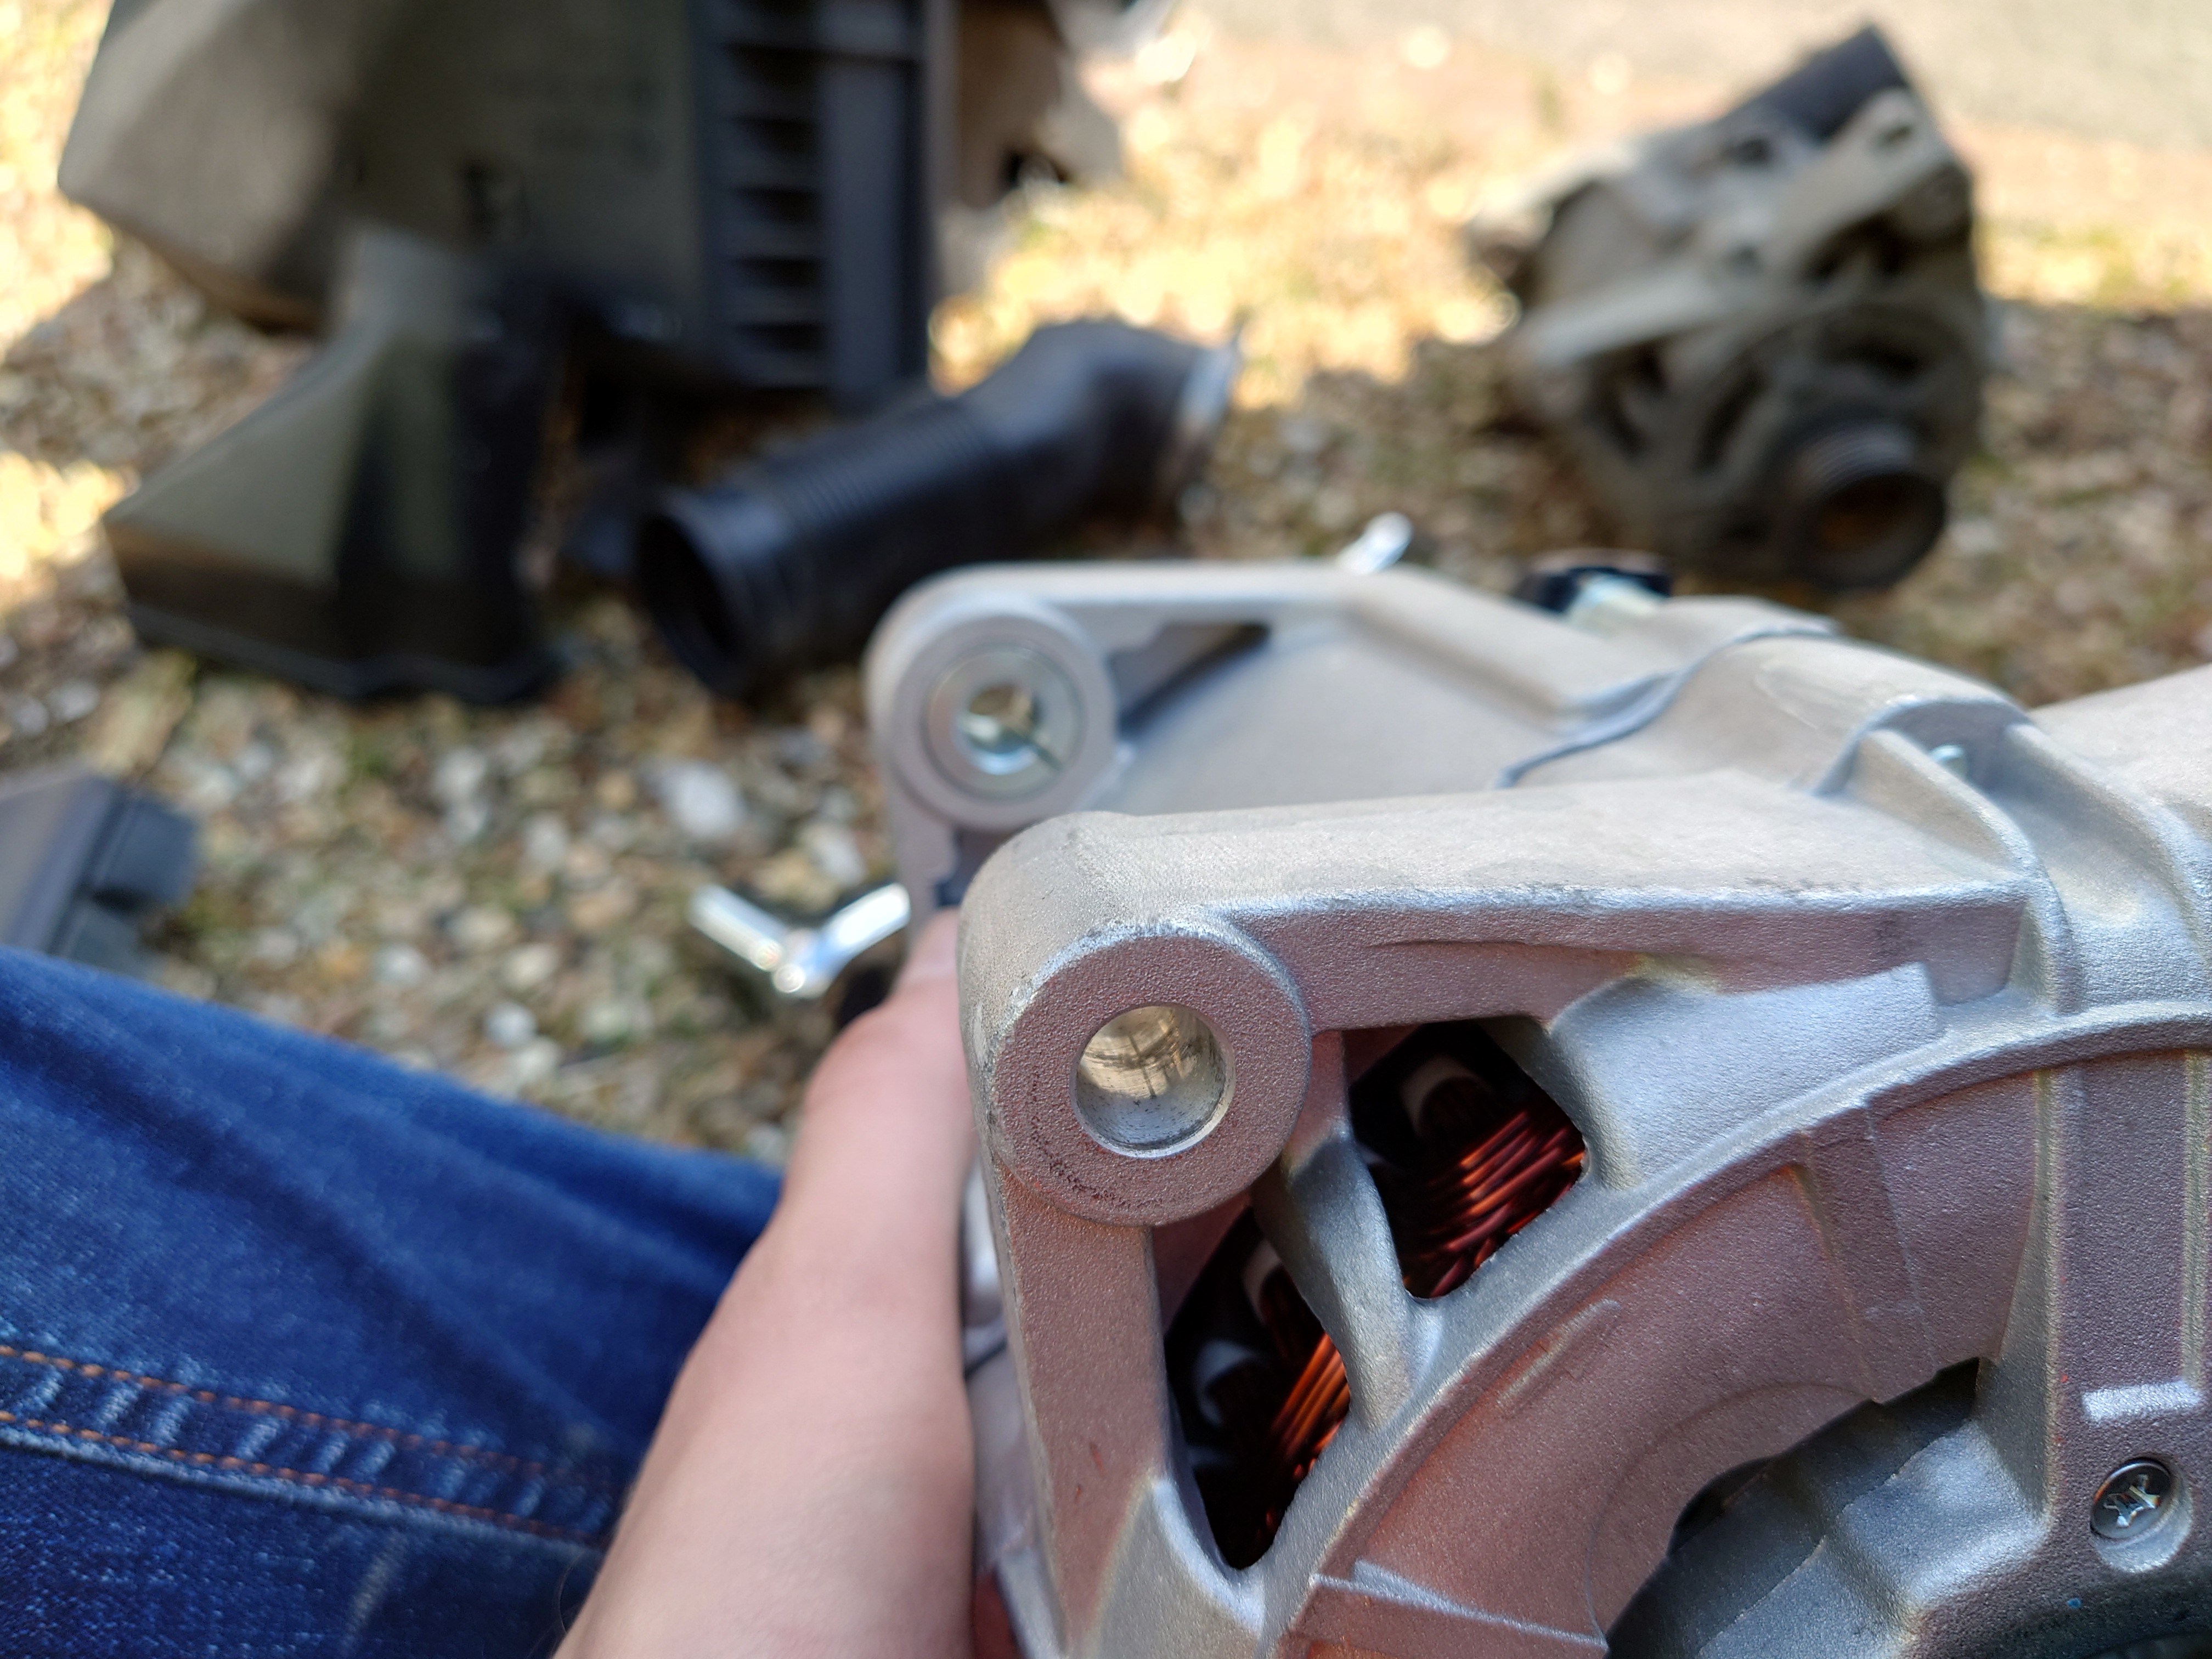
Now the back...
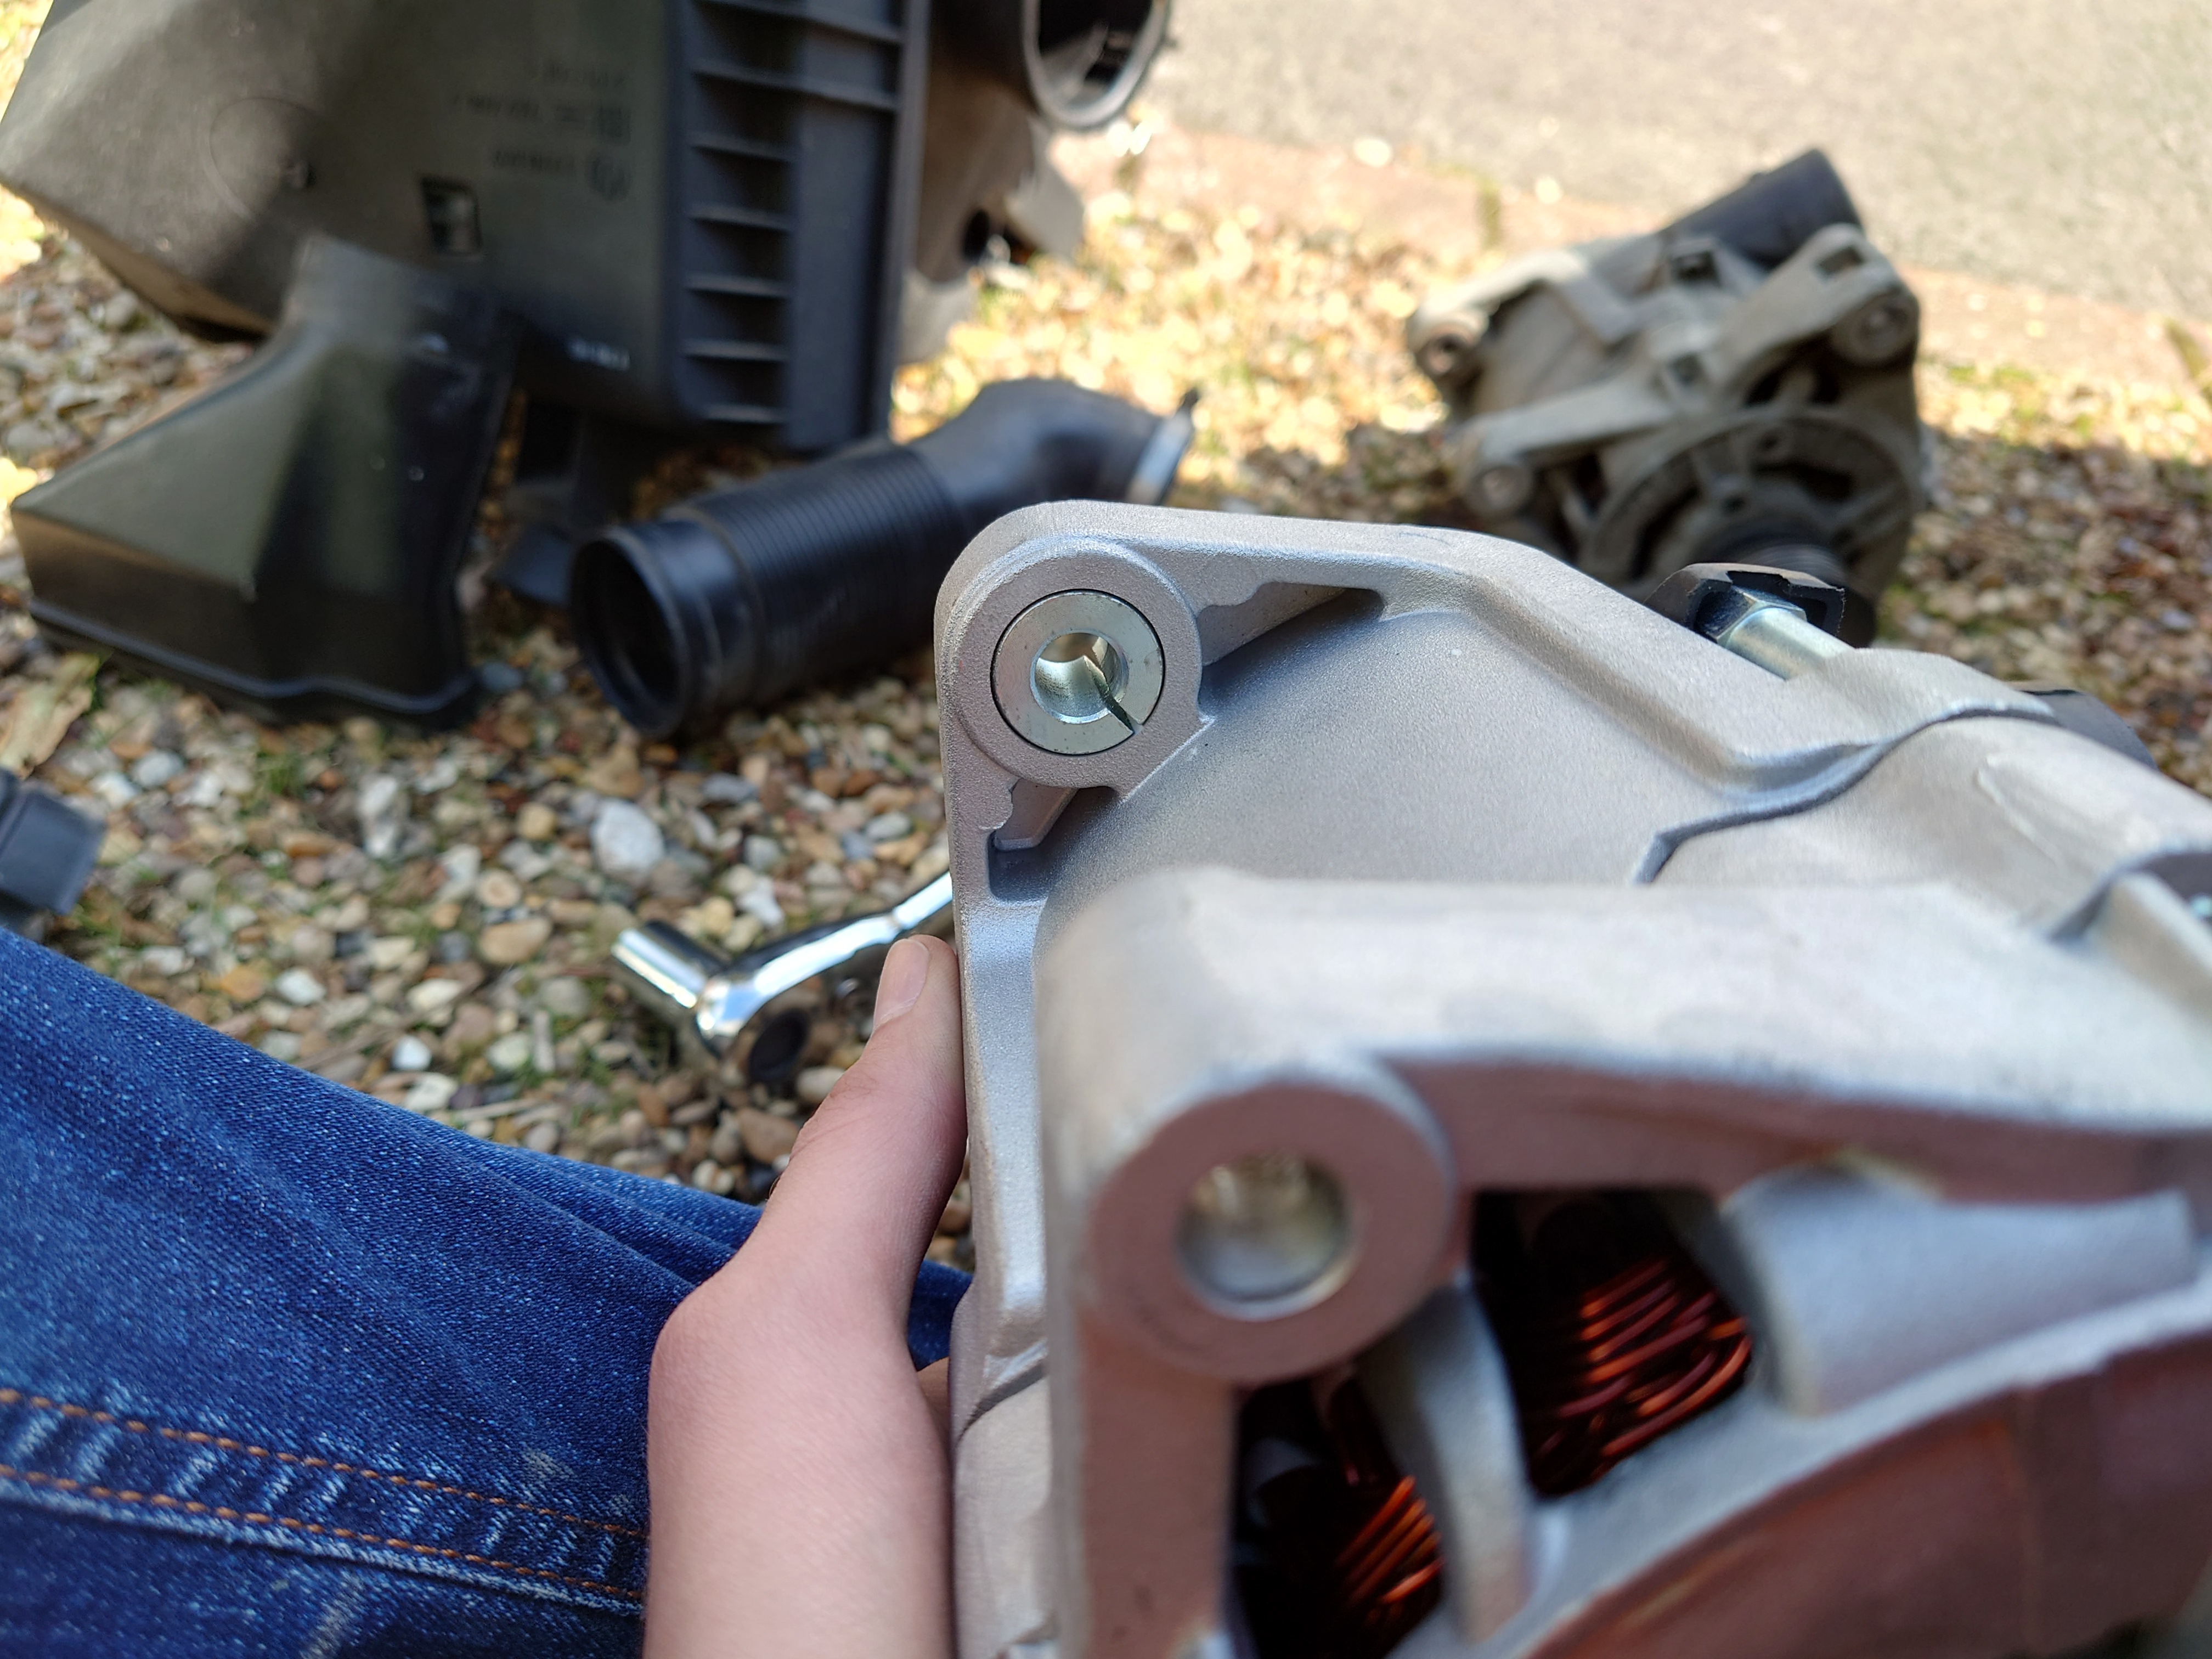

So I'll have to get a longer bolt for the bottom, and a nut to secure it. Not ideal, but apparently this is how it was done on some earlier E36 models. Of course, none of the local shops that are open have the right sizes, so I ordered these from Accu. As I'm already spending a stupid amount of money on a bolt, I may as well do both, and get them in marine stainless.
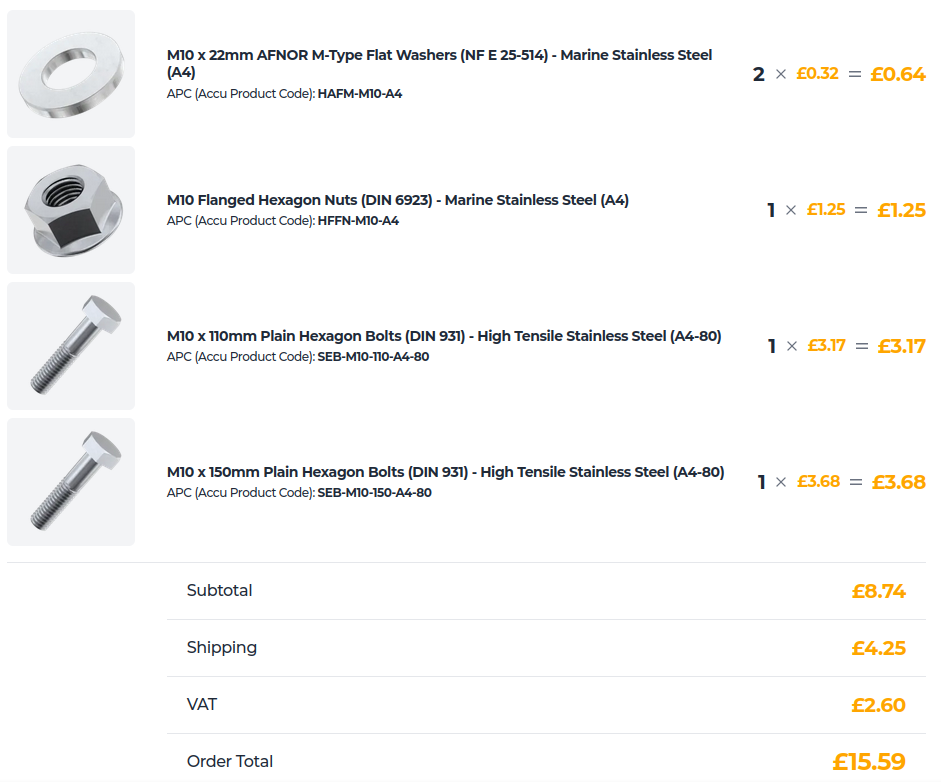
The top bolt will be the same size as the stock one, but for the bottom, I ordered 150 mm instead of 125. This should hopefully let it protrude enough to fit the flanged M10 nut onto the other end. I went flanged to avoid faffing around with a separate washer. The two washers that I ordered will go between the heads of the bolts, and the mounts, like the originals. They're a bit thinner than the originals at 2.1 mm, but I can't imagine that being a problem.
The DIN 931 bolts have a slightly larger head at 17 mm. Hopefully this won't be a problem. I could've got the ISO 4014 variant with 16 mm heads, but they don't have the 150 mm one in stock, and wouldn't get it made until late August. So I went with DIN 931 for both to avoid having to swap sockets when mounting/dismounting in the future.
Hopefully I'll be able to finish the installation on Thursday evening, when they're meant to arrive. Otherwise next Sunday ^_^'